


NAWY2J
-
Posts
21 -
Joined
-
Last visited
Content Type
Profiles
News and Information
Tutorials
Product Reviews
Supplier Listings
Articles
Guitar Of The Month
Links and Resources
Forums
Gallery
Downloads
Posts posted by NAWY2J
-
-
You really, really need to read Melvyn's book. There are tons of answers to questions you don't even know you need to ask yet.
In fact, I'd go so far as to say, don't attempt to build a guitar without first reading that book. It's amazing how many little things come up that require guidance when you start building.
Just curious....how long ago did you find out about this assignment?
Good Luck
Steve
(the post above was added to for emphasis)
november but 'cause we in school we got to do all these research and all taht wich took up loads of time
-
Did u make those you'r self?
-
I think MB just suggested using the search and you respond by asking another direct question that has been answered more times than i have done something i do a lot (lack of imagination fuelled by alcohol tonight)... if you have the initiative to take on such a big project, surely you have the initiative to search and learn a bit more so you can ask questions that may produce answers more useful to you
i am going to give you the simplest answer i can, use this calculator
http://www.stewmac.com/FretCalculator
its the clearest answer you will get but you need to at least understand what your scale length is and what bridge you have before using it.
use the search!!!
there are lots of people willing to help but you have to do a bit of work yourself first

ye i know i have tried looking for stuff already e.g trying to find the bridge postion but nothing came up and also i looked for how to earth the wire ?
-
Rick has it all covered. But as your questions tell me that you have no real idea about how to do all of those things (no problem with that, everyone have to start some were) I think that for every answer, you will have another question. I think that a really good place for you to start is with a good book that explains everything from start to end. Even in those hi-tech internet days a good, pedagogic book rocks. I always recommend Melvyn Hiscock's book, as it was the one that got me started. Many people also recommend the Martin Koch book, but I don't have it so I can't really tell you if it is good or not.
But to be a bit explanatory on this specific build, I was lazy. I usually make my own templates, but this time, as I have yet another Tele build (for a customer) coming up, I decided that I could be lazy. I got the body template from this guy:
http://www.revintage.co.uk/template_t.htm
He was cheep, the template is really accurate (I compared to a very detailed drawing and a facsimile of the original -52 factory blueprint) and he delivered really fast
Body outline, neck pocket rout, bridge pocket rout, control cavity rout. Everything with two templates. I did the neck template, head and heal area myself.
And 'bout the respiratory mask; Even though the water based (or more correct, water borne) lacquer I use is much less harmful for you, you should always use a mask. You will not grow new lungs when the old once goes bad.
Thank you all very helpfull
-
I think I have to stress the usefulness of the search function on the forum, as well as reading the tutorials on the main site, the pinned topics on different areas, the reading of specialized books and articles (on the net and in print)...there´s a lot of info, pics, discussions...a lot to learn from. I think you might learn more this way and trying to figure things out slowly than being given every bit of information...
ok thank you also one thing how do you determine the bridge and tail piece position??
-
Eh, I might. Let me check on that when I get home this evening.
ok thank you
-
I just ran the wire through a hole I drilled from the bridge pickup cavity to the hole for the stud, stripped about 3/4" of the wire, and tapped the stud into the hole with the bare wire coming up from the bottom of the hole through the middle of the stud, then screwed the post into it.
ok cool do you have a diagram or a picture of you'r guitar and you putting the wire in ??
-
I think that you reffer to the neck pocket rout. It is routed out with a template, pretty much the same way as the pickup routs. The question about determining the joint I really doesn't understand. Sorry...
Ye that is the joint where do you get the template from ?? and also how deep do tou rout same for teh ickups how deep??
also with the laquer do you have to have a special mask?
-
you need to drill a hole from the bridge stud hole to the control cavity so you can attach a ground wire
ok churz but how do i shove the cable in there and the pin ?
-
Grounding is what electricity wants to do. So in every application, in order to get electricity to work in your way, you'll need to eventually reward it with ground. In this case, the bridge is going to be your ground (or the trem claw, if you're using a floyd rose). What you need to do is make sure that the exposed metal is touching the exposed metal on the bridge. If you're using a tremclaw as your ground, then you need to solder the ground wire to the trem claw.
Some pickups don't require grounding (EMG actives, etc.)
What about a tune o matic ?
-
This this:
http://www.projectguitar.com/tut/body.htm
It sounds like you need some basic instruction on how to use a router too. Are you doing this for shop class? If so, your teacher can help.
Thank yo all just one question how to do make the cable going from the bridge to ground it ???
-
Thank you all for the comments i know it is short but im only doing a body cose im a newbie so i have bought the neck so taht saves a bit of time , also i dont have to treat the guitar in that 30 days and i can go in to do DT in free lessons so i get about 3 free lessons a day so if i could have some tips on how to router the cavities and the humbuckers nd the bolt on join i should be gfine i think ??
What your planning is only vaguely possible in the time ... but it's going to take a lot of focus and a decent amount of research.
Click on the link below and visit the best amateur (and professional) guitar building site on the net ... it has a stack of easy to read information and tutorials that will take you through all the steps you need ... and the search function is good.
Very useful guitar building site
After you've done that you'll be in a much better position to ask some good questions ... which the folks on this site will be happy to help with.
Thank you for teh help i will search the site for help fro now on thank you very much
-
The neck pickup is going to host a mini humbucker. As I don't have a dedicated mini humbucker template (it is the first ever mini humbucker I wind) and the rout is covered by the pickguard I used a traditional humbucker routing template. The neck joint is being made using this type of ferrules:

combined with steel inserts in the neck and stainless steel recessed Torx head machine screws (M6). That way I can reshape the traditional heel and get a superior coupling (if anyone still believe in good coupling between the parts of a guitar, I do) between the neck and the body.
The wood is from a local supplier here in Sweden. According to him it is north American ash and European maple. The fretboard is ebony that I got from Stewmac. The body wood is extremely light and very resonant. And it have a nice grain pattern too. the maple is... well maple. Not exceptional in any way. The ebony is one of the most uniform piece of ebony I have seen in a few years time. Almost 100% black and really nice.
Thank you very uch for helping me . could ijust ask how did u cut the neck join and how do you determine the join ??
-
30 days is not enough to build a guitar. I don't post on here much, but I read posts almost every day. That's what you should be doing at this stage, READING. Melvyn Hiscock's book is definitly cool. Also you're going to need to invest in some tools, or know someone who's got them. Actually all that's covered in the book.
Here:
http://www.amazon.com/Make-Your-Own-Electr...r/dp/0953104907
$23 may seem like a lot for a book, But if you're serious about building it's worth every penny.
Thank you all for the comments i know it is short but im only doing a body cose im a newbie so i have bought the neck so taht saves a bit of time , also i dont have to treat the guitar in that 30 days and i can go in to do DT in free lessons so i get about 3 free lessons a day so if i could have some tips on how to router the cavities and the humbuckers nd the bolt on join i should be gfine i think ??
-
Mahogany for strat, tele or bass neck or anything else I just can´t think of ? ( i note those aren´t common woods in those builds, but what can you tell, this is project guitar). Do you have an idea how guitar looks likes and etC. ?
If someone thinks think this is a joke think about army.
Hey it aint a joke in doing it as a school project ye i do have a shape in mind but dont know how to go bout it cose i only got 30 days of school to finish it in
-
Scraping the dye and first coat of lacquer of the bindings
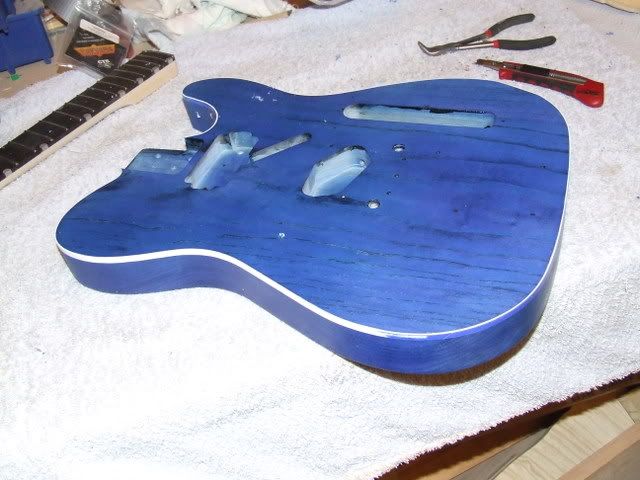
How did u router those humbuckers cavities out ?? and also how did u do the neck join ??
Where di u get that nice wood from ??
-

How did u get that nice shine ??
-
Ok so some sanding and shaping of the heal and fret work to do than paint
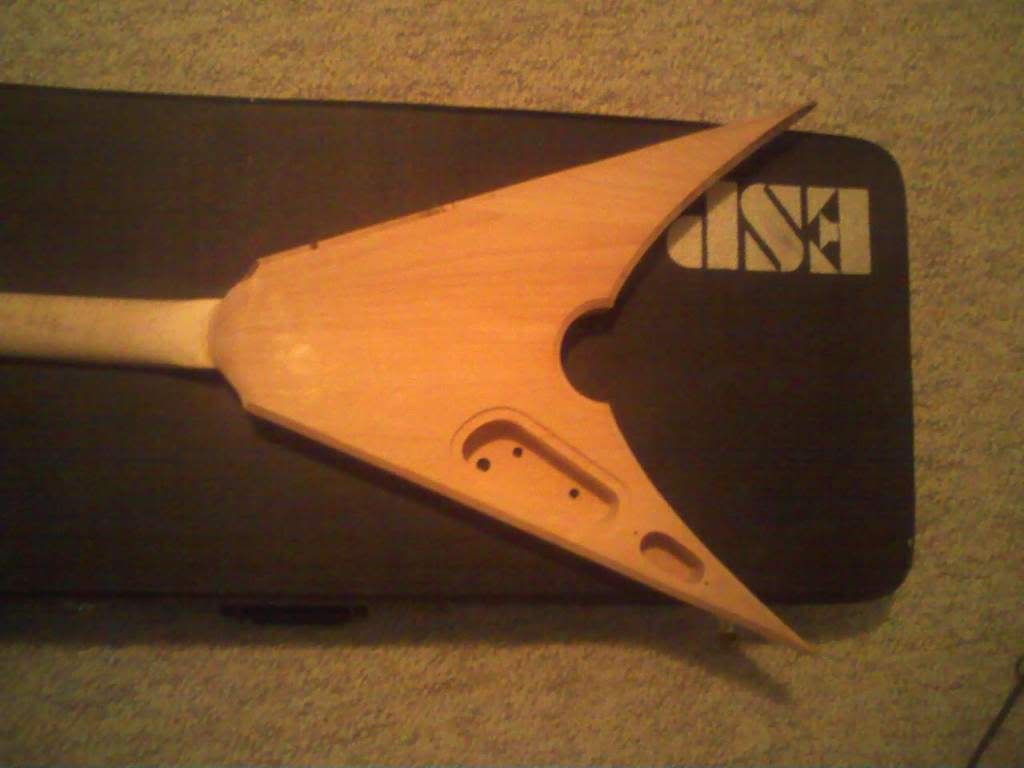
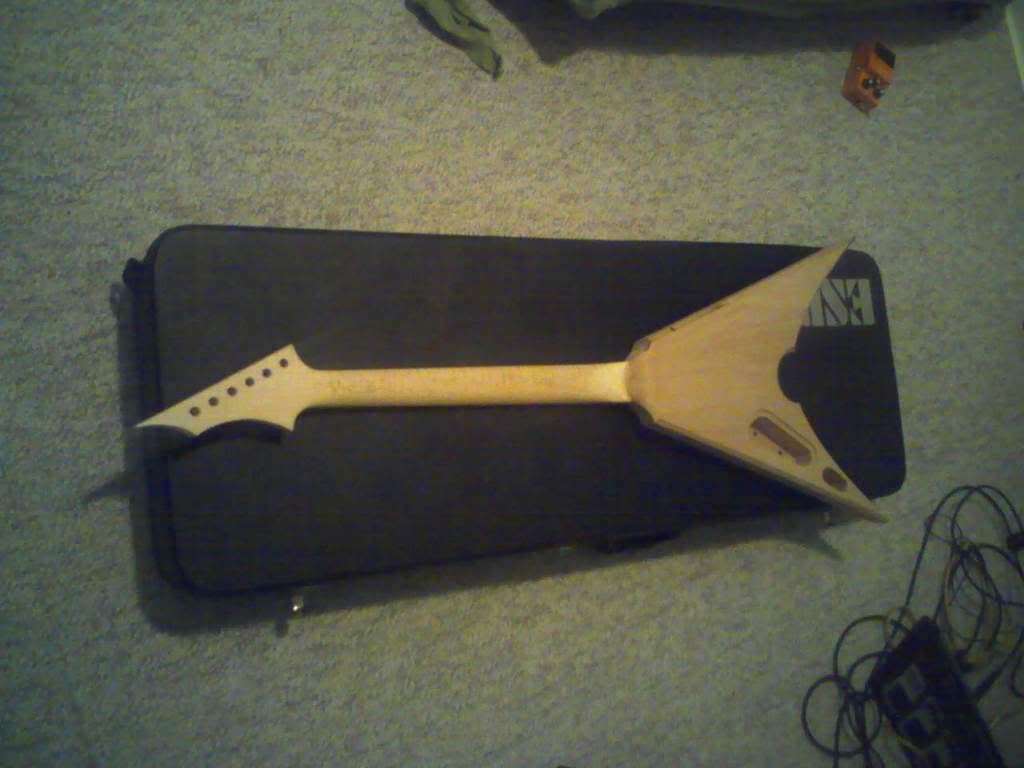
http://i359.photobucket.com/albums/oo34/RA...ITARS/005-2.jpg
Back of the guitar
http://i359.photobucket.com/albums/oo34/RA...ITARS/004-2.jpg
http://i359.photobucket.com/albums/oo34/RA...ITARS/003-2.jpg
http://i359.photobucket.com/albums/oo34/RA...ITARS/002-2.jpg
Dude that guitar is beutiful could i ask a couple of questions ?? cose im making one for my first time so could you tell me how you did the neck join ?? and aslo how did u router the back cavities ???
-
1. Buy melvyn hiscocks book - Make Your Own Electric Guitar
2. Use the search function of this forum to find out more detail and alternative ways to approach certain tasks
3. Ask specific questions when you want specific answers.
ok thanks at the moment all i have done is make a idea so could you help e choose the wood and where from ?? i was thinking mahogany
-
hi i was wondering if people could help e with the building bit like what would should i buy and where from , how to cut out the pickups and also how to make the neck join ?? thank you to every one

Please Could People Help Me To Build My First Ever Guitar ?
in Solidbody Guitar and Bass Chat
Posted
Tahnk you every one and yes i have read the book and it is just confusing me even more but thanks for how to ground and all that and i will post pics when im building churz