


kmensik
-
Posts
82 -
Joined
-
Last visited
-
Days Won
6
Content Type
Profiles
News and Information
Tutorials
Product Reviews
Supplier Listings
Articles
Guitar Of The Month
Links and Resources
Forums
Gallery
Downloads
Posts posted by kmensik
-
-
Neck glued to body, sanded to 500, first coats of amber shellac. The alder turned orange in an instant. I expected it to be more a pinkish skin hue. But it took the colour from the shellac very uneavenly, maybe soaked less on the more polished spots, maybe the grain was still pressed by the spokeshave. I did wet the wood between grits. It looked really desperately, so I sanded the top to bare wood to only 240 grit and started anew. Messed up again, so most of the top side got washed away with alcohol. On that mahogany neck the shellac looks awsome though.


-
I am making only a little bevel on the fret ends, so that it does not make the effective fret width much narrower. But it is not as comfortable as a generous fret bevel. Then i round the sharp edges with a concave crowning file and polish them with a 800 grit sandpaper.


-
 1
1
-
-
For the body carve, I only use one radius jig and then refine it with a spokeshave at the waist, horns etc.
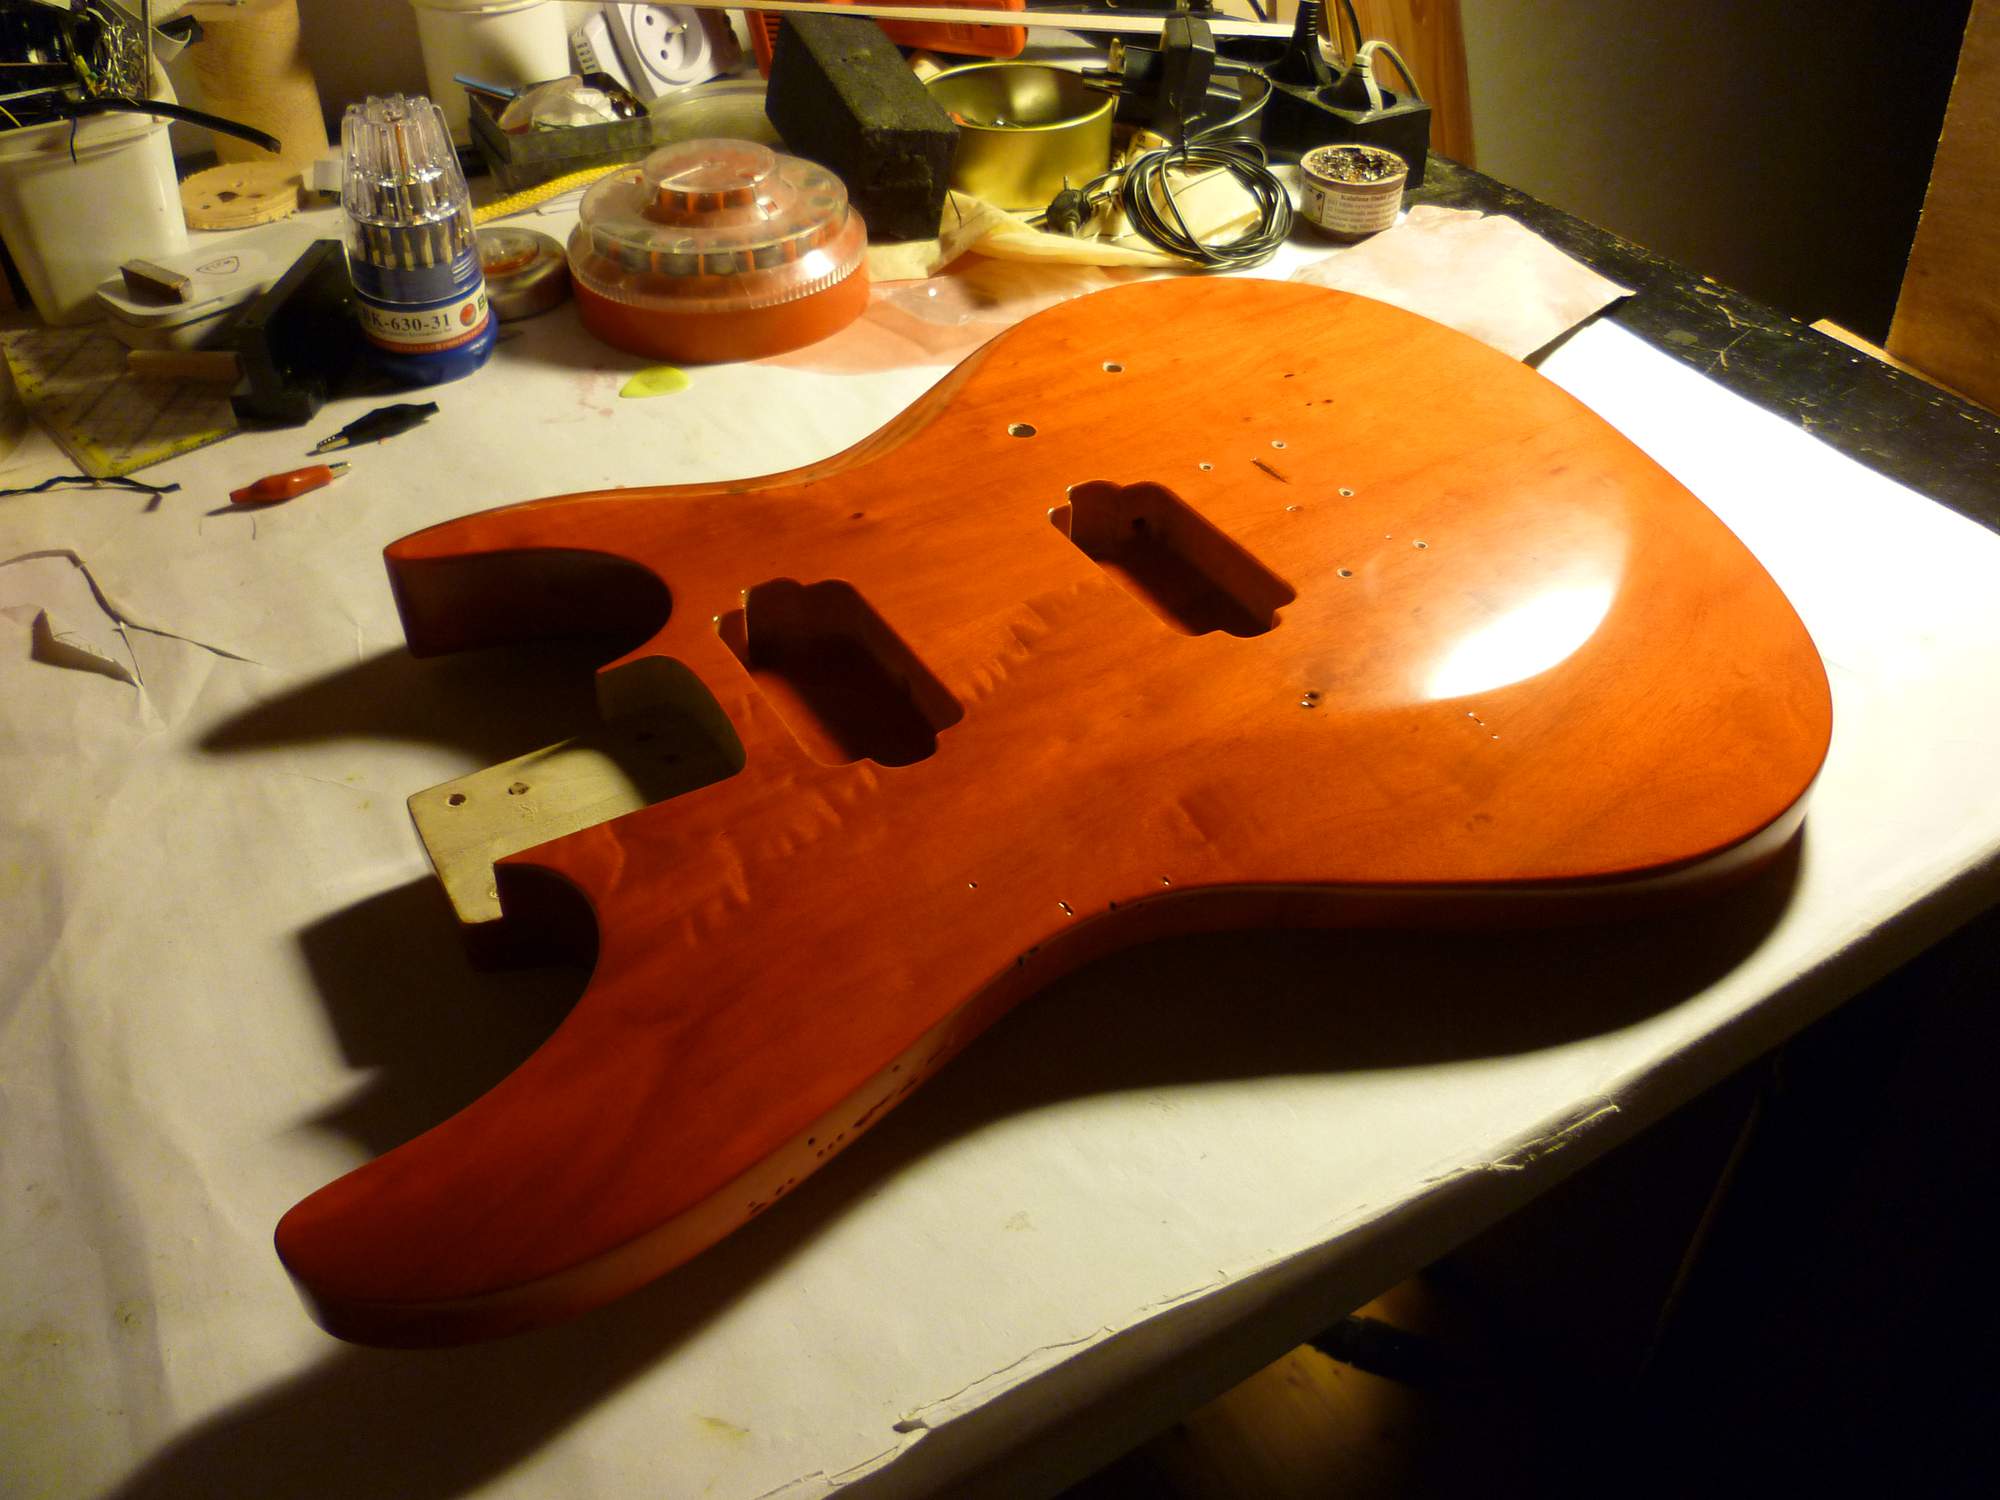
For the messed up jack access hole I made a 27mm tube of sapeli to be inlaid. But the hole was a bit too oval, the tube would not fit, so I just plugged the bottom with a little wooden disc. Such stupid mistake took half of a day to not even fix well.
Now the frets are in, nice job with new flush cutting pliers. The fretboard was sanded to 14" radius on a 100 grit sandpaper doublesidetaped to a glass trough. After the 100 grit it looked almost as fine as afterwards after 240, 500, 800 and 2000 grit. Now it is very fine, but still not as glossy as most woods would be.
I made a little space for the hex wrench to turn at least 90°.
In the meantime I worked on de-modding a friends Petrucci RG (Ibanez JPM-100P2). Very nice guitar, resonant basswood, much more responsive than the red one to the left, but not as rich on bass as the one in the middle.


-
The center laminate is flat, routed along a template. Now it feels quite comfortable, actually pushes your thumb to be on either of the three facets, which should force you to keep correct hand position. Only the edges closer the fretboard are sharp for the palm. I will definitely give this trapezoid a chance with frets and stings. I can round it over anytime afterwards, if it does not feel right.
-
1
-
-
My pleasure.
This is my 2nd S style body. I made a routing jig for the first one. It removes most of the mass of excess wood and leaves a "drop top", a shape of half-cylinder. Then I can rotate the body in the jig and make more adjacent half-cylinder segments, which creates almost a spherical segment.
Look here http://kmensik.rajce.idnes.cz/DIY_S#P1140577.jpg
and read here http://www.projectguitar.com/forums/topic/47314-sabre-body-for-ibanez-s-470-neck/
Anyway, most of the work is done afterwards by hand with a drawknife (reducing the waist) and with a flat spokeshave smoothing the segments. I messed up the first upper half-cylinder, went too deep, so I decided to make the carves asymetrical front/back and top/bottom. The body is thinner under my right arm, about as thin as the original Japanese Sabres, more contoured from the top, but I left it thicker in the lower bout where it would rest on my leg. The upper bout is cut more from the back, so it is as comfortable as a strat belly cut.
The jig is really not necessary, if you practice with the handtools. Draw the lines around the edges of how deep you want to cut, clamp the body firmly to the table (shame I do it on that lightweight foldable bench) and cut away with a drawknife. It is a rough dirty tool, but can do a fine job too. I carved the initial neck profile just with that. BTW what do you think of leaving the neck profile segmented as it is now? Just smoothing the edges closes to fretboard.
-
Ibanez Zero Resistance with Zero Position System. It is a lot more complicated to route cavities for this trem.
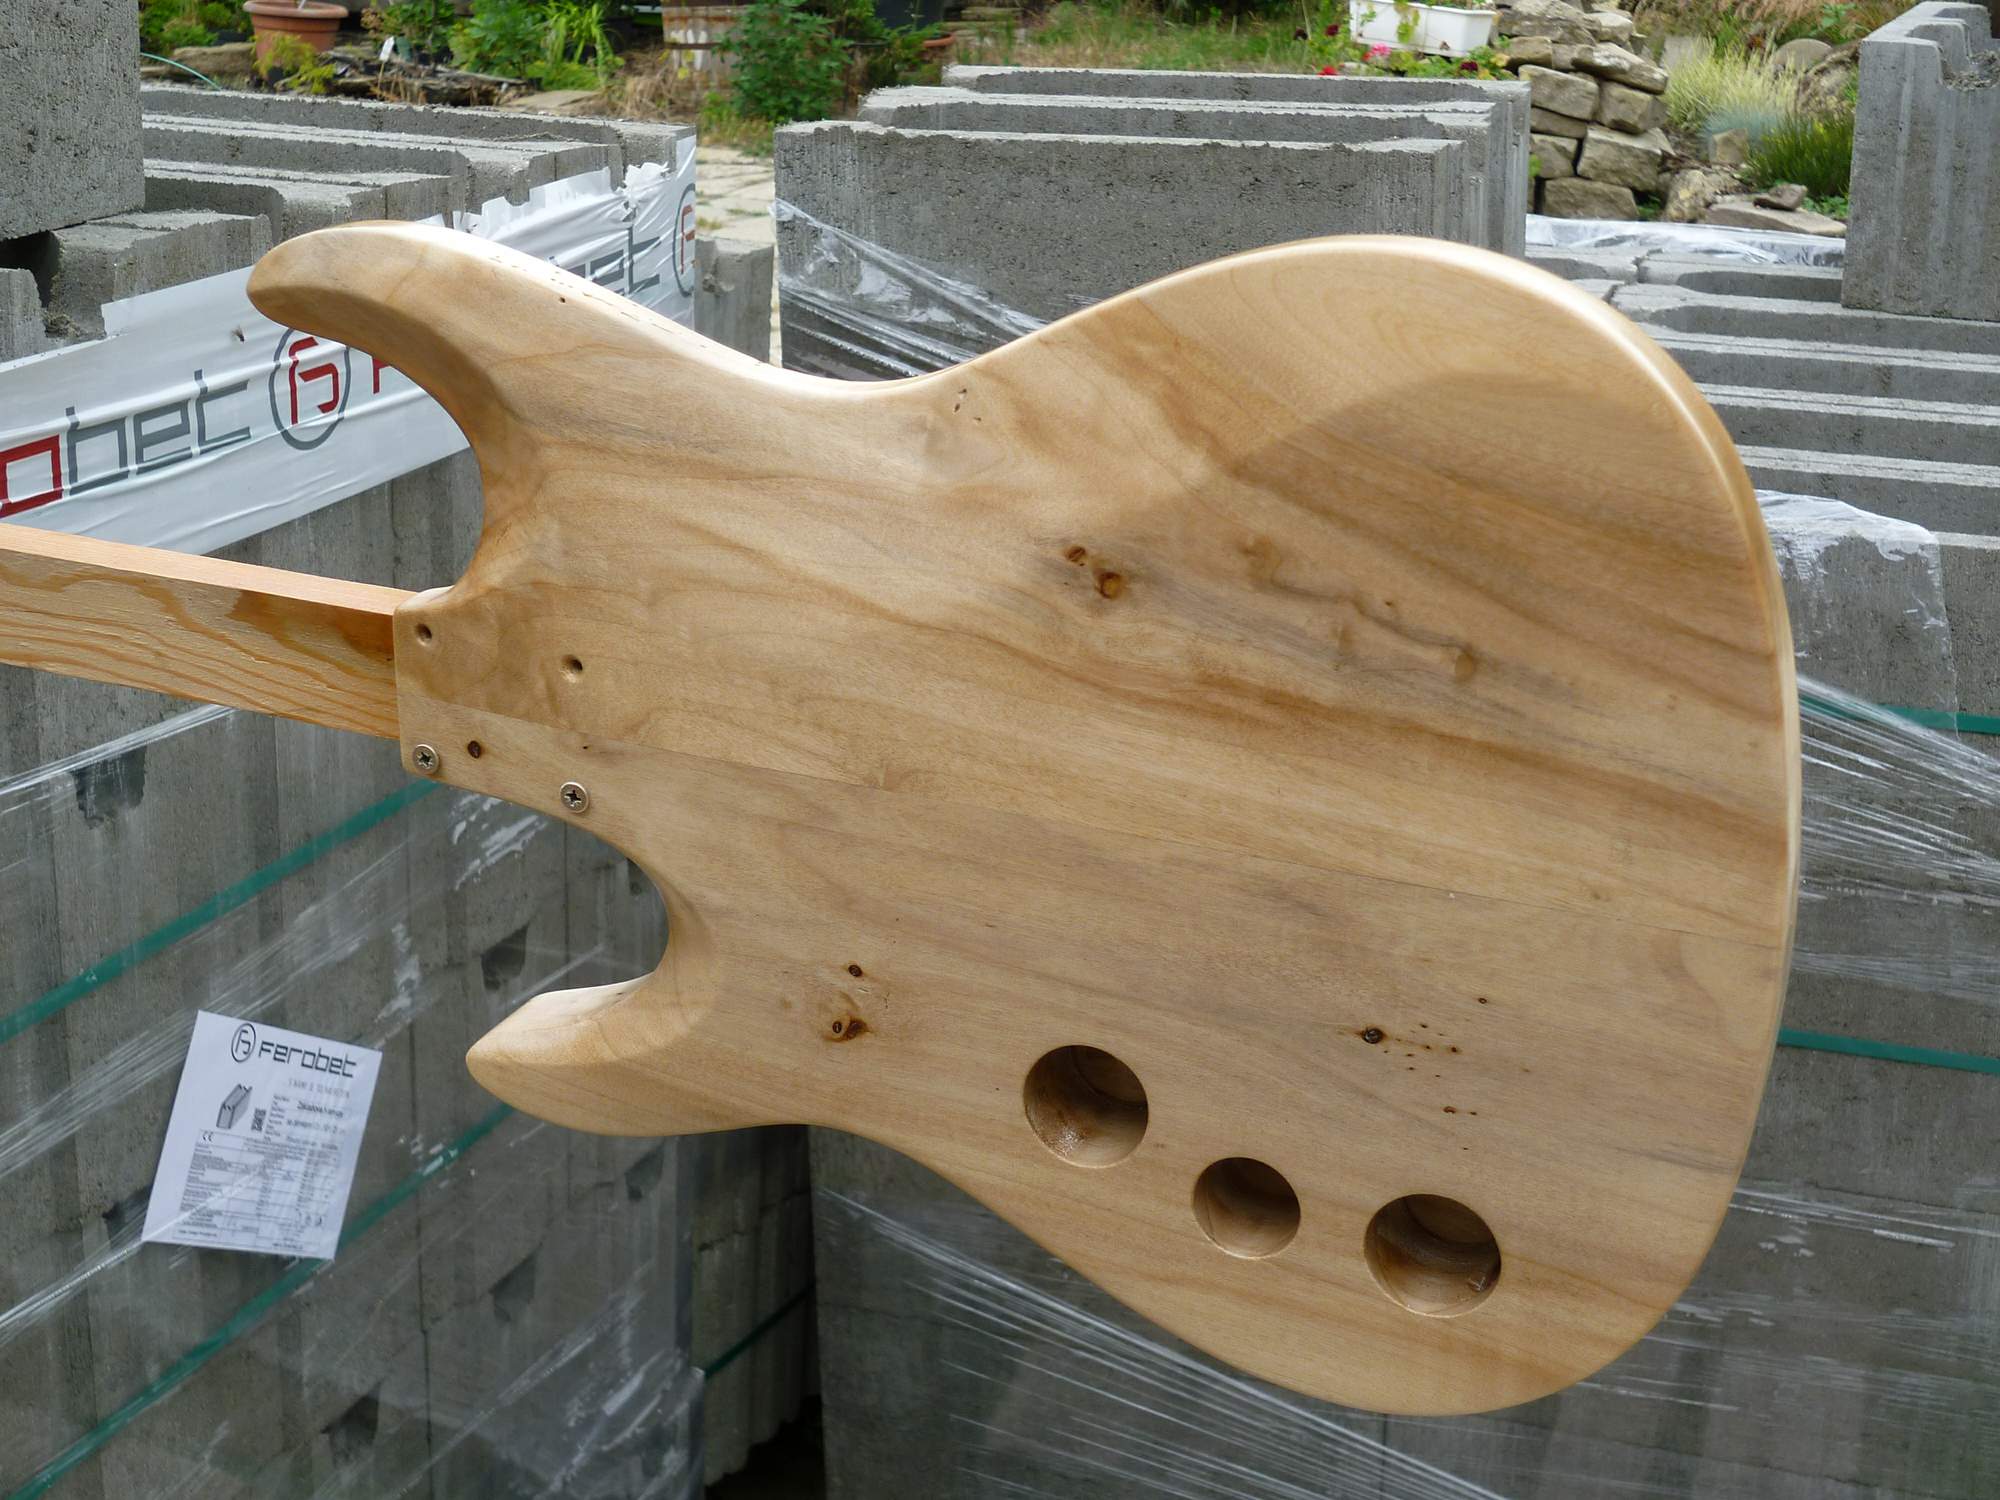
During the weekend I contoured the body, rough carved the neck joint and neck profile. I did a very clean job drilling the jack hole, but after contouring the body I had to make it a little deeper, freehand, with a forstner bit. Messed that up big time. The forstner damaged the hole, the top and side of body. Had no heart to take pictures. Well, I fixed it by removimg more wood, mainly enlarging the jack hole from 20 to 27mm diameter.
Next is fretboard radius, some scraping, sanding, and gluing the neck in.


-
1
-
-
Yes, a set neck. It goes right in the neck pickup cavity. The remainihg tongue is still 11mm thick under the neck pickup, so it has some structural function.
Some progress in routing cavities.


-
Starting a new build:
S style body of alder,
three piece mahogany deep set neck, zebrano fretboard,
ZR tremolo.
Other specs will arise during the work, not much is planned.


-
Prostheta, I guess you mean a different kind of two way truss rod Fender used. It really had an anchor in the middle hidden under a fret mark. The principle is very different. http://www2.fender.com/experience/tech-talk/bi-flex-truss-rod/
A modern two way truss rod pushes against the neck pocket on one side and against the solid wood of the headstock on the other, so it can not really push the skunk-stripe out. I was much more worried of it breaking through the fretboard when making my RG wit a fairly thin and brittle zebrano fretboard. But again it works fine.
As for the adjustment hole, mine is about 8mm in diameter, I can access it comfortably with the shorter lug of the hex wrench for fine adjustments or with a long ball-ended hex wrench.

-
I have done this once wit no issue. I put the trussrod with the nut towards the fretboard. You adjust it the oposit way then you normaly would, it's upside down. I routed the skunkstripe not much longer then usual and drilled the rest both from the groove and from the front of the headstock. The nut sits a little deeper under the nut than a nut of a traditional rod, no problem. I tried to maintain the traditional look of the access hole, so it is angled, I messed it up so it is a little larger diameter, no filler. But I have seen it done by routing a flat access groove from the top. Maybe some Yamaha or Godin have it that way.
http://kmensik.rajce.idnes.cz/DIY_Tele/
-
1
-
-
Incredible mess. You can learn a lot on this one.
First thing - can you make the body flat somehow? Do you have a router? Overhead router would be best, even a drill pres could be used to thickness the body board.
To make it a longer scale you will have to move the bridge and you might end up with a 20 fret guitar, if you dont move the neck pickup too. I would keep the 24,75.
The neck wood looks like mahogany and the body like a lighter kind of yellowish asian mahogany.
-
1
-
-
Wow. All black is the best choice. It also remindes me of a green Jackson Adrian Smith strat played by Courtney Cox, but this color is way better.
-
I am more conservative in shapes, but admire your courage. Finish is awsome. And the matching tuning knobs!
How is the ergonomy with the switch and knobs? And output jack?
From the rear the route is not nice, next time you must do better. I am little affraid of the cavity weakening the neck pocket neighbourhood, but it will not be a broblem.
BTW look at my rear route.
I have only few advices. Build more, start making necks and put your imagination in the neck design too.
-
Hi. If your first one was decent, the second must be better. Judging from the photo, which is a good photo itself, with Dopamine you made a giant leap. Show us!
(my first is this one http://kmensik.rajce.idnes.cz/DIY_GTR/)
-
No, it looks 1st class. I know what you mean, with all the fancy tops seen around, the plain black is plain, but not cheap, elegant. You gave it the time and care, and it shows through. It has so many little eye catching features that make me think wow.
-
I enjoy your build too, you bet. It makes me more and more curious where it ends.
Well, you are the artist of a bolt on joint.
-
Wonderfull.
I wonder how the upper bout extension just touches the neck, which is pulled from that thin edge, will there be a hair thin gap soon? It is like two cantilevers pulled from one another.
With the sidedots I feel with you. I made the same with ebony and black walnut in an accu-drill, from 3mm square to 1,5mm rounded. It was fast, but ebony kept chipping. Accu-drill chuck can take much thinner rods than a drill press. Just held it in my hand with a folded sandpaper, moving it in and out. Slowly, it gets hot. Photo with a 6mm skunkstrip.

-
Knightro, the design is excellent. Both the body and the headstock, very elegant. At the first sight I would make the lower horn a tad wider, the even narrower pickguard makes it looks tiny, fragile. Looking forward to the neck-body joint.
You will have to cope with ballance. I don't mind this fixture (by Hamer), with your body shape it might even look decent.
The templates are a piece of art themselves. If you don't scratch them too much, hang them above a fireplace.
-
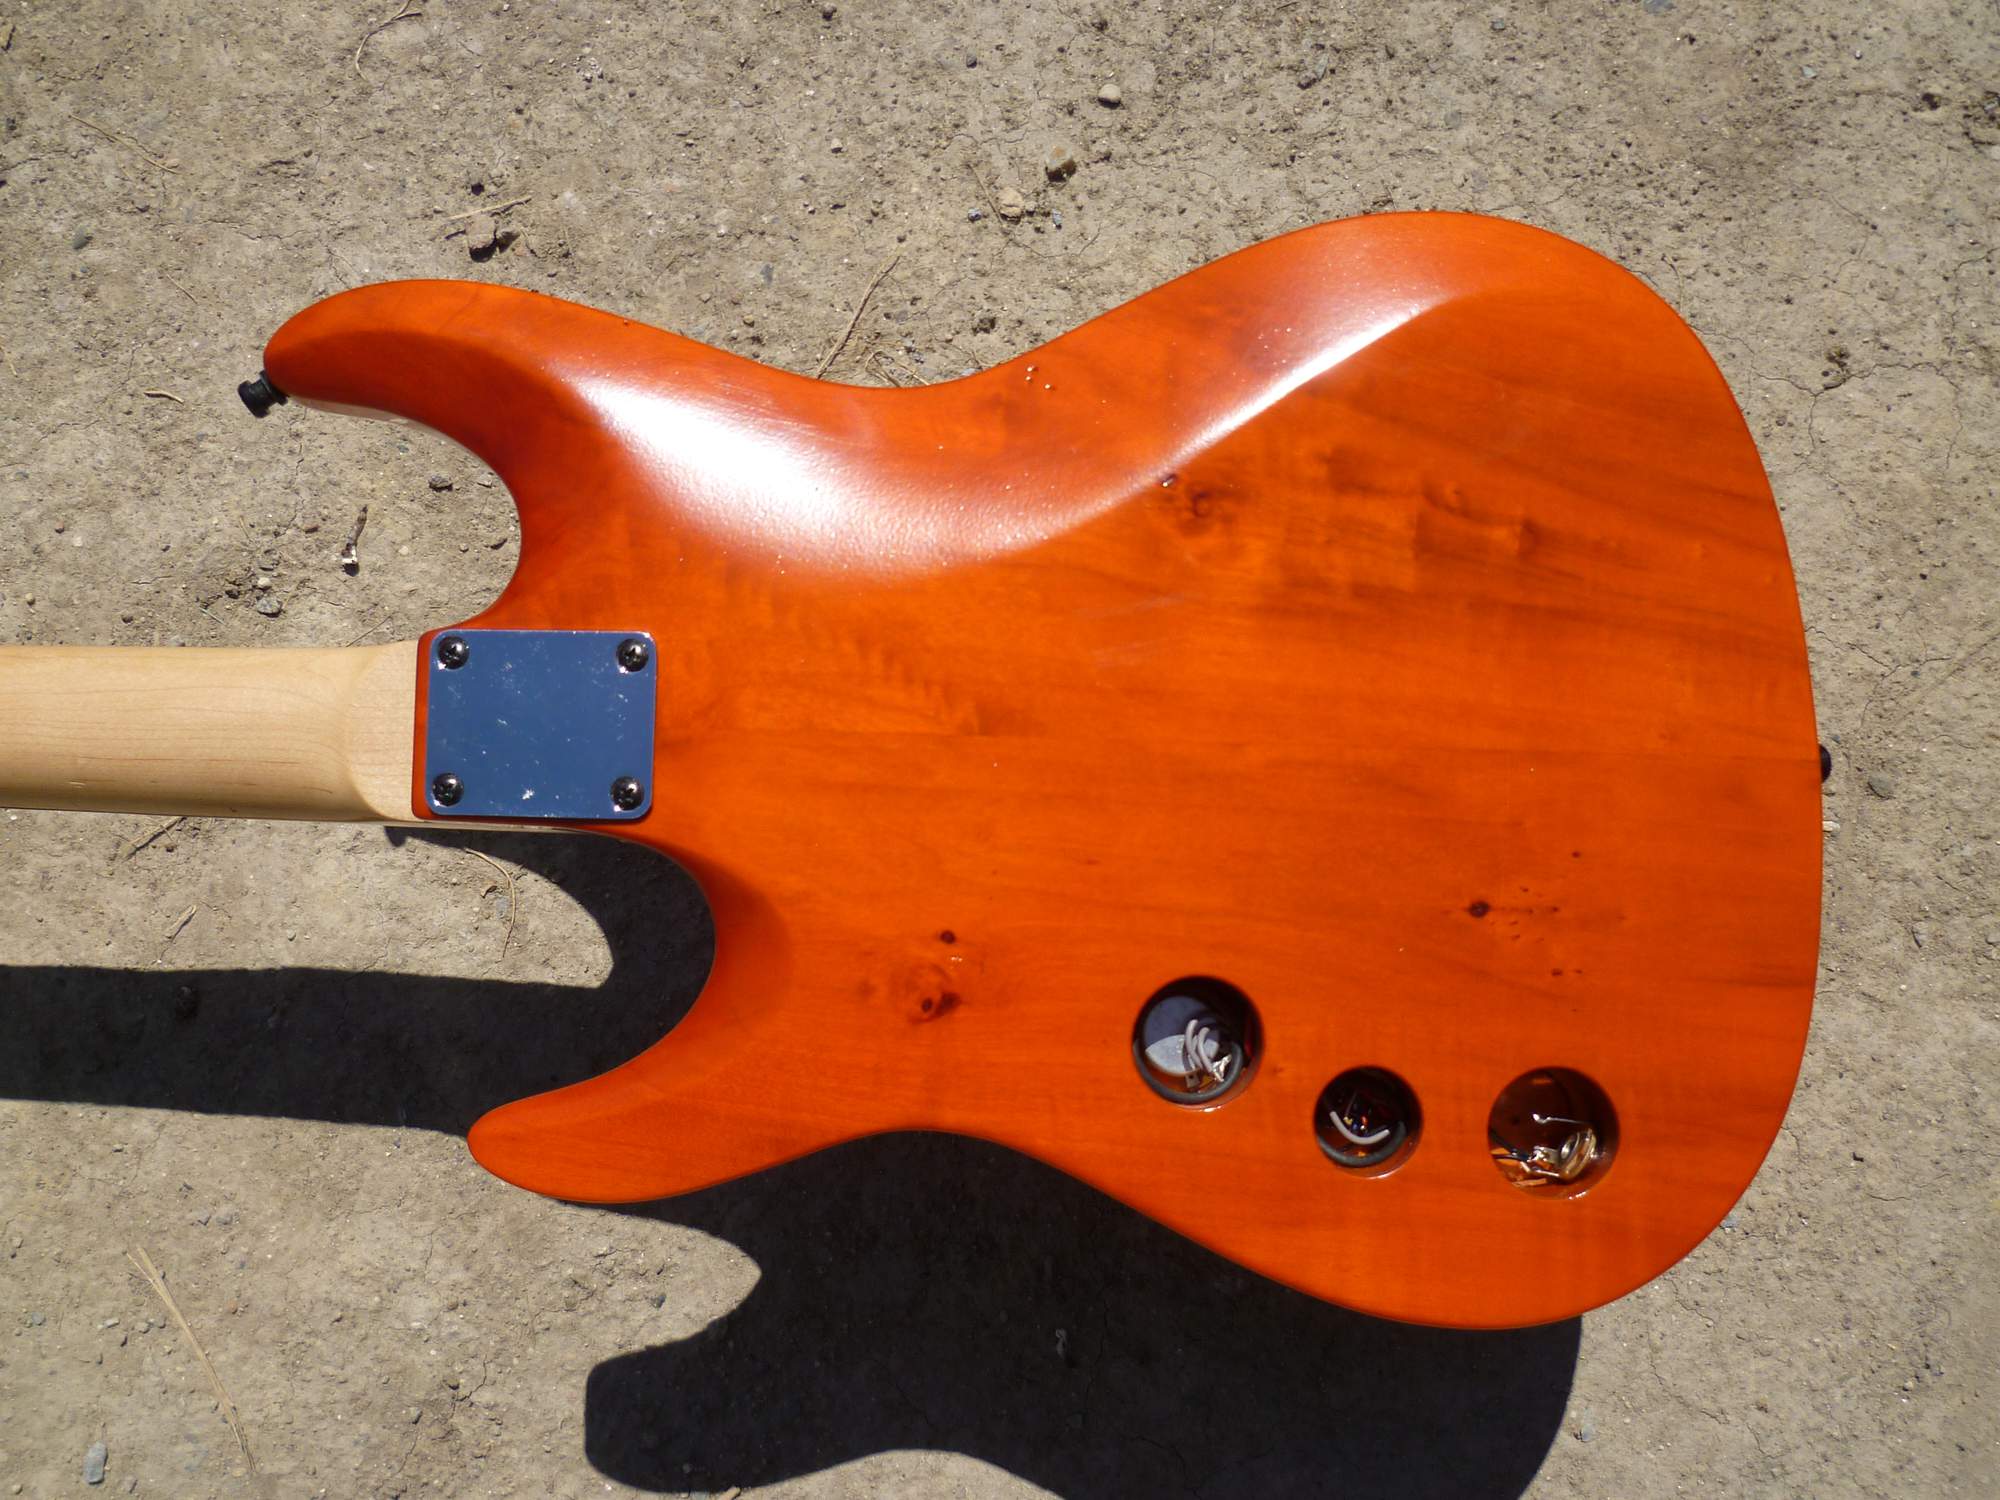
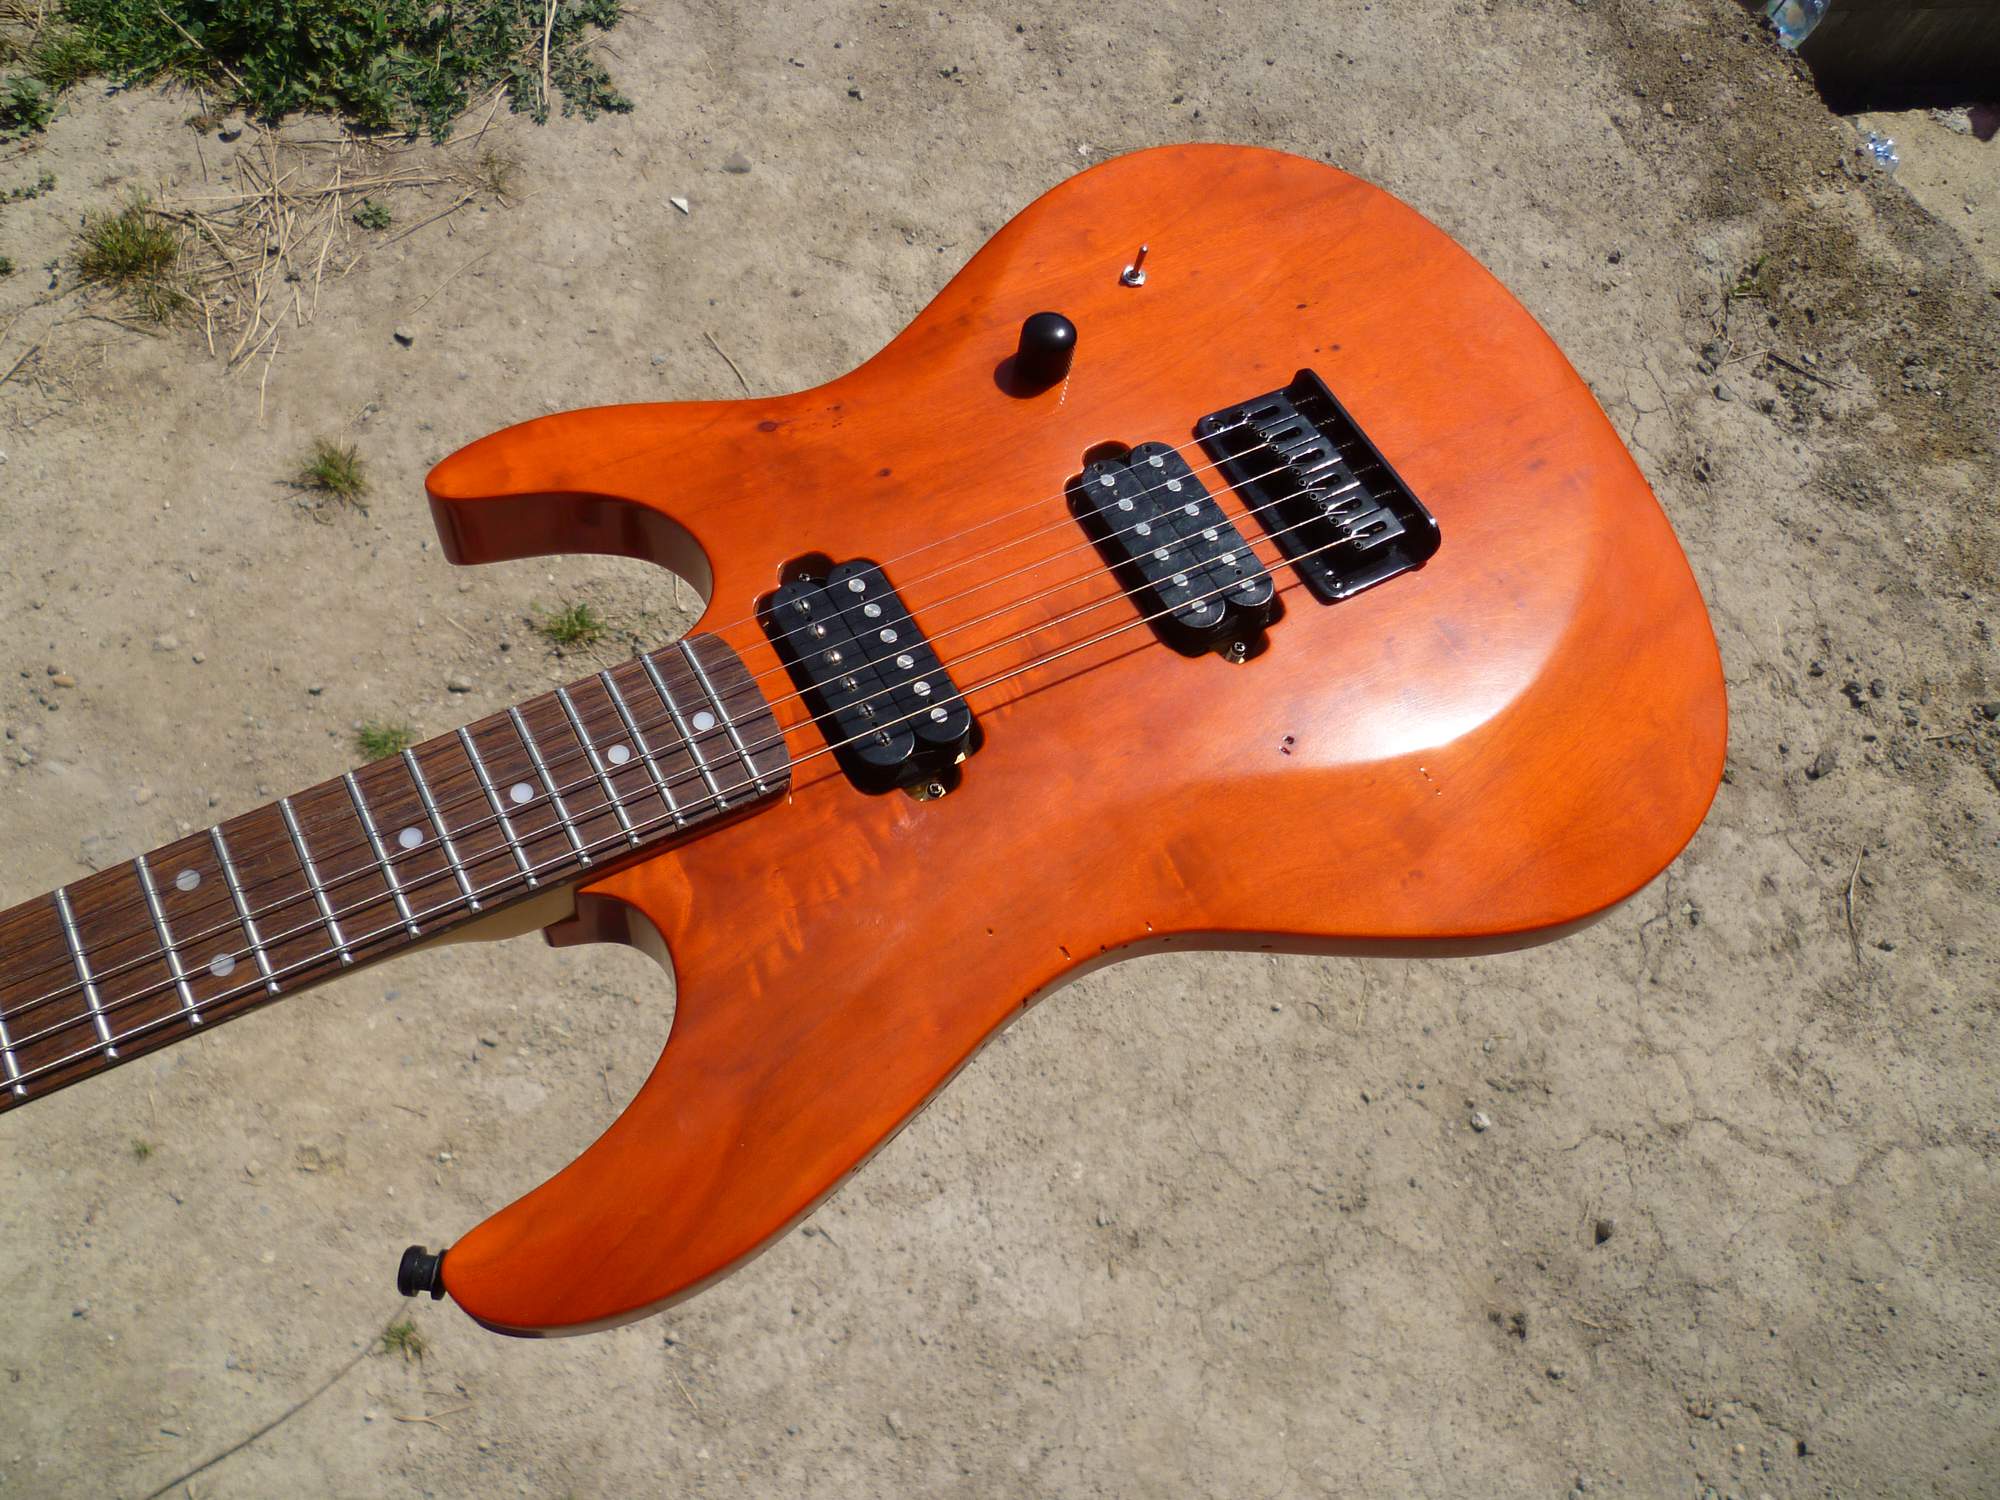
I just finished the poplar body. I call it Orange peel, guess why. Actually I sanded the front and sides, keeping the infamous texture on the back. The body is 1070g of wood + 120g of PU laquer, the whole guitar 2550g, i.e. 5.62lb.
-
Hi. Look at the complete album, there is a lot from the building process, e.g. the simple router table I built for this. I printed out plans for JEM guitar and made templates from that. I had an actual RG470 at hand to compare to and measure some details, but I got all I really needed from the plans.
http://www.gitarrebassbau.de/viewtopic.php?f=10&t=6
I think I used http://www.gitarrebassbau.de/download/file.php?id=18027&sid=30628572ce17bc4fbad3fe0985b4bf1e
I changed the neck pocket a bit, cut away the little corners and kept the neck heel not rounded, ald the headstock angle is 14° like the older japanese, newer ones have 12°.
Good luck building, show your progress.
BTW I just started a new body from a superlight kind of poplar wood. What do you think of it? Can it remain in natural finish? Yellow is the other choice.
-
I do not like the way you modded your guitar, even dont like decorated guitars, but your drawings have a quality and impress me with both the technique and the content. Plain pencil will be great. Do you know how to fix the pencil lead? Avoid glossy lacquer.
-
Oh, thank you. I do my best to make all detail precise, all curves fluent. Still I´ve got a lot to learn, like patience.
As for the tremolo, the demaged Edge III is working now, though I had to make the cruelly shortened block a bit longer with two hex bolts. Dirty, hopefully temporary solution.

Actually I have Edge Pro in my S470 http://kmensik.rajce.idnes.cz/DIY_S/ and it fits this RG. I hope I find one second hand.
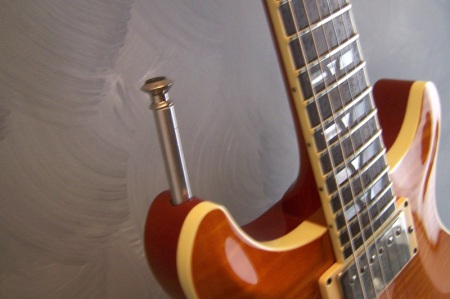
And yes, a volute was the first feature I was certain about. I enjoyed adding one also when I repaired a broken Epi SG headstock. http://kmensik.rajce.idnes.cz/Epiphone_SG/#P1360165.jpg
Logo is a problem. Firstly I don't feel like putting my name on a copy guitar. I only put my name and date inside the neck pocket.
Secondly, I have no idea what the graphics shoud look like or what name shall I use. For my business card I designed this logo, which comes from my initials K.M. It can be made plain black to put on the headstock.

I hesitated wether to put any name on my first neck, which was a tele, but it remained clean since then. BTW it is this one http://kmensik.rajce.idnes.cz/DIY_Tele
-
My new RG is almost finished, just waiting for a new tremolo baseplate. The recycled Edge III is in a horrible state after an attack by a previous owner.
Shellac body finish again, purpousely showing the grain. Wipe on lacquer on neck, linseed oil on fretboard.
Plays great, fulfilled my hopes. Despite the weight of 4kg and very sharp body edges it feels comfortable.


The whole build photoalbum is here: http://kmensik.rajce.idnes.cz/DIY_RG/
Hope you like it.
-
Hallo, this is my second attempt at a complete guitar build.
I like the RG, but most basswood pieces lack the bite I want, so I chose sapele. Also because I had some of it left from my previous S body build, I'm making her a sister.
Neck is three piece maple with a thin 4mm zebrano fretboard.
I want to keep the back cavities uncovered, to stress the mechanical engineering look of the body.
Whatever you might not like or have an advice how to do better, please tell me or kick me.
Here is my gallery. http://www.rajce.net/a10845499


Ibanez RG, my 2nd build
in In Progress and Finished Work
Posted
Once a guy told me the screws holding the five way switch look stupid on my guitar and I tried to educate him that the switch must be fixed to the body somehow and because of the wood thickness..... Long story short, how do you like this?