


demonx
-
Posts
1,803 -
Joined
-
Last visited
-
Days Won
63
Content Type
Profiles
News and Information
Tutorials
Product Reviews
Supplier Listings
Articles
Guitar Of The Month
Links and Resources
Forums
Gallery
Downloads
Posts posted by demonx
-
-
I agree with wes - I reckon with some compound and a orbital buffer that'll dissapear
-
Here you go. Broken up into two quick clips.
I hope someone learns something.
Part 1
http://www.youtube.com/watch?v=eWQmZwQL2ik&feature=channel_video_title
Part 2
http://www.youtube.com/watch?v=t7Il74_cc0E&feature=channel_video_title
-
 1
1
-
-
They look pretty fancy!
Good work!
-
Ok, I'll see what I can come up later today.
Anything else paint related you want me to touch on in the vid?
I just want it to be known I dont see myself as a paint expert by any means. But I'm willing to share what I know and at the same time learn from anyone I can
-
Hahaha! Or not!
-
I was gonna give you a hard time about metal guys and playing in tune and whatnot, but then I watched the video, and realized I'm in no position to criticize your playing.

That playing was super hack job - I'm kinda embarrased by it but it was an on the spur of the moment video as someone on facebook made a comment so I did a quickie video to upload asap - it was when I was not in a mood to play, you know what its like when you dont feel like playing so everything you do just doesnt work and sounds like ****? This was one of those moments! Probably why I didnt even test the tuning when I picked it up!
-
Good questions.
I've done similar repairs with car filler and over time (about 1-2 years later) had them shrink on me and change the outter finish. Didnt crack the paint, just sunk in. Apparently (so I was told) it was my fault cause I didnt seal the filler the same day I layed it.
AFTER MANY TRIAL AND ERRORS THE WAY I DO IT NOW:
Ive done this successfully many times and its quick and easy.
- Get a hardwood kebab scewer
- Cut the scewer into lengths deeper than your hole
- Sand the edge to a rounded point as if it's been in a pencil sharpener (I just hold and twist on my linisher for a couple seconds)
- Make a blob of wood glue onto a piece of scrap cardboard or something
- Dip the pointy end of the scewer it into glue
- Shove it hard into the screw hole twist etc so its super tight.
- Leave them to dry overnight
- Cut it flush with some nippers and sand flat.
Holes gone and filled with wood, no need for filler.
If the holes are too small for your screwer, drill them out a bit.
No filler, wood only = great repair.
-
If you really need to to see it, I could probably get my other half to film this process on my iphone so I can post a vid. It'd be a dry run (no paint)as I'd get overspray all other the phone and I couldnt talk with a paint mask on! You'd see the steps involved though.
-
Sure do... A piece of wire
I have sprayed dozens of neckthru's and over time got a order inplace.
Masking done and the guitar I hang through one of the tuner holes
First I spray the top of the headstock (part facing the roof)
Side one of the headstock all the way down to the heel (if its a V then all the way down to tip)
Side two of the headstock all the way down to the heel
Front of the headstock
Rear of the headstock all the way down the center of the neck to the heel
I then come in at an angle and hit the inner horns from the tip down
I spray the edges/sides now from the tip of the horn downwards through the curves back to and past the center of the bottom (where the strap pin would be) To get this I grab the guitar (I wear nitrile gloves whenI spray) by the inside of the pickup and bridge routes and tilt it as I'm spraying so the bottom of the guitar is verticle by the time I get to it. Make sure you lift it straight so the wire doesnt rub the headstock. Ive never had it rub as I try make the wire hang wide, but I'm just laying caution!
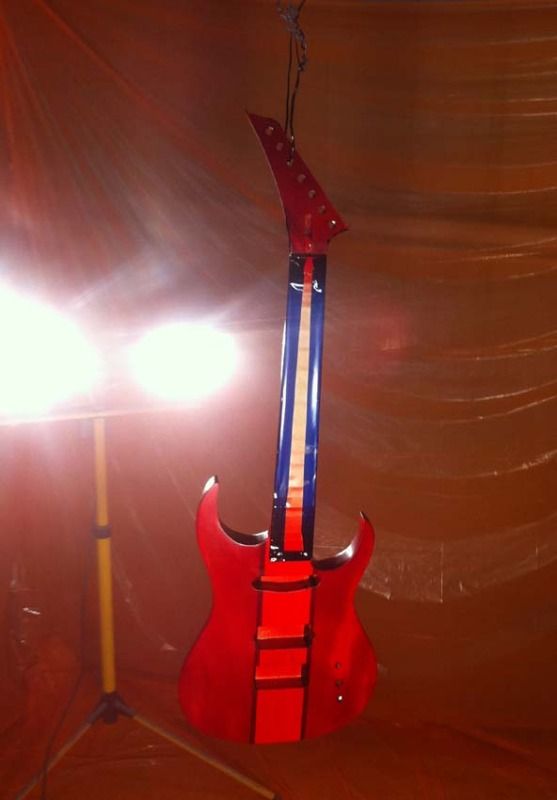
I then hold the wire up above the headstock to stop the guitar swinging whilst I spray the front and rear of the guitar.
Thats not a "spraying" video but you can see how the guitar is hanging in my spray room
-
Someone on my facebook page suggested a vid so I just asked my other half who held the iphone so you can see it in action.
Completely unrehearsed and sounds like ****....
No comments on the sound please!!! - This is a spur of the moment vid, unplanned. It's a shitty old metal zone plugged into a Marshall and filmed on a mobile phone, so please hold the critisism, it's not a Warner Bros movie.
Also, i prob should have tuned the guitar before playing which became very apparent once i turned then damn metal zone off.
Somehow when the video was compressed the video and audio sync got screwed up... I'm sure you'll manage
-
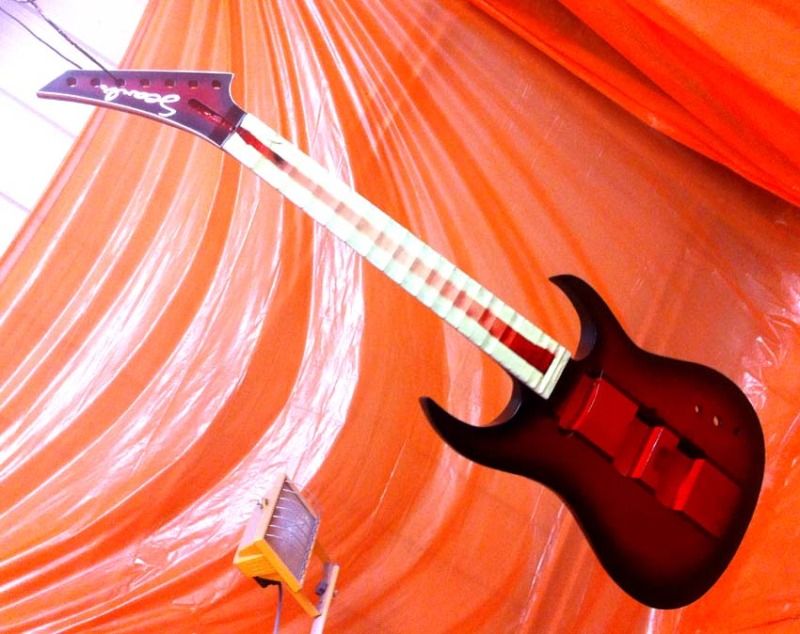
Heres another pic that better represents the true color:
In person you can clearly see the wood grain and depth of the mahogany but the iphone just cannot capture it
-
-
Today:
A bit of block sanding:
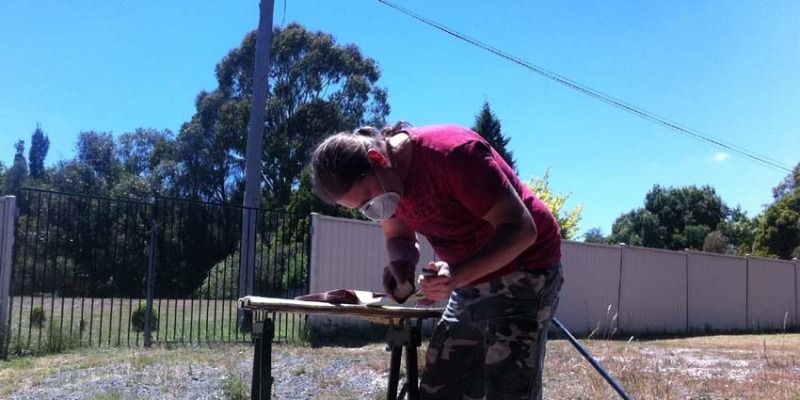
Followed by spray time !!!
-
Hahahaha
I get it now. Cheers. So much for google search - it should have known!
-
Thanks Maiden69...
I'm pretty happy with it. Need to pull it apart again though cause I forgot to ground the bridge before screwing it down, but that's only a minor thing. I got stuck yesterday playing it for ages, didnt want to put it down to go to work!
Man, you're great at finishing. It's inspiring.
It's all photoshopped! The real guitar is fluero pink... hmmm, or not!
I'm getting better with the finishing but still have a LOT of improving to do.
Especially in the "not rubbing/buffing through corners" area!
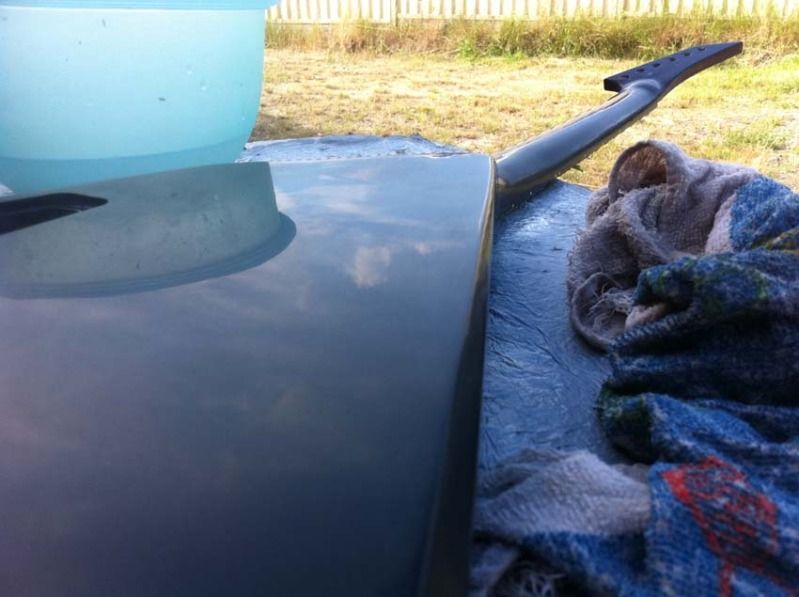
and
"remembering to lay down a foam mat before working on painted guitar" area!
Want. And gotm? Lol
Thanks, it could be yours for the total sum of "Go to hell its mine!!!" I'm keeping this baby. Bout time I had a new guitar. Thanks for the compliment.
What does "gotm" mean ? I tried googling it and come back with nothing
-
Beautiful guitar... simply beautiful. Makes me want to build a LP !
-
The Black looks good but he should have been happy with the woodgrain! It looked great. Still does. Very frusterating re-painting something you've already done.
-
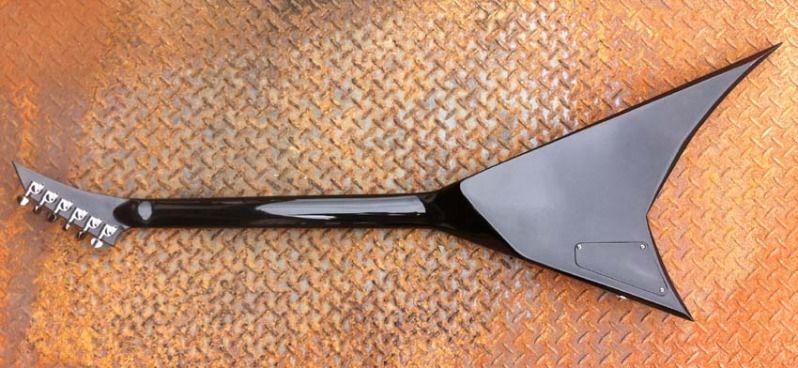
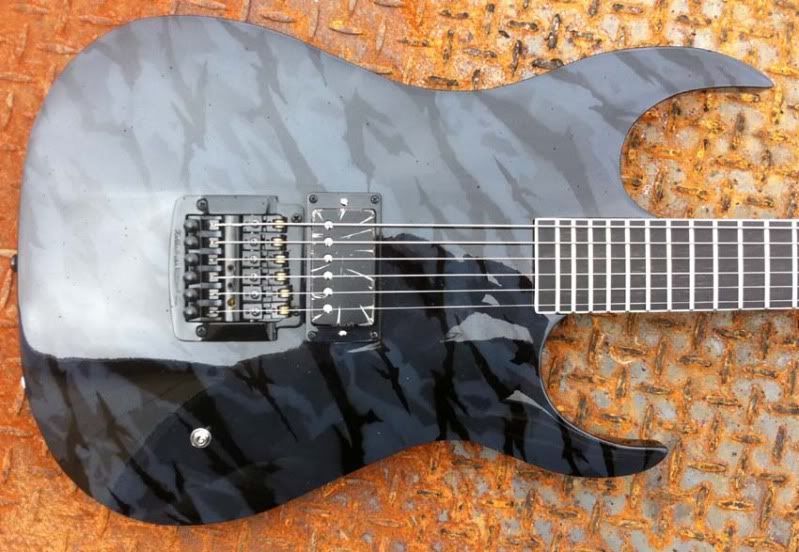
URBAN CAMO RHOADS V6
Queensland Maple body
USA Maple 3 piece Neckthru
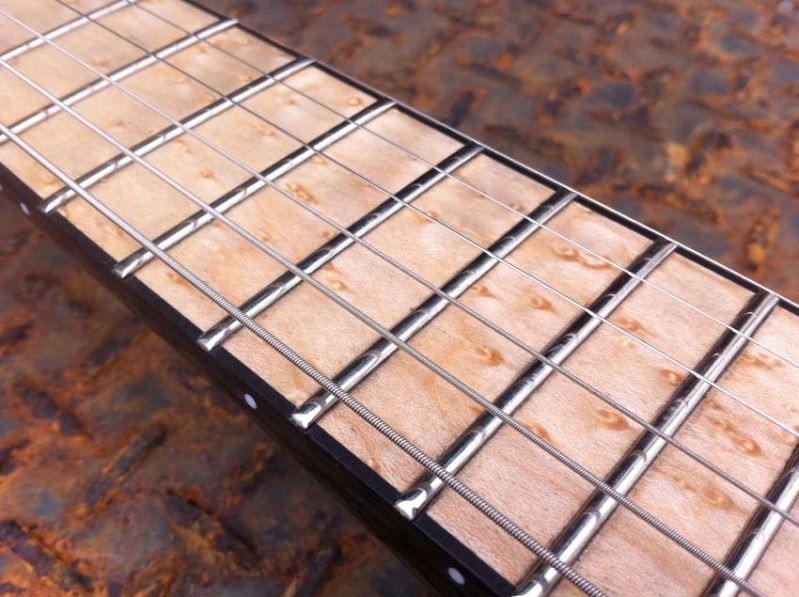
Birdseye Maple board with Ebony binding
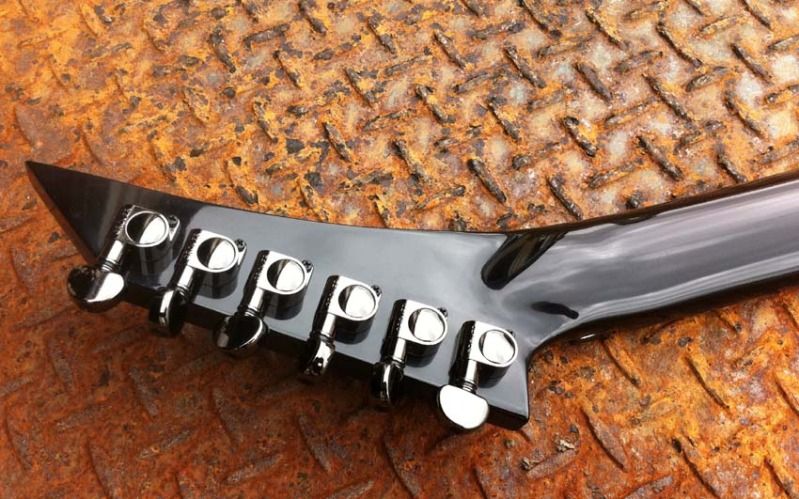
Reverse Sasafrass headstock
Kahler 7300 Tremelo
Grover Mini Tuners
Floyd Rose lock nut
Allied Luthier truss rod
Maple cavity cover painted same color as guitar
Rotosound strings - 10 to 46
Metal Dome knobs
Bridge pickup - Bareknuckle Painkiller
Neck pickup - Bareknuckle Mothers Milk
Switchcraft 3 way selector
Bareknuckle custom audio taper 550K pots (made by CTS)
NOS paper in oil 0.22mdf capacitor
Automotive 2k paints:
PPG (Autothane) primer
PPG Deltron Black
PPG Deltron White
Airbrush paints mixed from above PPG black and white
Airbrush used Iwata HP-CS to create the urban camo and to spray a slight burst around the edge of the camo to blend into black guitar
PPG D800 clear, cut to 1000, 2000 then 3000 before 3M perfect it polish
Build thread: http://projectguitar.ibforums.com/index.php?showtopic=45779&st=0
I built this guitar for myself to be my main player.
After building the Groges guitar, which was a new neck profile I experimented with I just had to build one for myself that played/felt just as good. Also after the black camo job on the Groges guitar I really wanted a camo for myself, so here it is:

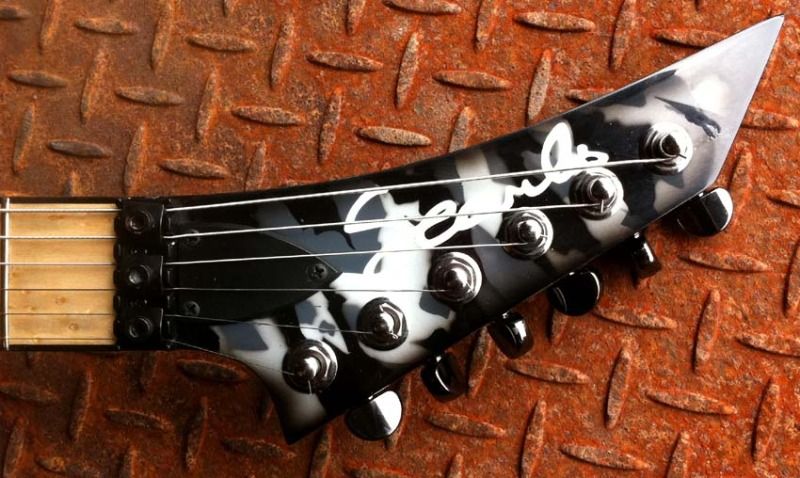
I just cannot get a pic of the headstock with my iphone, the mobile phone camera cannot capture the white logo over the grey paint.
It is clear as in person but the pics it looks like it blends in.
-
Played this thing today - it's sexier in person than the pics...
I just cannot get a pic of the logo with my iphone, it cannot capture the white logo over the grey paint.
It is clear as in person but the pics it looks like it blends in.

-
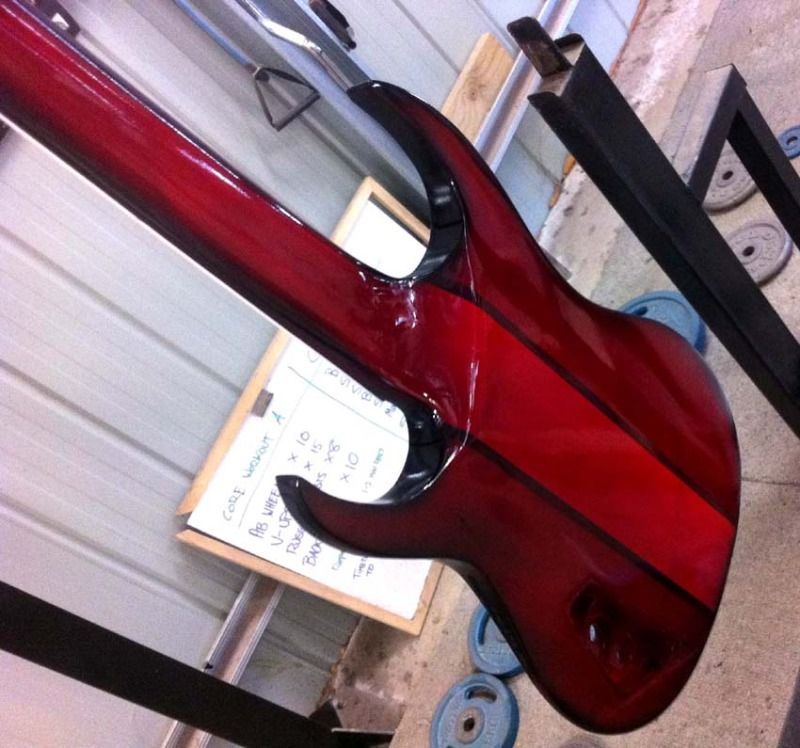
Wet sanded ready for polishing.
1000 grit to quickly knock it back leaving some of the peel
2000 grit detailed cut to get rid of all the peel
3000 grit to make sure is smooth as glass
-
All the maple tops I used so far......came from the same supplier
Thankyou for sharing. Most appreciated.
-
I can officially be added to the list of people who dislike the SM hotrod and the depth of the rod rout they cause. - along with the need for a certain router bit....
I blew through the back of the guitar neck while shaping it. - I guess I can be added to that list too,
The SM hotrods are monstors of things - completely massive. I tried a rival brand that I thought was going to be great, I finished a build and went to setup the guitar and the hex key rounded off first turn. Cheap chinese crap.
Had to remove the fretboard and reroute for a real truss rod on a fresh build - then repaint. You can imagine I wasnt happy.
So what did I learn from all this? Pay extra and buy http://www.alliedlutherie.com/ These are the bestrods are I've ever used. I've installed several of these now and they've been perfect every time. Thin. Strong. High quality and they even come with their own hex key. I can carve a super thin profile and not get through.
Worth the extra dollars.
P.S. - I'm not affiliated! I just want them to keep making them so I can keep buying them.
-
So much so, that if i ever get another bike, I'm tracking you down for an urban camo paint job. I can't wait to see this beast finished man.
Check out the "Groges" guitar on my facebook page. It's the first camo I ever sprayed - similar to this but different colors.
-
Now I want to buy a decent airbrush also, I only have a set that was made by Testor back in the days that I used to paint my model cars with. I want to give it a try to see how good can I do.
When I bought mine I had no idea what was what - so I just bought the same one that a guy in an instructional video was using - Mike Lavalle. Since he's a pro I figured it'd have to be good airbrush, endorsed or not. It's an "Iwata HP-CS." I did a short airbrush fundamentals course, everyone there was using "Badger" airbrushes. I like my Iwata better.
Even though I did a course, it doesnt make me an airbrush artist. The course was only dots and lines and basic stuff to get you started. I'd have loved to do more courses but just dont have the time to take on any more hobbies. Theres heaps of cool tutorials on youtube but most of them are way out of my skill level!


New Buffing Setup
in Solidbody Guitar and Bass Chat
Posted
Prostheta: if you go to an auto paint shop you could ask for smaller size tubes of the top shelf stuff, theyre usually a bit bigger than a tube of toothpaste and will last several guitars if you don't waste it.
As far as overloading the clear, if you spray too much itll just create ripples and peel making more hard work for yourself afterwards. If it's a straight black then I'd probably just spray 2-3 base coats over a tack coat then 3 coats of clear. Definitely no more than 4. That's spraying auto 2K.