


SwedishLuthier
-
Posts
2,147 -
Joined
-
Last visited
-
Days Won
17
Content Type
Profiles
News and Information
Tutorials
Product Reviews
Supplier Listings
Articles
Guitar Of The Month
Links and Resources
Forums
Gallery
Downloads
Posts posted by SwedishLuthier
-
-
OK, I'm not one of the best when it comes to build threads, but as I already does this in a lokal guitar forum for the customer I might at well share with you guys too.
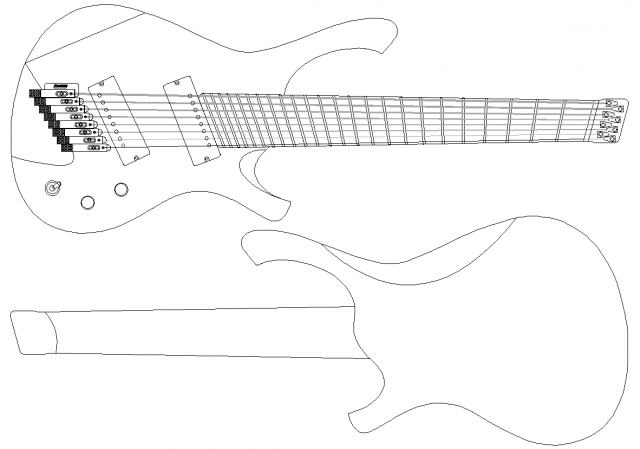
This is a build based on my NorthStar body. However it is going to be a headless guitar with compound scale (fanned frets) and 8-Stings. Oh, and compound radius too. Here's a drawing
Body wood, Brazilian cedar
Body top, Masur Birch, a quite common birch burl in Finland and Sweden
Neck is going to be multi laminated, with a lot of things going on, but mainly maple with mahogany stringer
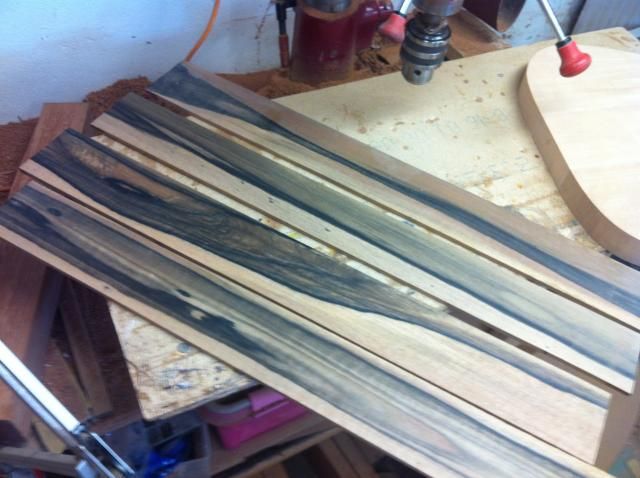
The customer got to choose from one of these striped mahogany fretboards
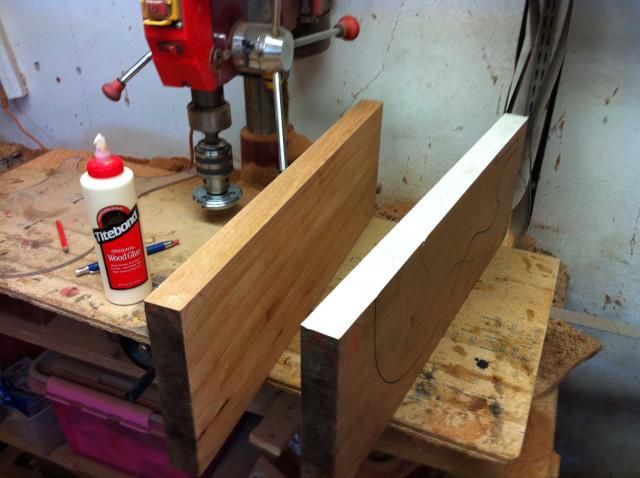
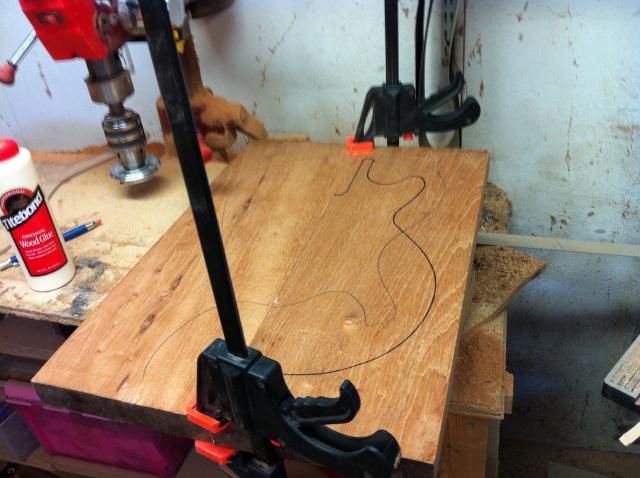
Body being glued up
EDIT:Forgot, hardware from fellow Swede Ola Strandberg and it will also have an EndurNeck profile, that Ola is kind enough to let me license for this build. Or anyone that just pay his quite reasonable fee.
-
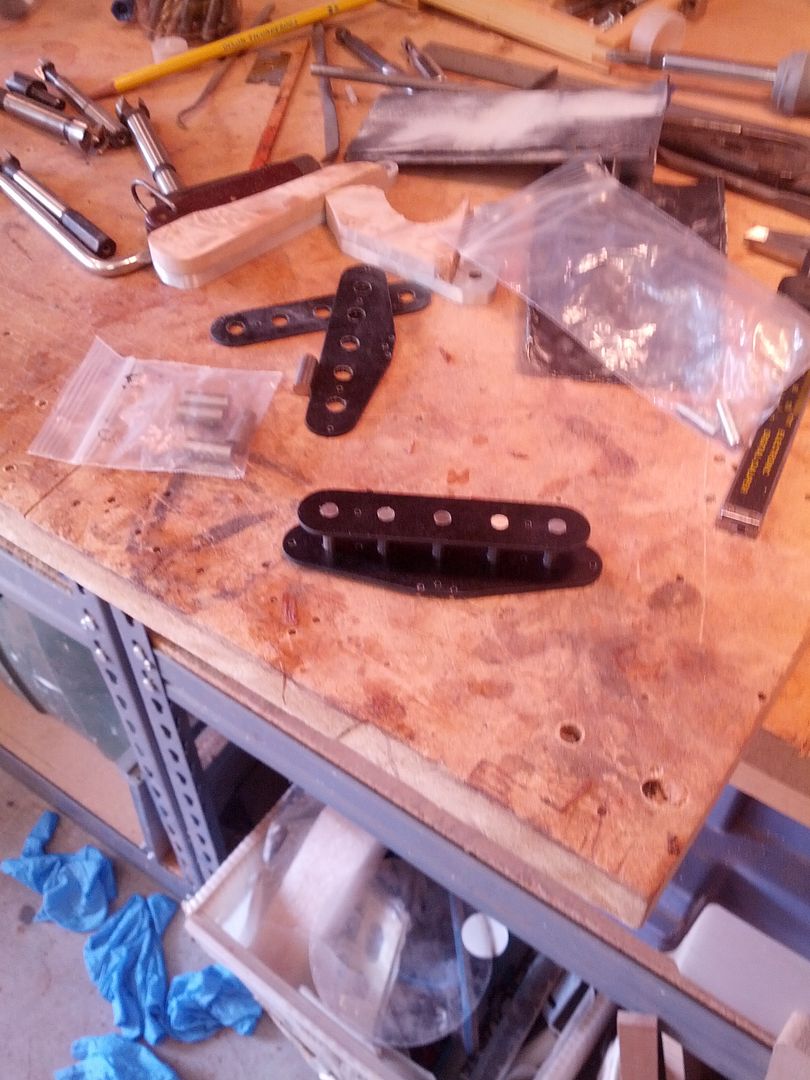
Pickups for Carl.
I hate to break it too you... but you missed one of the magnets there. You have to start over again

-
Anybody else experiment with "metal flake"? So it is kind of textured and the glitter stands up in places, I haven't burned though during the wetsanding, but I've hit some of the glitter and instead of green, I'm getting some silver shining through. I'm not really seeing any green in my sand paper or water or wash cloth.
Should I have put on more than 3ish layers of clear coat?
Yeah. Most of the metal flakes out there are just tiny colored aluminium (Scientifically correct spelling!) flakes. So if your flakes start turning silver you have ended through the color coat of the flakes. And it doesn't take much and through for ti to be visible. You need to get the finish coats on really heavy, I sugest laying the instrument flat (or suspending it like you do) and getting extra thick coats on, making sure that you cover the sides too, let it sit extra long, flip it and get extra thick layers on the other side, once again shooting a "normal" layer on the sides. This way you will get extra thick lacers on the top and back for each spraying session and double layers on the sides for every "complete" coating. The surface need to feel more or less completely level before you shoot at least one or two final coats. then it might be OK to level sand. Metal flakes takes a bit of extra care to succeed with.
One way to fix the problem with the flakes turning silver is to shoot a green tinted layer and a few more top cots. That will tone down the silver effect.
-
Ukulele tuners are often friction tuners without gears. Stay away fem those. Have a look at geared banjo tuners instead. However I'm not sure that they will be either cheeper of better than the Steinbergs.
-
Ola Strandberg, a fellow Swede and the master mind behind "building the ergonomic guitar" and Strandberg Guitars, has the integrated single string tuner/bridge he designed and now manufactures up for sale here:
http://guitarworks.thestrandbergs.com/products/purchase-page/
As I'm about to build a custom order headless 8-string based on Ola's hardware I have already completed CAD plans for those and I'm about to post those too, any day now... These tuners/bridges take standard strings. However the maximum string gauge is .080 and I'm not sure that the bigger end ball of bass strings will fit. However it is possible to get custom ordered bass strings with guitar ball ends and tapered end/beginnings that might work. In the end; to much effort if you ask me.
-
Hi There take look at this website,tried it myself with great results on solid bodies.Web site is " well oiled with adamson" All the best
Thanks for posting. Here is a direct link
EDIT: Had a quick look at this (still not finished the complete essay). It looks really good. If you did the writing (= no copyright infringements) this would make an excellent tutorial to re-post here on the forum. If you have some photos it would be even better...
EDIT2: After reading through it all I guess that you are not "Adamson" and we will have to do with a link. Maybe I'll try this exact working scheme on a Alto Acoustic being completed any time now and snap a few pics to show this method a bit more graphical...
-
File Name: Free-Way Switch
File Submitter: SwedishLuthier
File Submitted: 20 Jun 2014
File Category: Electronics
2D CAD for 6P6T Free-Way Switch
-
490R, Alnico2 magnet 42AWG (probably Poly) wire, 7.2 to 7.8 Kohms 50 mm pole spread
57 Classic, Alnico2 magnet 1.94" pole spread (49.3mm), 7.4 - 8.5 kOhms, unknown wire type but probably 42AWG with thicker insulation compared to the 490R.
So the 57 will be slightly hotter, with more mid and probably (because the wire insulation) a slightly "drier" sound. This is only based on the specs and no A/B comparison.
-
You are right that there are several versions of the classics out there. The problem is that very few of them are very accurate, or complete (example, the extremely detailed and accurate Tele body drawing floating around, no neck that match that level of detailing is available). My thought was that a "PG stamp of approval" in regards of accuracy would be a very nice touch.
-
 1
1
-
-
If possible without infringement of copy rights etc I would love to se a series of complete (or as complete as possible) drawings of all the old classics (Tele, Strat, LP, SG and so on)
-
1
-
-
That, of cause, depends on what type of system we are talking about and what you want to do with the "scars" from the old system. I'm assuming the current controls are mounted at the sides of the body and that it is ok for you to either plug the current holed with something that is visible or just leave the controls in place. If not you also need to adress the holes in some way or another. You can even make the holes a feature and call them sound ports...
Anyway, if you are looking at a system that is mounted like this

it takes some skills to do it. You need to assure that you doesn't weaken the structure too much (at least don't cut through too many side braces). The preamp need to at least reasonable match the curvature of the sides to fit nicely. And you need to be able to cut a few straight lines in the side. If you feel comfortable doing this it shouldn't be impossible to do it yourself
-
DCR isn't really that interesting. Turn count is what it is all about. How much was you able to get on the bobbin? My guess is around 7000 to 7500 turns. Anyway, there are those who aware by the under wound P90s, Lindy Fralin is one of them. With 42AWG and 6 Kohm-ish you will probably be just fine.
-
File Name: ABM 3710C single string bass bridge
File Submitter: SwedishLuthier
File Submitted: 27 Apr 2014
File Category: Component Drawings
2D CAD of ABM 3710C single string bass bridge
-
File Name: ABM 3210 Single string guitar bridge
File Submitter: SwedishLuthier
File Submitted: 27 Apr 2014
File Category: Component Drawings
2D CAD of ABM 3210 Single string guitar bridge
-
File Name: Gotoh GTC 101 hardtail bridge
File Submitter: SwedishLuthier
File Submitted: 08 May 2014
File Category: Component Drawings
2D CAD of Gotoh GTC 101 hardtail bridge
-
File Name: Gotoh 203 4-string bass bridge
File Submitter: SwedishLuthier
File Submitted: 08 May 2014
File Category: Component Drawings
2D CAD of Gotoh 203 4-string bass bridge
-
File Name: Gotoh 201 4-string bass bridge
File Submitter: SwedishLuthier
File Submitted: 08 May 2014
File Category: Component Drawings
2D CAD of Gotoh 201 4-string bass bridge
-
File Name: Tele bridge threaded saddles
File Submitter: SwedishLuthier
File Submitted: 08 May 2014
File Category: Component Drawings
2D CAD of Tele bridge threaded saddles
-
File Name: Tele bridge barrel saddles
File Submitter: SwedishLuthier
File Submitted: 08 May 2014
File Category: Component Drawings
2D CAD of Tele bridge barrel saddles
-
File Name: Shaller 4-string roller bass bridge
File Submitter: SwedishLuthier
File Submitted: 08 May 2014
File Category: Component Drawings
2D CAD of Shaller 4-string roller bass bridge
-
File Name: Schroeder art deco style stoptail bridge
File Submitter: SwedishLuthier
File Submitted: 08 May 2014
File Category: Component Drawings
2D CAD of Schroeder art deco style stoptail bridge
-
File Name: Hipshot hardtail bridge
File Submitter: SwedishLuthier
File Submitted: 08 May 2014
File Category: Component Drawings
2d CAD of Hipshot hardtail bridge
-
File Name: Hipshot Baby Grand
File Submitter: SwedishLuthier
File Submitted: 08 May 2014
File Category: Component Drawings
2D CAD of Hipshot Baby Grand
-
File Name: Gotoh T-O-M
File Submitter: SwedishLuthier
File Submitted: 08 May 2014
File Category: Component Drawings
2D CAD of Gotoh T-O-M


NorthStar 8-string headless
in In Progress and Finished Work
Posted
Body left to dry
while I turn my attention to the top. First clean it up a bit on the planer
The burl makes the birch extremely hard. So hard, in fact, that the band saw didn't had enough power to complete the job. So I had to hand saw it, quite a bit of work...
After even more cleaning up with the Wagner Safe-T and the planer: