


SwedishLuthier
-
Posts
2,147 -
Joined
-
Last visited
-
Days Won
17
Content Type
Profiles
News and Information
Tutorials
Product Reviews
Supplier Listings
Articles
Guitar Of The Month
Links and Resources
Forums
Gallery
Downloads
Posts posted by SwedishLuthier
-
-
Thank you, and wow those are very similar. I assure you that I didn't set out to copy anyone. I'd say that yours is much prettier, anyway.
He he, no problem. Lets just agree that we both have excellent taste!
 I'm really curious how you guitar will look in the end. And I'm sure yours will be very nice too.
 -
No big problems to go from a 14" to 12" radius. You will need to adjust the nut and the bridge radius. The nut radius it probably what scares most people the most, but you will probably need to do a nut job even if you replace the fretboard with an identical radiuses board. And adjusting the bridge might be very easy or a bit more job depending on type. Do you have a picture of said (or similar) guitar?
-

Nice design. Looks a bit familiar though...

more pics here>>
I know it is extremely hard to be original, so no problems from my side...
-
Don't know the radius of your fretboard, but here you can find 24 fret fretboards with 12" radius:
If you need 24 frets or not is depending on the design, but I'd say that if you had 24 frets you need that on the new fretboard too.
-
I'd say that there is a tiny difference in sound. My perception is that the longer scale length has a bit "snappier" sound compared to the shorter (generally speaking) and I can hear a bit of that when comparing a 25.5" and a 25" scale guitar. However, and this is important, that can also be contributed to the difference in feel (longer scale, stiffer strings) that translate in a different approach of the player and it might be that I hear and not an actual difference in sound.
-
Welcome to the forum!
I can see that you like to spend some serious time on perfecting jigs. Really nice. And the guitar too, of cause!
-
@SwedishLuthier - Graphite dust is surely toxic for the lungs and general health. I will not delve on this level of details or graphite sandwich. I am not that experienced nor have the proper tools for that kind of work. One step at a time. It looks awesome, but too risky for me and I do not know where to get those thin layers of Graphite. Does the Graphite glues well with the wood?
Thanks! A bit off topic but the graphite can be found in any on line RC shop. Use epoxy as the solid graphite pars, sheets etc are essentially graphite fibers in an epoxy matrix. As long as you have an epoxy that bond well to wood (and possibly scuff sand the graphite to dull it slightly) you should be fine.
-
I Use TurboCAD so the Block funktion is not entirely different from the block funktion in TC. If you are fine with the scaling part, just go ahead and do it. The main thing; if you should care about that tiny difference, the anser is "not really".
@SwedishLuthier, that photo cleared all my thougths. How is it to sand the graphite to the final neck shape compared to sanding wood? I once sanded down some metal fillings done to a defretted guitar (to replace the removed frets), and that was weird. Very interesting and nice approach there.
Cutting graphite with sharp tools is a nightmare. I tried to plane a neck blank on my planer and one single run made small groves in the planer blades. Yikes! It dulls my spokes shave quite quickly, I have to sharpen it halfway through a neck carve compared to after/before a complete carve without the graphite. Sanding is OK, almost as sanding wood. However the dust will be even worse than ebony dust in that it blackens maple and other light woods. Be careful, blast away all dust with compressed air, clean your paper after every second/third stroke or so when you are approaching the final sanding grits and you should be fine. Wear a dust mask and long sleeves, the dust is not pleasant on your skin and I can only imagine what it will do if inhaled.
-
I don't know if you saw that the on line fret finder have a "multiple" scale function. Punch in the two scale lengths and the fret number you want to be perpendicular and export a DXF-file that you can import to Auto-CAD. And you are ready to go. If that is to simple, I made my first multi scale by step by step starting with two standard scale drawings, isolating one single string on each with included smal fret "snibbits", placing the single strings side by side, aligning the perpendicular fret, extending the fret snibbits, adjusting the string spread, angling the bridge and nut, drawing the outline of the neck, drawing new frets by connecting the points were the fret snibbits cross the neck outline and you are good to go. Or simply use the dxf from the on line fret finder.

Seriously, doing it the manual way is extremely time consuming, compared to getting the job done by the online tool. And the difference between the two ways to measure a fan fret scale will be minimal. You can also discuss if a fan fret scale should be measured from nut to bridge or from fret board edge to "bridge" (theoretical bridge placement that is...) as those measurements will differ slightly too. In the end the differences are minimal and personally I just use the tool and don't spend more time worrying about that part...
That link i pasted lived its own life...
Heres a picture:
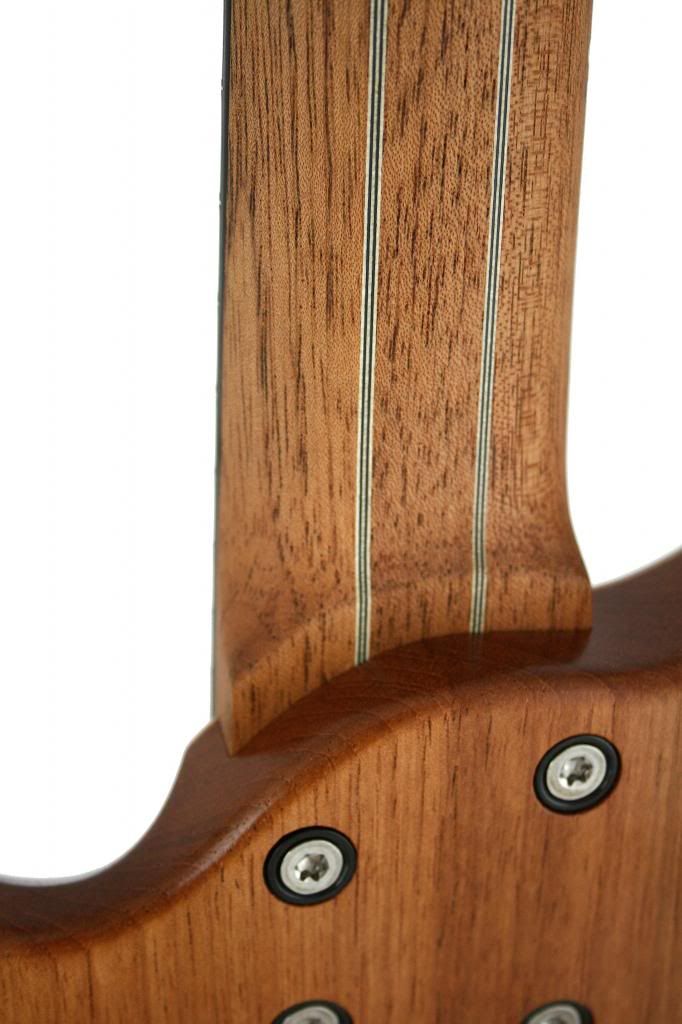
The neck in case is a nice wood called Spanish Cedar or Brazilian Cedar, actually a wood within the mahogany family. It is extremely light weight, but I wouldn't trust it to hold for a 8-stringer without the reinforcement. So the neck is Cedar, maple veneer, graphite, maple veneer, graphite, maple veneer, cedar and so on. Very effective way to spread the graphite our and closer to the surface of the neck as the stiffness of the neck is greatly increased if the reinforcement is closer to the surface compared to buried deep inside the neck close to the center.
-
 1
1
-
-
Andrews suggestion to use the on line fret finder is excellent, that is actually what I use for fan fret instruments, export it as DWG-files and import it into my CAD SW. But IIRC the tool can also export printable formats (PDF?)
I have become a big fan (no pun intended) of a perpendicular fifth fret as it still keeps the left hand in a reasonable comfortable angle when playing cords and the higher positions are all still very natural.
None of the eigth string fan fret guitars I have built have double truss rods. However I use graphite reinforcements on all my necks. Have a look at this:
http://peternaglitschluthier.com/eng_index.htm
and you will find some pictures of one of the instruments. The black stringers you see at the back of the neck is actually thin layers of graphite. I have tested this method and compared it to inlaying graphite in the middle of the neck side by side with the truss rod and this method is way superior as it also fight any twisting tendensies in the neck.
-
1
-
-
Don't sand metallic finishes. Never.
-
I have not done exactly what you describe (large decal on body) but my gut says that I would shoot the base. level, shoot a few layers of clear, apply the decal and then shoot a lot of clear. And you are right in assuming that you need a lot of clear to make the edges of the decal invisible. Before I got mu current headstone logos I used a transparent vinyl sticker and man, did I had to lay down the finish thick.
-
You might try fret leveling under string tension. Search for Rick Turner fret leaving or something like that. Or build/get a neck jig if you are really serious. I have a neck jig but I rather use the Turner method.
-
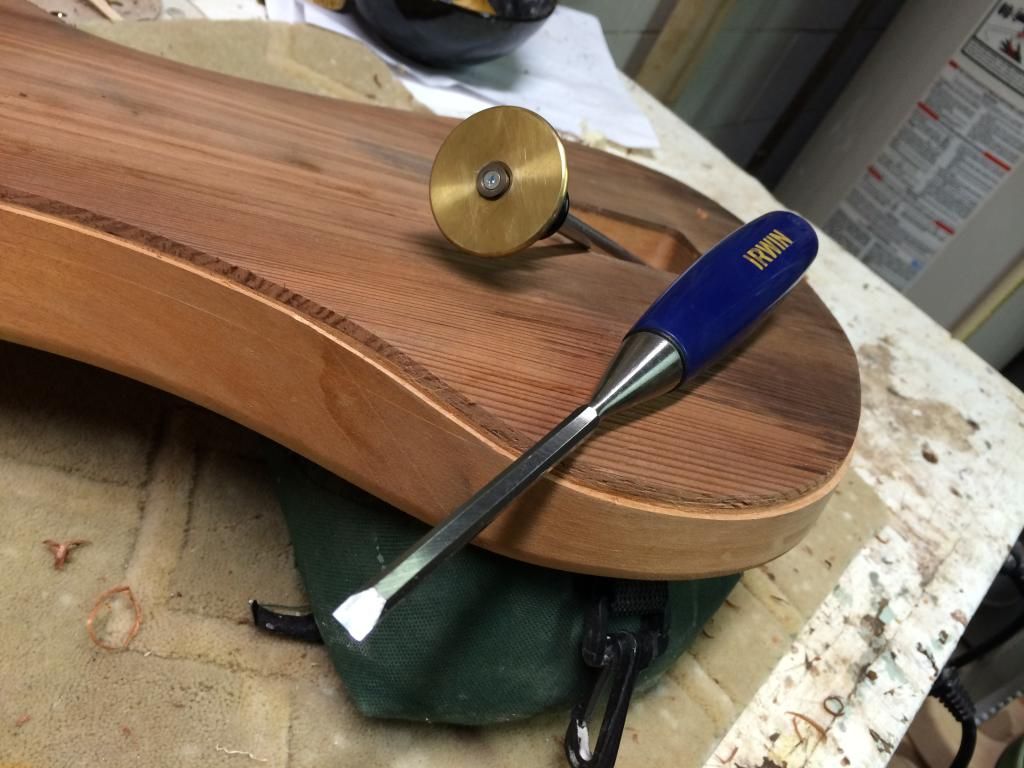
Meh. Just went ahead and did it by hand. Fun little exercise in hand tools:
Chris
Nice job!
-
And testing on skrap...
-
Really nice look there with the with plastic parts.
Just for reference: Mojo has white P90 covers
Soapbar, yes, dogear, no
If you like, please show a bit of your vacuum forming. The link you posted leads to something quite amusing, but not to anything related to pickup covers...
-
First of all: Welcome to the forum!
I don't think that you are doing anything wrong here, starting with cheep instruments and learning on them before moving on to more expensive things.
Just a thought on the static you are hearing: When changing the bridge, did you connect the ground wire? How is the static if you touch the sleeve of the plug when connected to the instrument? Better or worse?
-
1
-
-
If you look hard you can almost see the doughnut from the LMI jig in this picture from my review of that jig. :

I don't think it is totally impossible to use something like that. You might need to set the bit to a greater depth than on the sides, but if you have a flat arm bevel (myself I cut them in a smooth curved shape) the offset in cutting depth is constant and you should be able to do it with only minor touchups in the transition area.
You might get a better view in this video
At around 1.00 you get a good look at the rub collar/doughnut
-
The birch was quite easy to get a nice finish on, It was pretty rough to resaw by hand, but other cutting and sanding was OK. The wood itself has a some tiny internal cavities almost lite very short hairline cracks along the burl pattern that is impossible to see before you start to work it. They are thin enough to fill with the try-oil but they were a surprise to me. The look is spectacular, especially if you get a piece lite this that also has som flame in it.
I know that the old Swedish guitar maker Levin (started at the turn of the last century to ca 1973, actually bought by Martin Co in 1969 and made Martins for the European market for a few years...) used flame birch (no burl) for backs and sides for their high end instruments in the 30-50's. I would love to get my hands on some "plain" flamed birch wide enough for guitar tops. The Swedish guitar builder Robban Sarling of Ares Guitars have used quite a bit of Birch and according to him the sound is quite similar to the sound of Maple.
-
Your right, calculation!
So the pickups arrived today. Got them installed and the guitar up and running. The sound is nice, even though I think I could have been able to give the guitar a slightly better "bite" with my own pickups, but alas, no time to redo it. Maybe we can upgrade the guitar later on...
Here she is in front of her sister:
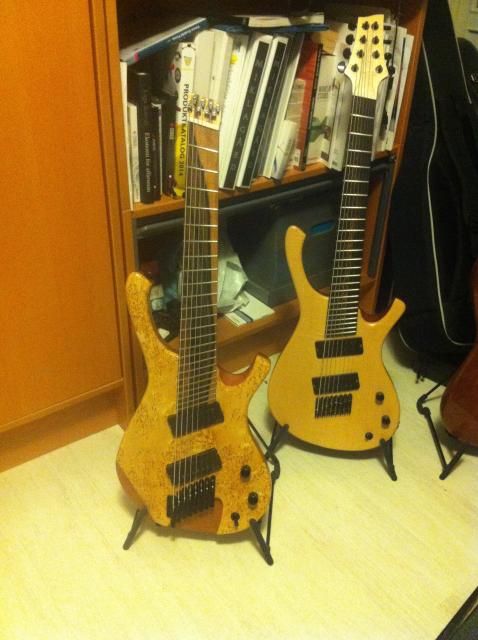
I just have to give her a final set up, have a quick photo session for the web page and then its time to hand her over to the customer.
-
You're a nutter... and I mean that in the most wonderful of ways that leads to extremely cool guitars! Can't wait for this.
One thing I'd wish you'd try though is bending the tops over the arm contours. I've never been a fan of arm contours that carve through the top wood.
Got a bending blanket? It's pretty easy.
Chris
Thanks, on the nutty part too...
I know about the arm rest, but the idea was to intentionally show the back wood, behind the tuners, at the arm rest and at the high fret cutaway. I think it will be a bit more visible when it is finished and I can take better, full on pictures. I just hope the customer will like how it turned out. I actually gave him the option to have the top bent, but he opted for this look.
Some epoxies can be quite fractious as you know. A runaway cure is probably not desirable for what is being encapsulated or the quality of the finished epoxy. As I mentioned, the West System I had an "adventure" with decided to bubble and attempt to escape the tub, not unlike the angry slime in Ghostbusters. I doubt you would be able to recover much other than the keepers, mags and slugs from the epoxy (if that) but I would definitely want to know whether the internal shape of the encapsulation warped or melted the plastics in there, and how. Take something positive from it as a learning experience.
Does the epoxy manufacturer make a retarder or a filler like West System? Whilst I have not tried anything like this, I would consider experimenting with the same "case painting" as you did previously, but having a safe low-density slow-curing encapsulation mix. Just putting ideas out there. Maybe overcomplicating the issue, as it might even be a simple case of banging it in the refrigerator to slow down the process.
I've had that bubbling experience too. That time I mixed way to much pigment into the mix (I made a calculus error...). For the "painting process I would like to try a filler, like some epoxies can be thickened with. Especially if I wanted just make an empty case and not encase the pickup totally. For now I just have thrown the batch away and waiting for a new shipment
-
Very clean work Carl, looking great
-
I still suspect bad or only partial curing (Not curing completely before I took it out of the mold?) or something like that. Thinking about it, if it gets hotter than usual, it should really mean a faster curing process that normal, which suggests that that last idea might be totally wrong...
Taking them apart is a good idea. I might do that.
Anyway, its the first time it has happened, I have order a new batch of resin, will test it without pickup parts first the next time I have to cast pickups and se what happens.
The EMGs left the US on Thursday so they will probably arrive end of this week or beginning of next week so that I can wrap things up and hand it over to the customer. One of the pros of switching to EMGs is that the wiring will at least be quicker...
The Ebay seller actually knocked down the declared value on the package (for the customs) from 230$ to 59$ without me asking for it. So if someone in the EU would like to know were I got this from just PM me. That reduction of declared value is of cause not legal, but with world wide free shipping and (hopefully) low import taxes I got those pickups really cheep
-
This is a special casting epoxy, or maybe I should say "resin", a German brand; Artidee. I have used that brand for all my casting projects and never had it get as hot as it got with the test mix i did later on. When it works in a more normal way it might reach say 50-55C, not rally hot, more like nice and comfortably warm. The test I did might have come up to 70-80C or even higher. i still thing I got a bad shipment. I have ordered a new batch. I'll make sure I make a test I go on and use it for anything that is going to be used.
 I'm really curious how you guitar will look in the end. And I'm sure yours will be very nice too.


Warwick Streamer Repair/refinish
in In Progress and Finished Work
Posted
West systems are frequently being referred to as the go-to solution for surface covering (compared to more traditional gluing) applikations. However I have more or less the same problem with one of the epoxies I use for gluing graphite in necks. The glue gets completely cured, but the outer surface of any seep out or similar are sticky, even after a week of curing. It seems to me (Although I'm far from an epoxy expert) like some epoxies might have that properties, curing but remaining sticky on the surface.