


JGTay
-
Posts
329 -
Joined
-
Last visited
-
Days Won
18
Content Type
Profiles
News and Information
Tutorials
Product Reviews
Supplier Listings
Articles
Guitar Of The Month
Links and Resources
Forums
Gallery
Downloads
Posts posted by JGTay
-
-
23 hours ago, RVA said:
That looks amazing. Applying an oil finish is slow, but it is certainly more relaxing than spraying
Thanks RVA.

It is very slow oiling, the waiting between coats is a bit frustrating as I can't use my workshop for anything else, but I do like the finish it produces.
I didn't get as much time as I had hoped today, managed to get all the wiring done, but the other bits will have to wait until tomorrow.
-
 1
1
-
-
That sounds great and looks amazing. Really good work.

-
Have been busy all week oiling the front, getting enough coats on there to match up with the rest of it. Also drilled for the bridge earth.
This was before final sand and buff.


Next up was the final sand and buff, no pics for that as it will show in the final pics at the end and will have a final polish.
Then it was the magnets for the cavity cover, ran out of my biggest ones, had to put a mix of smaller ones in and with the cover being mahogany it is a bit of weight so I had to add a few extra to get it to hold firmly in place. Also drilled for the jack and got the plate in place.
I then got on with the shielding.

And then it was in with the pots and 3 way switch.

Next up was putting the tuners in, screwing the bridge in place and also the strap locks.


I was just getting ready to do the pickups when I found that they were missing some screws and springs, so will have to go back to the shop tomorrow and get them to sort it out. While I am there I will pick up some side dot inlay material which I totally forgot about.
-
2
-
-
The gold covers and fretwork work very well together, ties it all in with the rest of the guitar.
-
Managed to get some time this morning to lightly sand the cavity cover, back, sides, neck and headstock ready for the next coats of oil. Hopefully this should be the final coats for the body, cover and sides, but the neck and headstock still need some more to catch up with the amount of coats.


It will now get a few days to harden as I am busy over the weekend. I can get started on the front next week. Once it is oiled with enough coats all over I can do the final higher grade sanding and buffing all over in one go.
")
-
2
-
-
Managed to get the holes drilled and test everything in place before having to head out and help with an emergency at my sister in laws.


Very happy with the layout.
-
1
-
-
After speaking with the wife and daughter have decided to go with the first option with the switch towards the back, but inline with the pots. It is more aesthetically pleasing and keeps the switch away from accidental knocks when playing.

-
7 hours ago, nakedzen said:
My tip is, don't put off making the neck yourself. It's pretty easy to make a fender-style neck, and the fretboard you can buy premade with slots and radius if you're worried about your accuracy.
Totally agree with you, my first couple of builds I purchased necks as I didn't think I could make them, but soon got over it after making my first one.
-
Thanks @Bizman62
Big update on progress (lots of pics, sorry!)
Have been oiling the back, sides, neck, back of headstock and cavity cover since the last update, getting plenty of coats done with sanding in between every 3 coats.

The back, sides, neck and headstock are ready for another light sand before the next coats.


Yesterday I was getting ready for the sanding, but then I had a delivery of items, which included the bridge. I decided to go with a high mass bridge, for no other reason than I liked how it looked, was in my price range (not too cheap/nasty and not overly expensive) and also it had 18mm string spacing which was within the range I had been looking for (between 16.5mm and 18mm at the max).
The only thing I hadn't taken into account was the size of the base plate and saddles, the base plate is just over 5mm and with the saddles it lifts the strings 17mm above the body. The fretboard is only 7mm in the centre and the frets are less than 0.9mm, which would give a string height of 9mm at the final fret... the options became obvious, either get a different bridge or sink it into the body.
I went with the second option!

Firstly cut a couple of bits of thick cardboard for the body to sit on so that it had protection and could compress down with clamps without damaging the back, put some masking tape around the area for the bridge, then marked out the scale length, moved the treble side saddle to the edge of the bridge plate, lined up the string break point with the scale length and marked the position of the bridge.


Then scored the lines with a Stanley knife and went round it with a chisel.

And then gradually started chiselling out the wood.


Once it was to the correct depth and level all the way across, the bridge slotted in nicely. The base plate is just below the surface and the lowest position of the saddles gives just under 1mm string clearance at the final fret.


Next up I need to decide on the control positions, have a few options....


Can't quite make up my mind yet, but need to get the holes drilled so I can do clean up before oiling the top. Any thoughts?

-
1
-
-
Past few days have been spent tidying up my workshop ready for finishing. Still need to find some space for all the stuff at the back, but much better now. Even mounted some of my Kef speakers to replace some old dodgy shelf speakers and hung up some cat pics my daughter gave me.
Marked out and drilled for the tuners.

Then tested them in place.

And then tidied up the headstock.

Next up was the first coat of Danish oil on the back, cavity cover and sides.


Moving along nicely.
-
2
-
-
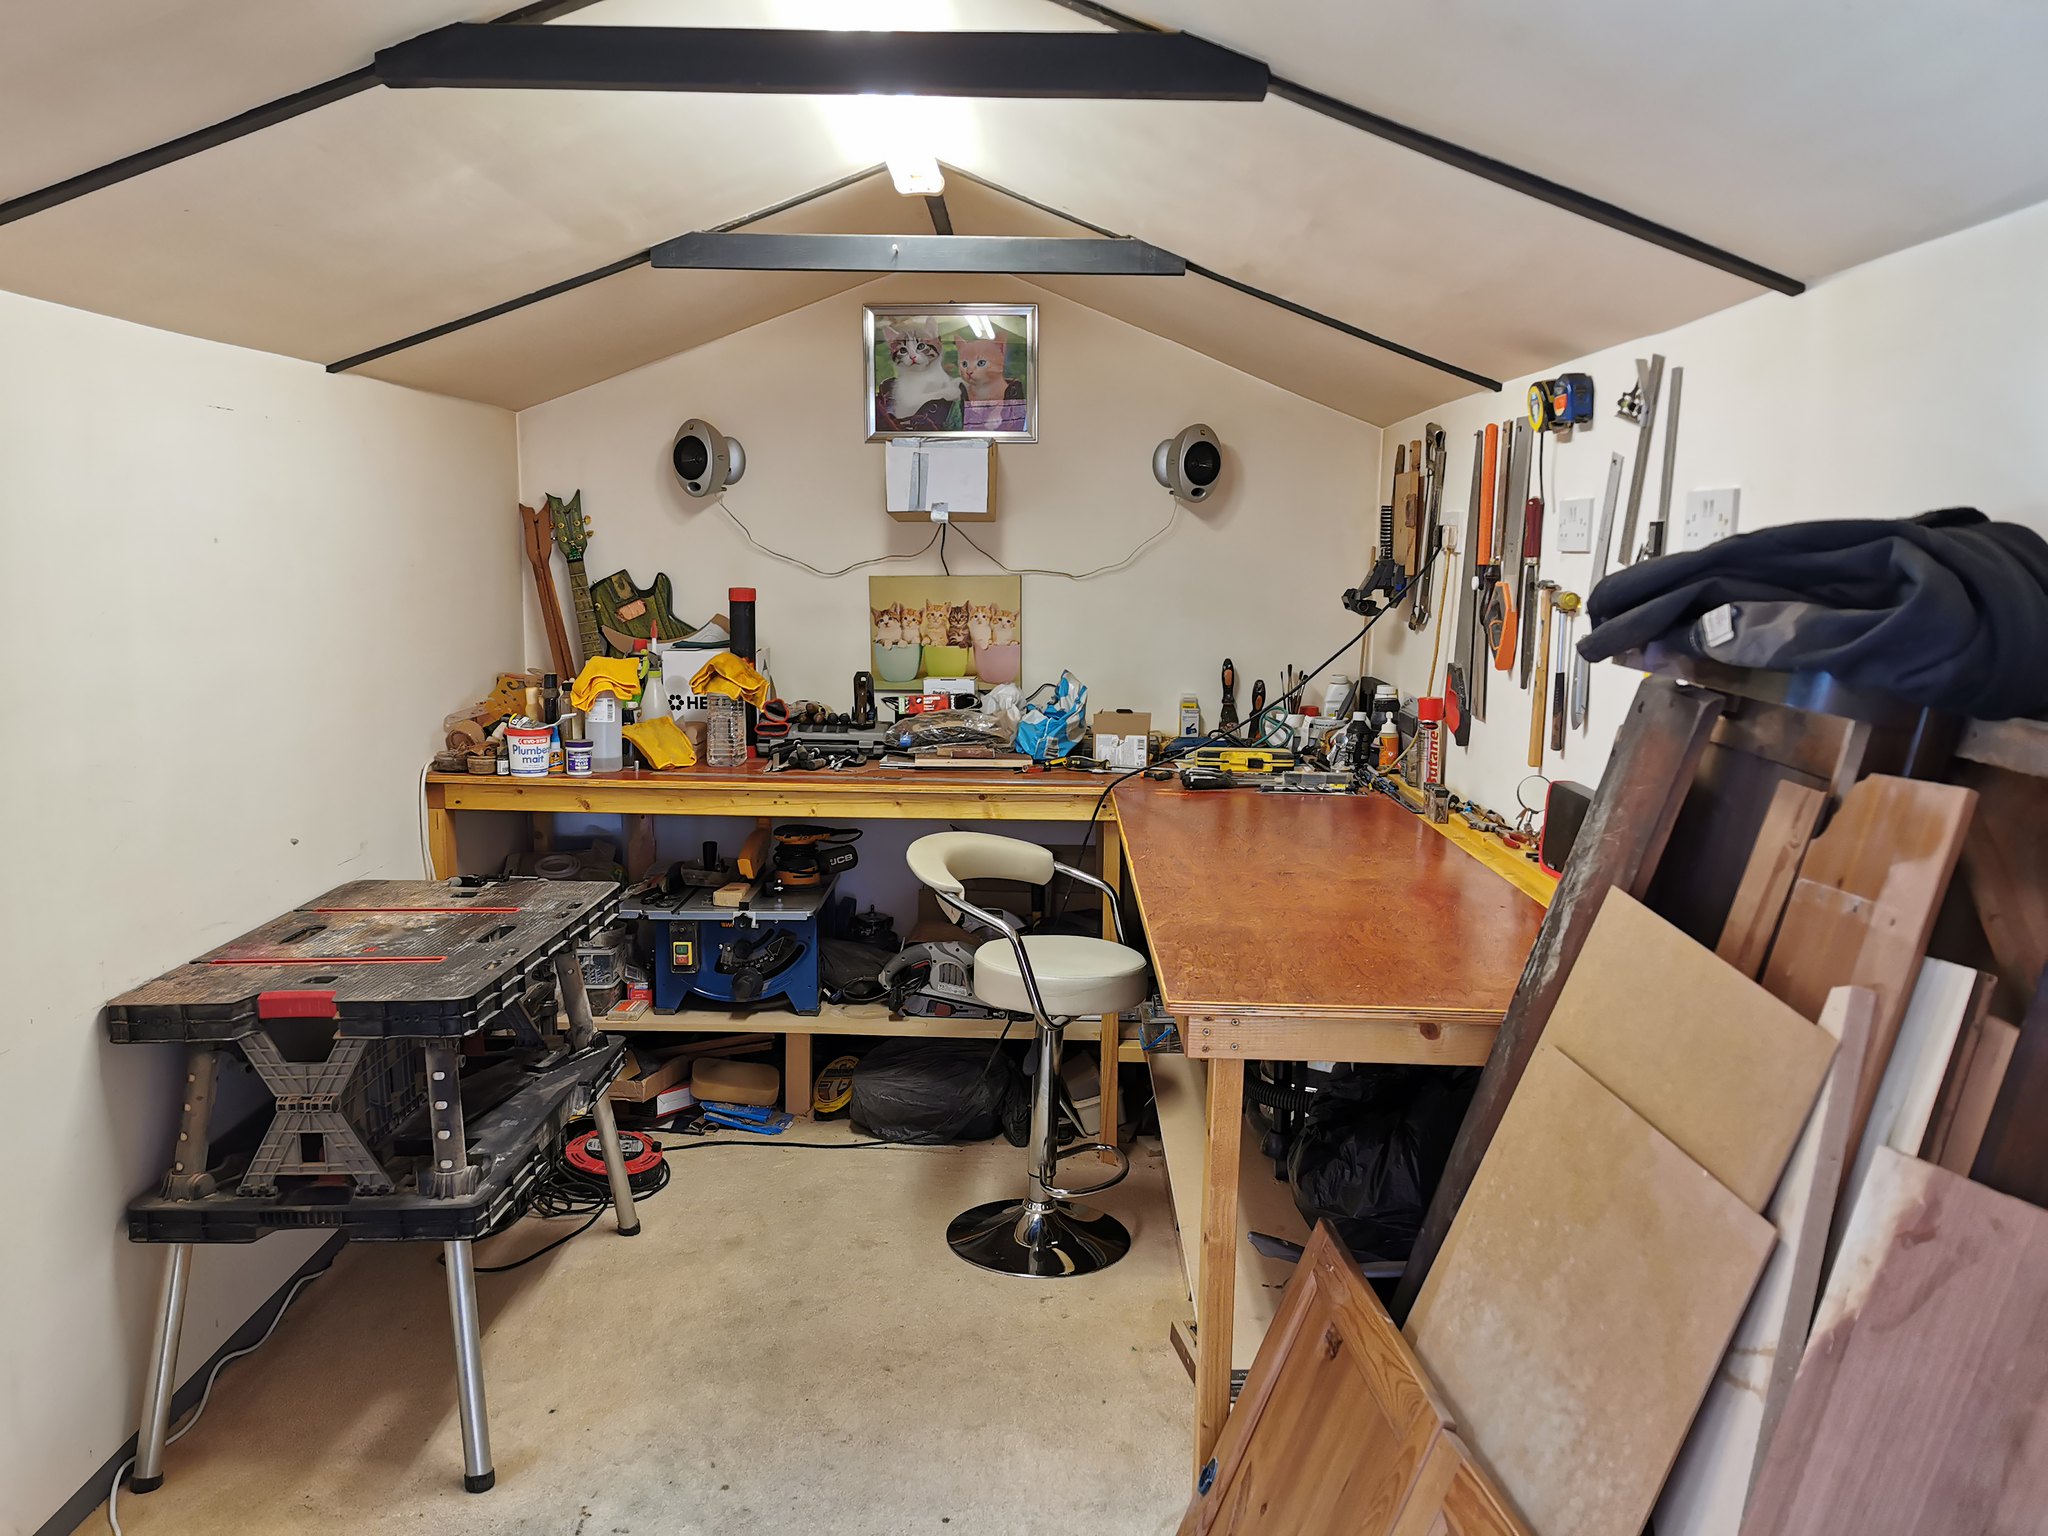
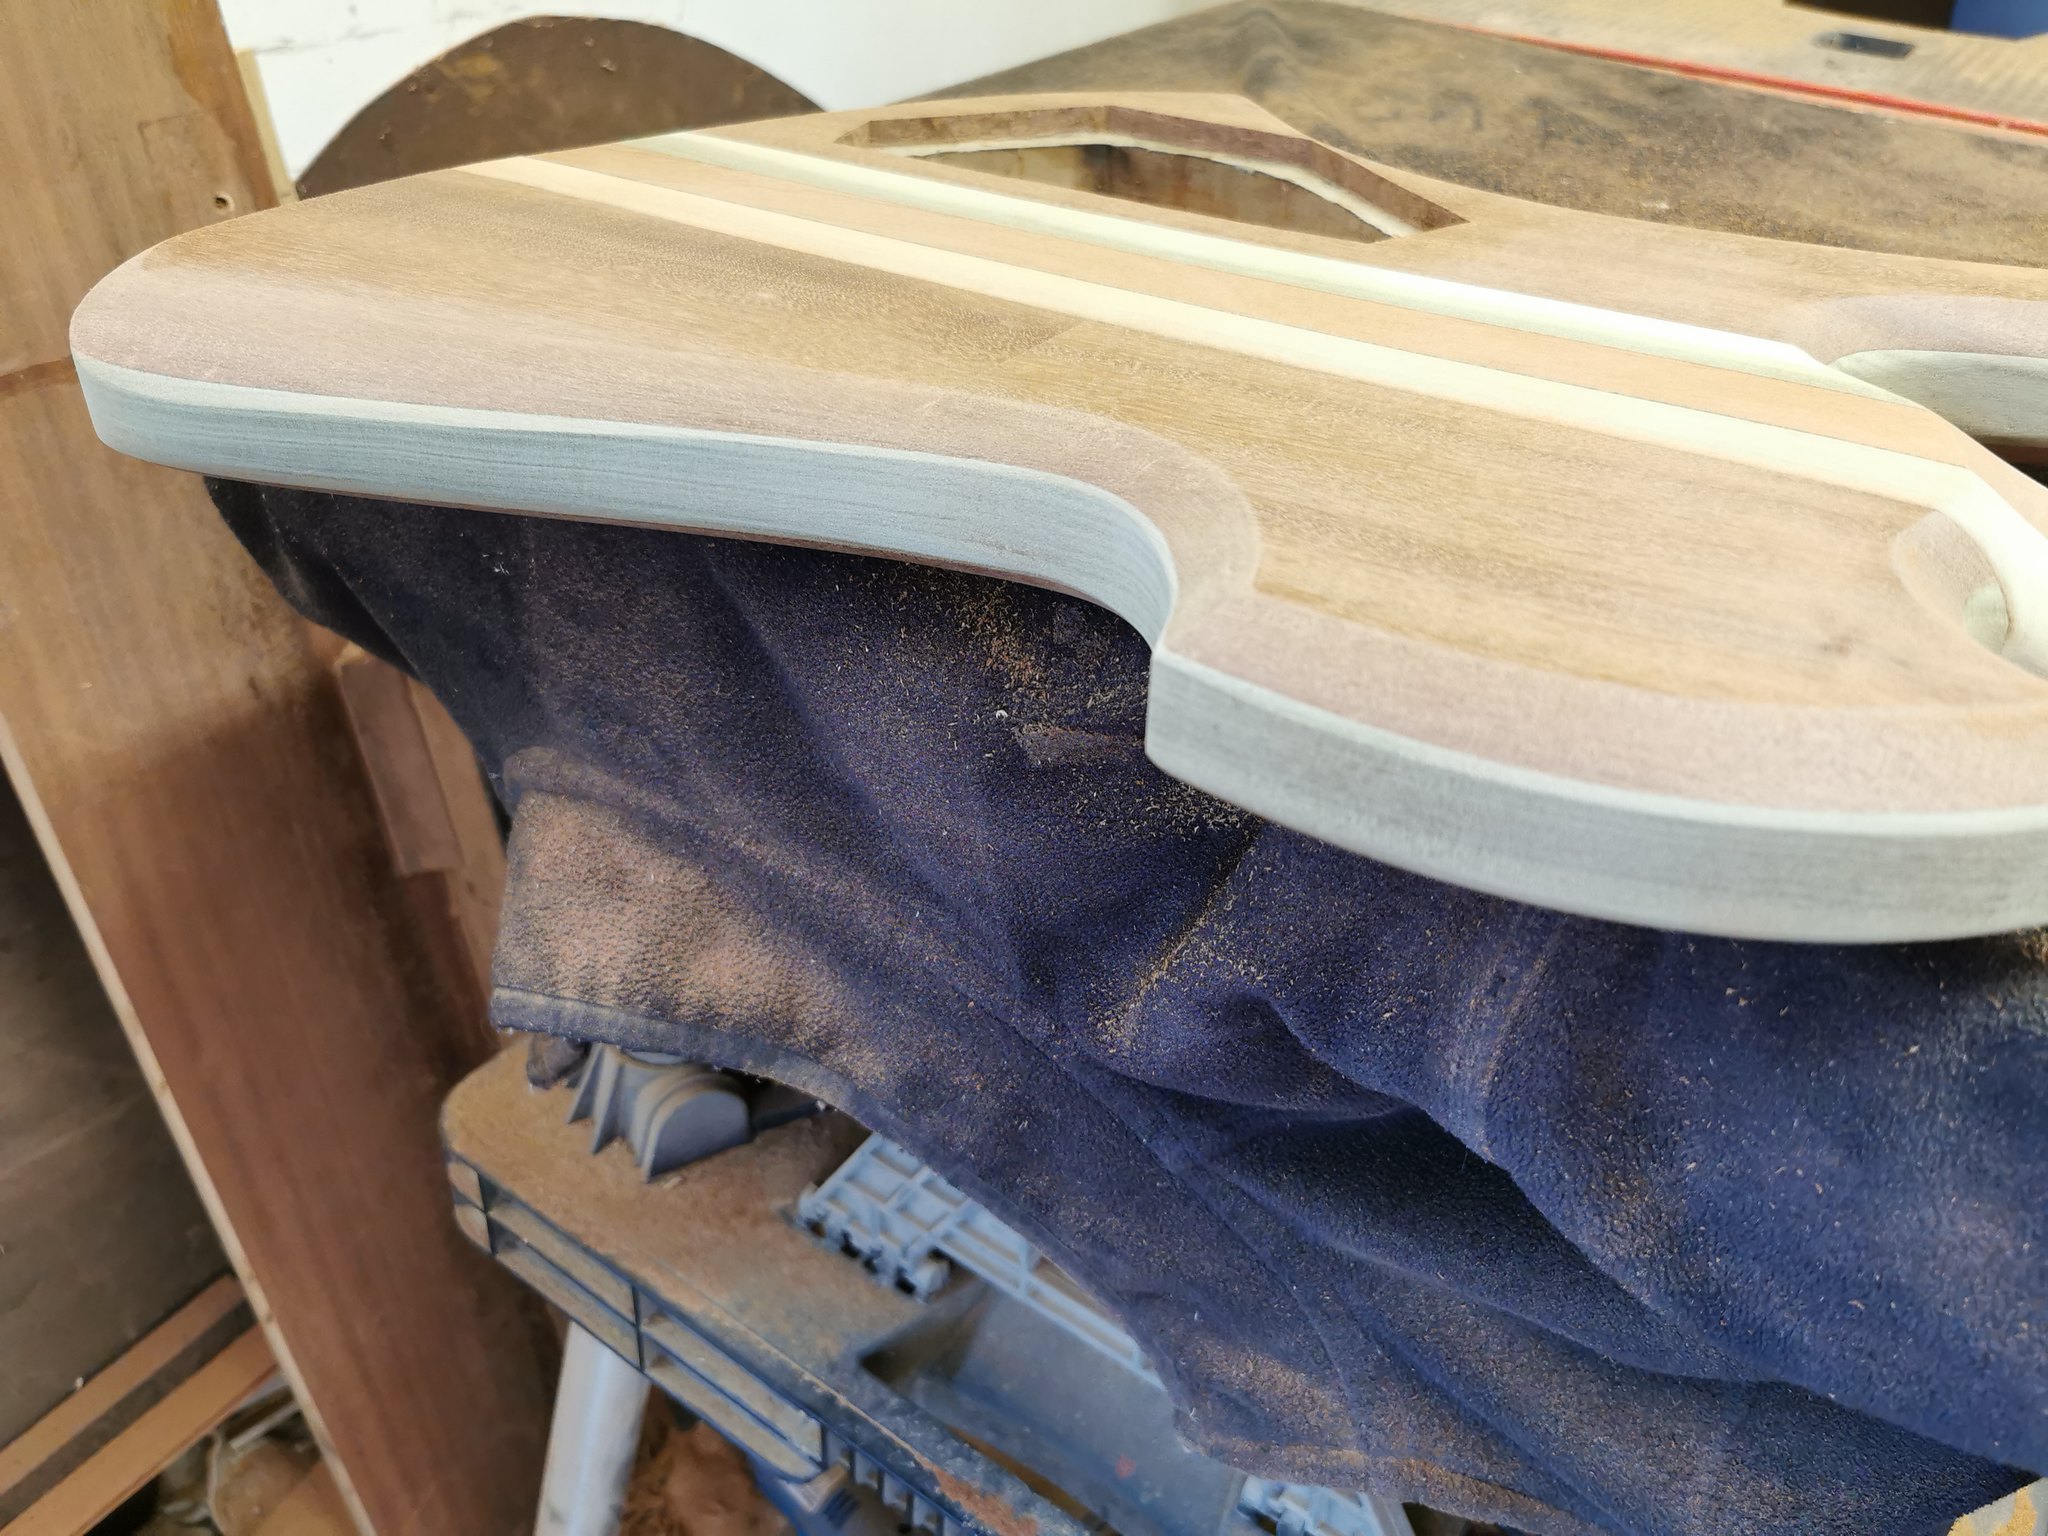
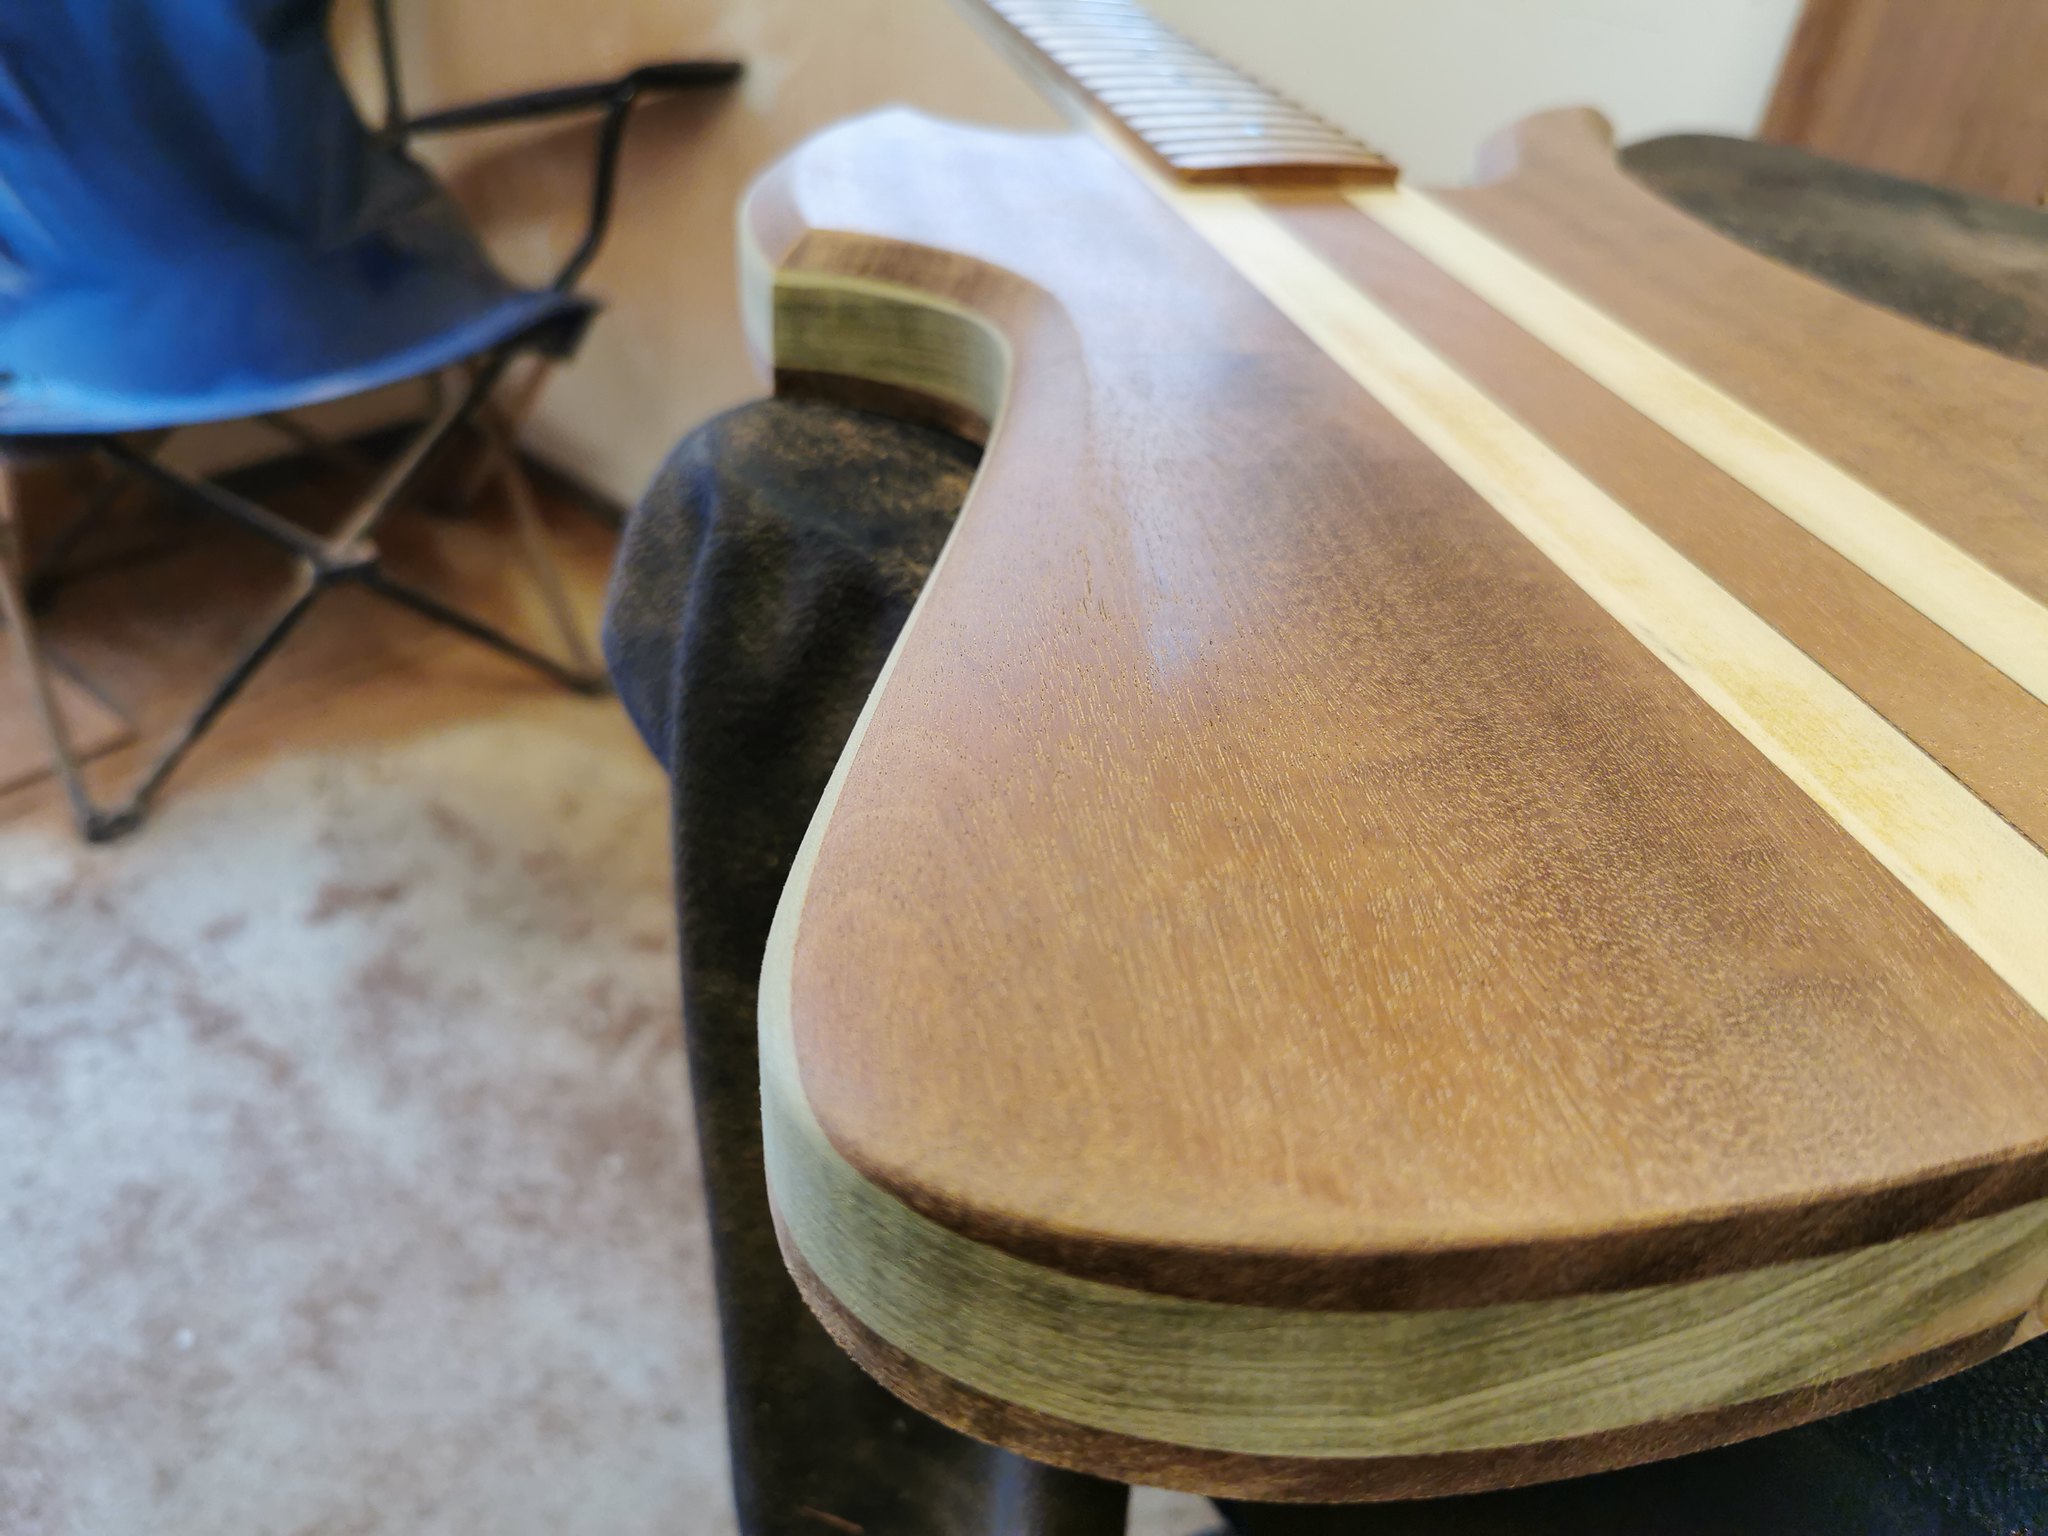
Progress was slowed slightly over the past few days due to the heat wave, my workshop was actually quite a bit warmer than outside even with both doors open as well as the window.
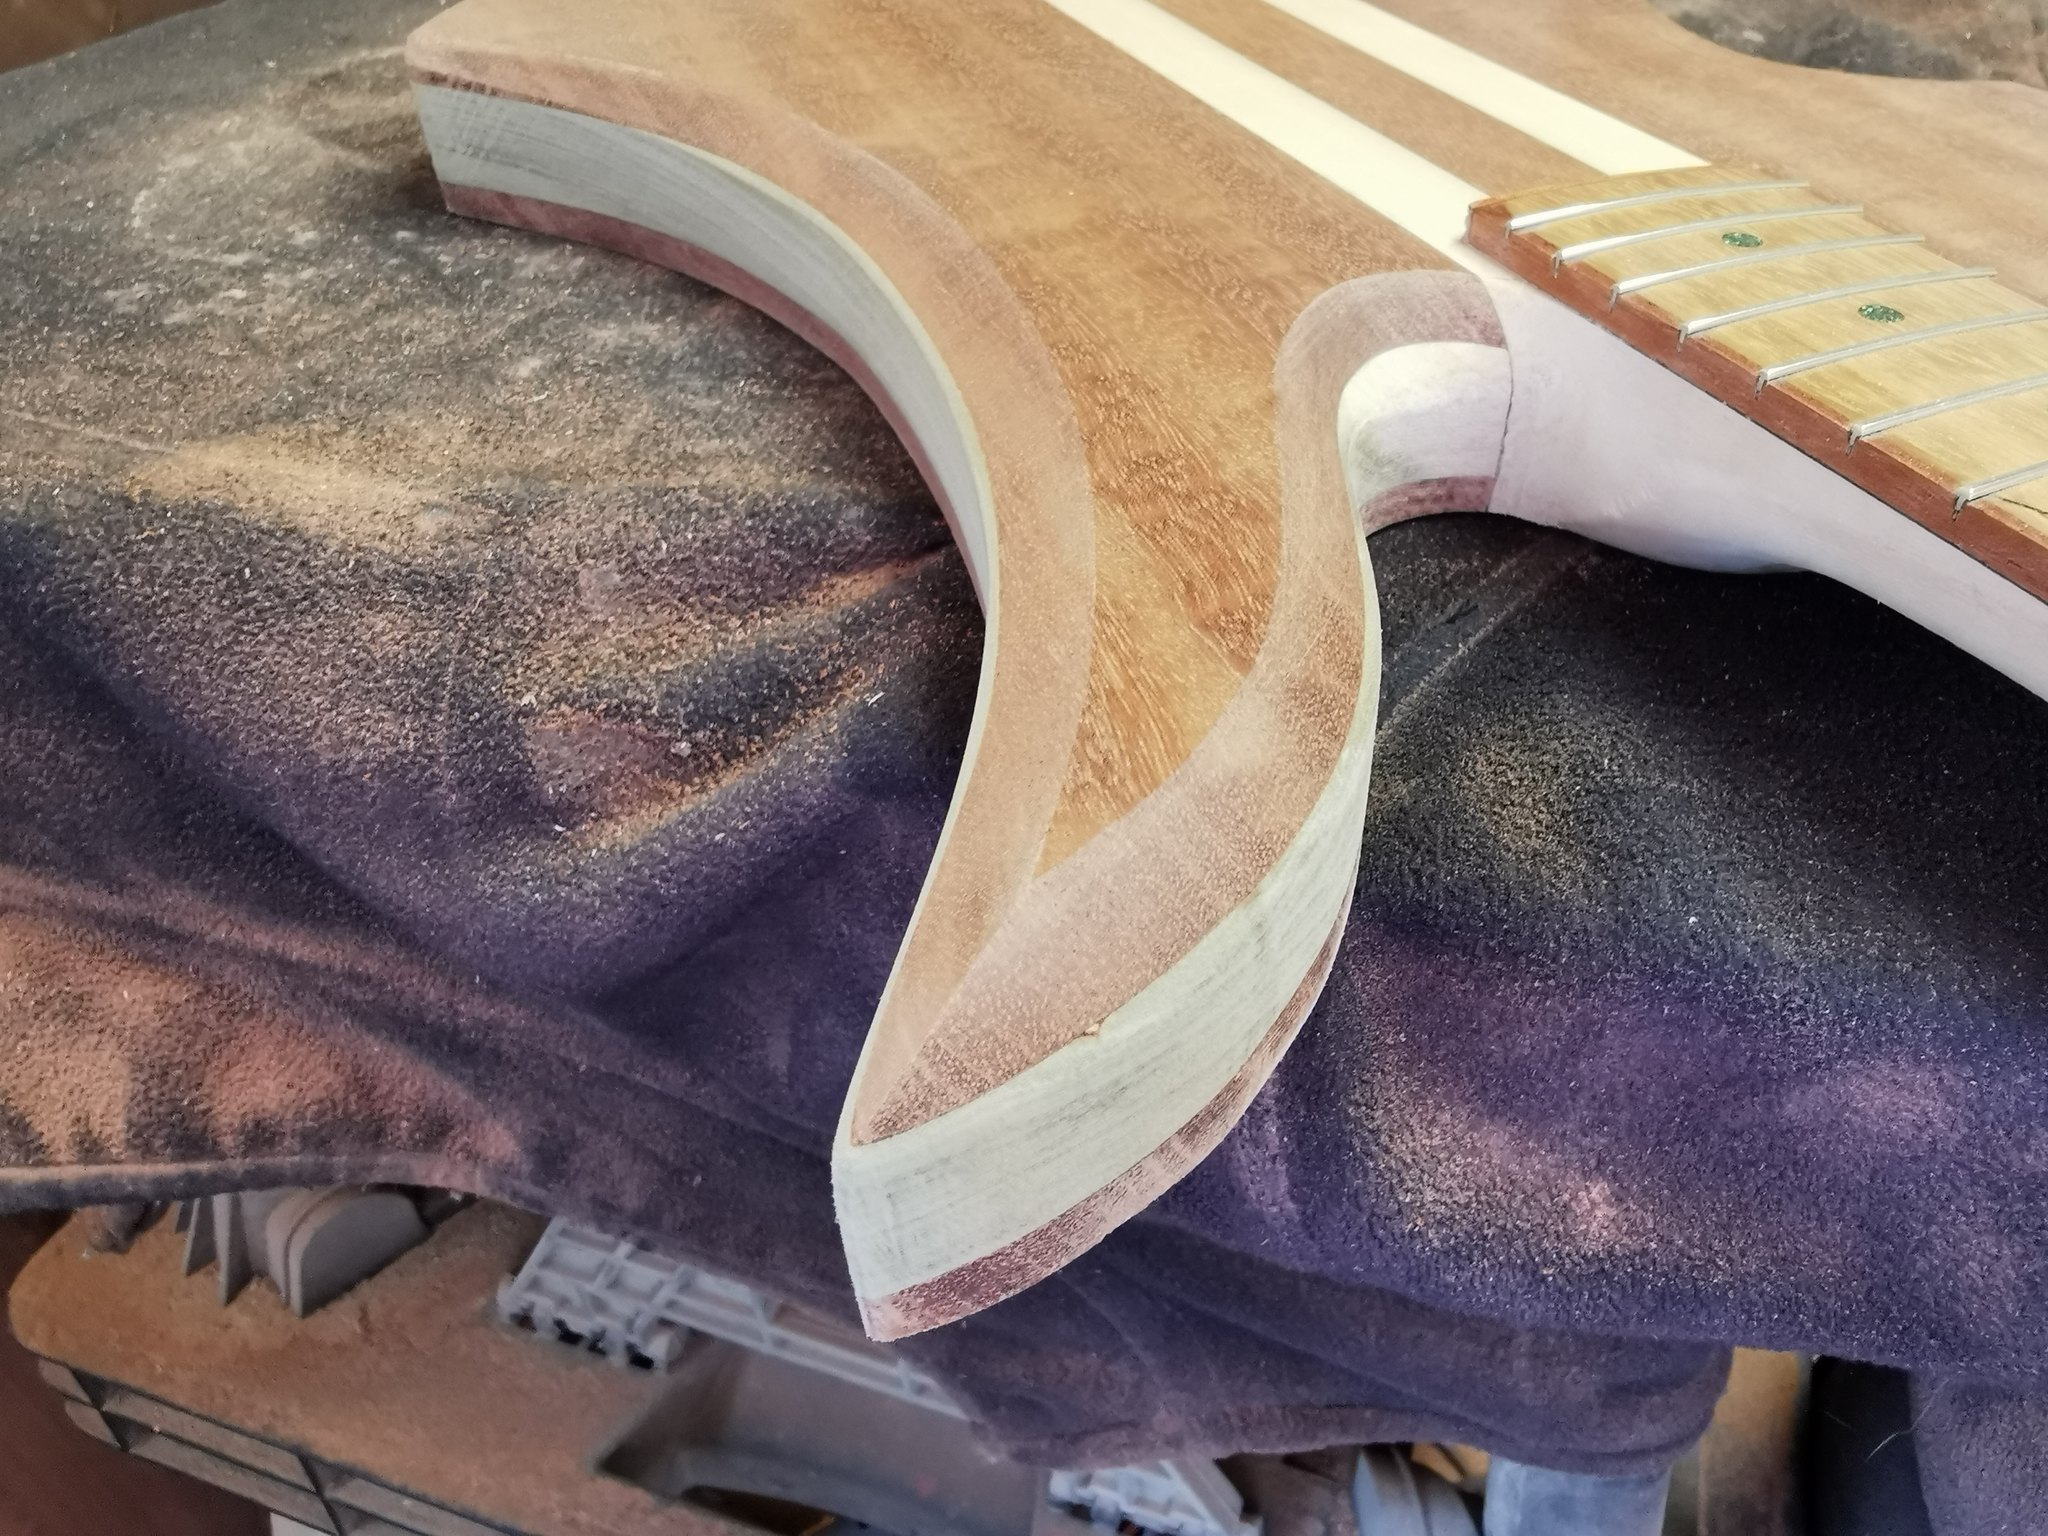
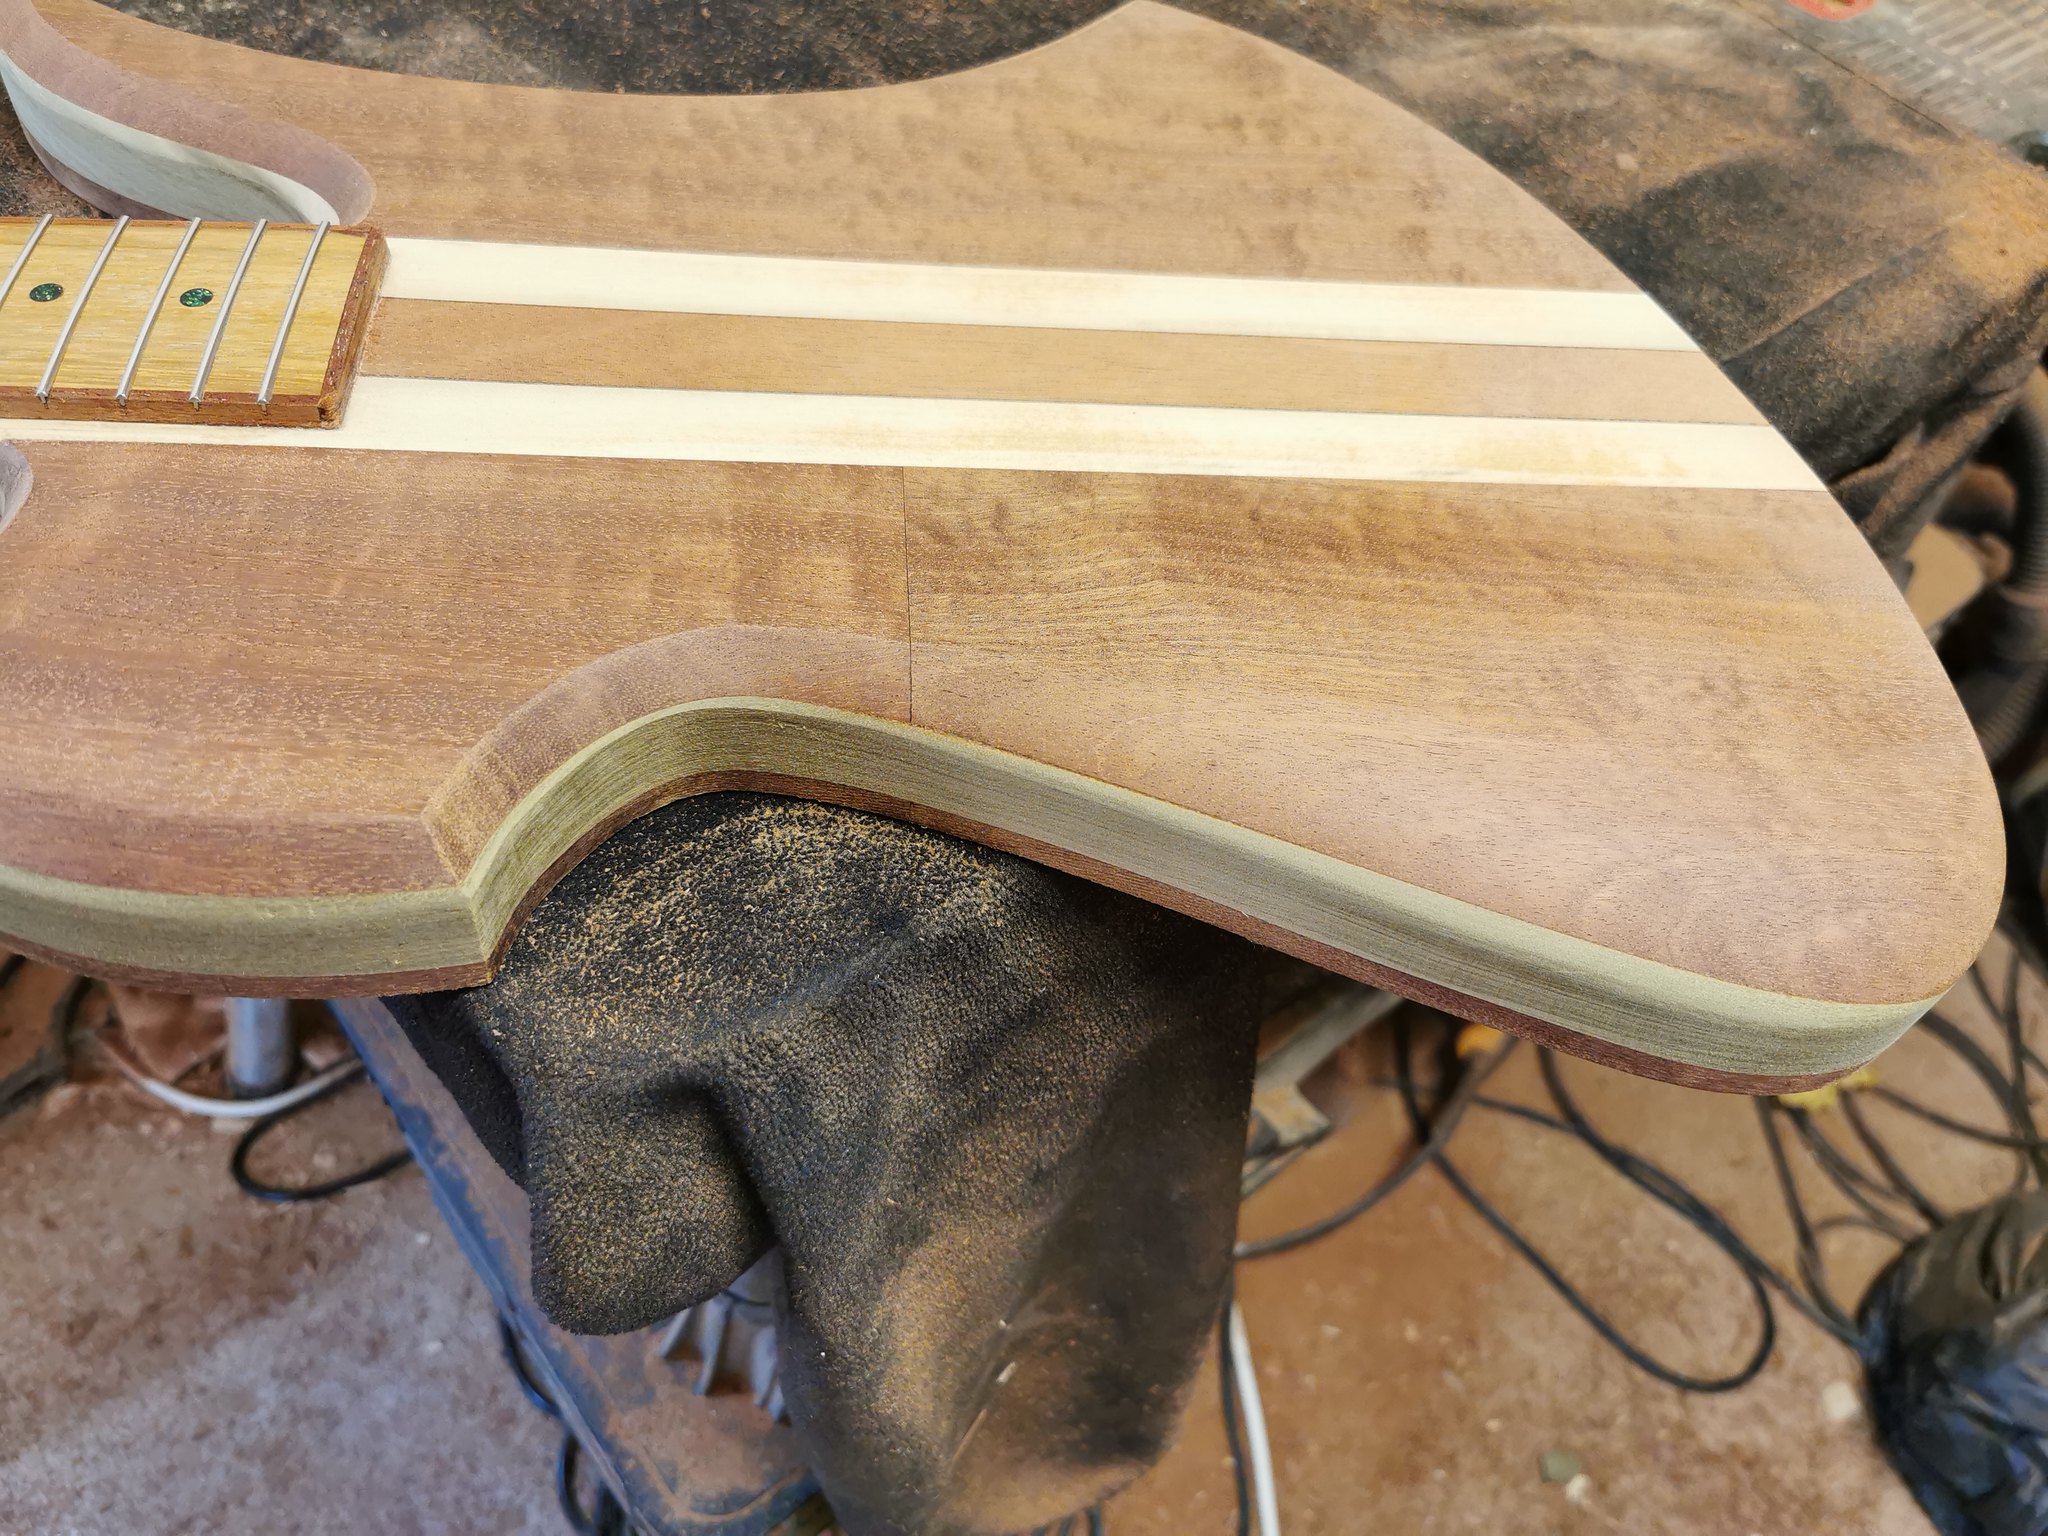
I did manage to get the neck profile sanded up through the grades and also did the transition between neck and body, then moved onto the back bevels.


All the bevels match up top and bottom, including the arm bevel as I do like a bit of symmetry.


I will concentrate on getting it all cleaned up next ready for a finish. Considering Danish oil as I have plenty in stock, need to keep costs down.

-
1
-
-
36 minutes ago, mistermikev said:
btw... sometimes I wonder if my responses sound like I'm poo pooing ideas w/o giving fair thought to them...
Not at all. I think it is the nature of the beast with all written responses, be it text, email, forums, etc. You have no idea how/what people will read into it.
I feel the same way after most things I post, especially if there are no responses within a day or so.
-
1
-
-
I can't see it being a problem, unless you are using a less dense wood than the fretboard. Also depends on whether you are putting a finish over the top.
-
Got on with the bridge pickup cavity today.


With both pickups in.
And after clean up.
Also sanded the back up through the grades, still need to do the bevels and then I can move onto the neck profile.
-
3
-
-
31 minutes ago, Bizman62 said:
Isn't that the standard classic LP wiring? For single coils 250k pots and a .047uf capacitors?
Thanks for that.

I was unsure for single coils on the caps and the tone pots, I have seen some people use 500k on the tones. I have only used humbuckers on all my builds.
-
Collected the pickups today, Wikinson WJB Jazz Bass Pickups with Alnico V Magnets.
Bridge: 7.5k
Neck: 6.8k
Thinking of going with 2 vol and 2 tone with a 3 way switch, but need to work out the wiring for it and also the pots... if anyone can assist with a diagram it would be greatly appreciated.
I rounded the edges of the frets yesterday and accidentally caught the last few frets slightly along the tops, but they will have a final clean-up and polish once I have done the finish.
After doing some jobs around the house this morning and checking in on an elderly neighbour, this afternoon I collected the pickups and then set about marking out. Have been dreading this bit!!
Drilled some pilot holes to the correct depth.
And then a 13mm bit to take it close to the lines, scored the outline with a Stanley knife, went round them with a chisel and then started chiselling out the wood.


Still needs cleaning up, but it is the correct depth and managed to hit the wiring channel sot on in the bottom right hand corner. The pickup sits nicely.

Should be plenty low enough. I may put a very small bevel around the edges of the cavity, haven't fully decided yet. Will clean up the edges first and see how it looks.
Had to down tools at this point, so will get on with the other cavity in the morning.-
1
-
-
42 minutes ago, Bizman62 said:
That's starting to look like something I'd like to own! And tell everyone I built it...
Wow, that is high praise. Thank you Bizman, very much appreciated!

-
Got some more done today.
Did some work on the heel transition, may do a bit more yet, but it is looking much better.

And the neck profile is basically done, just needs sanding up through the grades.
Then moved onto sanding the sides, top and top bevels up to 400 grit. Also increased the arm bevel a bit more into the body. Cleaned it off with white spirit so that I could see how it will look with a clear finish.


A good days work, think a clear finish is definitely the way to go.
-
3
-
-
Looking really good.
-
Moved on to the back bevels today. First roughly marked out the carve around the edges.

Then on with the carving.


Will do the heel next and blend it fully into the neck profile.
-
1
-
-
... But seriously, nice job. Shouldn't take much to get it to the correct shape from there.
-
46 minutes ago, RVA said:
Very nicely done. So you used the handheld router? And what did you do to mitigate the risks?
Had his wife do the job...
-
1
-
-
On with the carving. First roughly marked out the carves.

Then on with the Shinto rasp and files.


Rough shaping done on the top bevels, lots of sanding to be done and it should slowly reveal more of the green around the edges from above. will move onto the back next to get the bevels in and the neck transition can then be done.
-
13 hours ago, mwez219 said:
I think you are far to critical of yourself.
yes it’s there, but only with close scrutiny and a very very minor thing.
Thanks for that.

I am critical of myself, most people are and I accept that maybe I can be overly so (the wife says I am a perfectionist), but I do find it helps me to go beyond my current limits and improve my skills.

My First Bass build - Short scale (30") and a bit of experimentation with the fretboard...
in In Progress and Finished Work
Posted
It has come up very well, every third coat I gave it a few extra hours drying time then did a light sanding with 5000 grit to remove any dust nibs, then went over it with Meguiars ultimate compound and cleaned off with isopropyl alcohol before doing the next coats.
I didn't do any grain filling beforehand as I wanted the grain to show through, which has worked in the way I hoped.
Thanks Scott, glad you like it. Still some way off the quality of your builds, but I am definitely getting better.