


Muzz
-
Posts
1,435 -
Joined
-
Last visited
-
Days Won
45
Content Type
Profiles
News and Information
Tutorials
Product Reviews
Supplier Listings
Articles
Guitar Of The Month
Links and Resources
Forums
Gallery
Downloads
Posts posted by Muzz
-
-
Cool guitar, the pink pickup is great, gives it a sexy look, if I had a guitar like this I'd have to buy a pair of boots to match

-
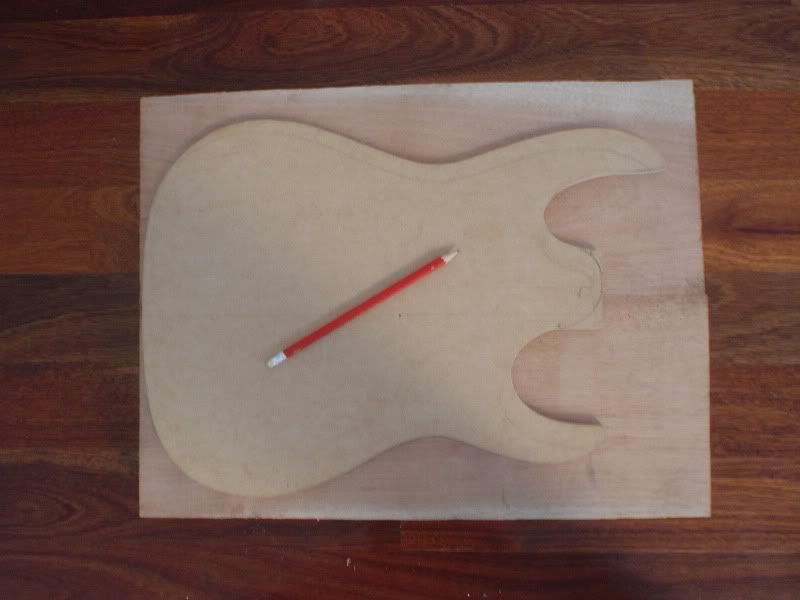
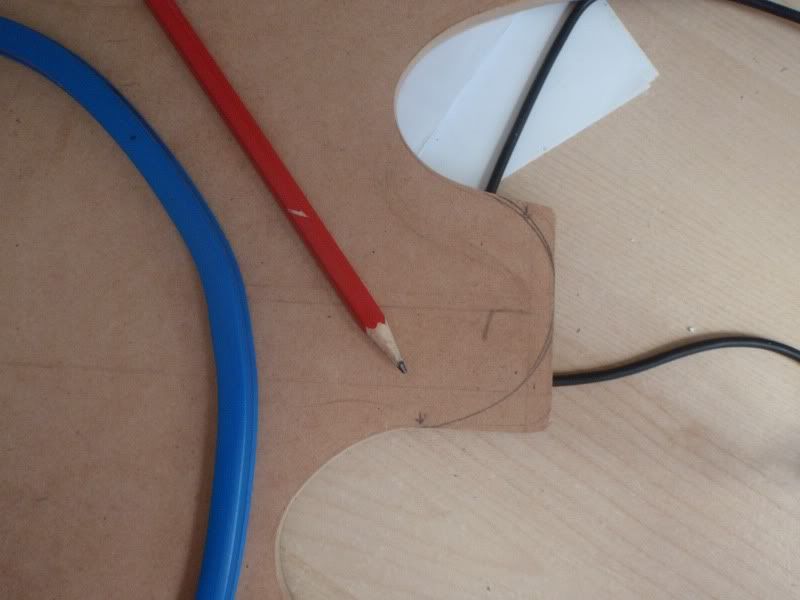
I drew this shape up, thinking about it rather than a standardish strat shape.
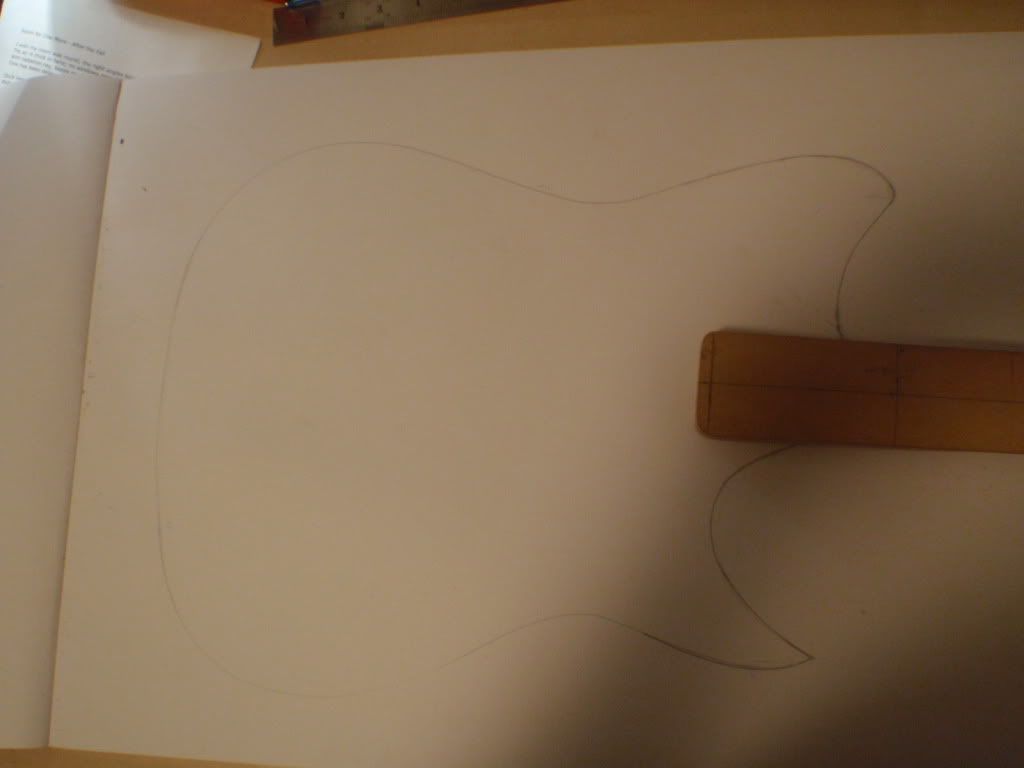
Deciding whether to go 22, 23 or 24 frets
-
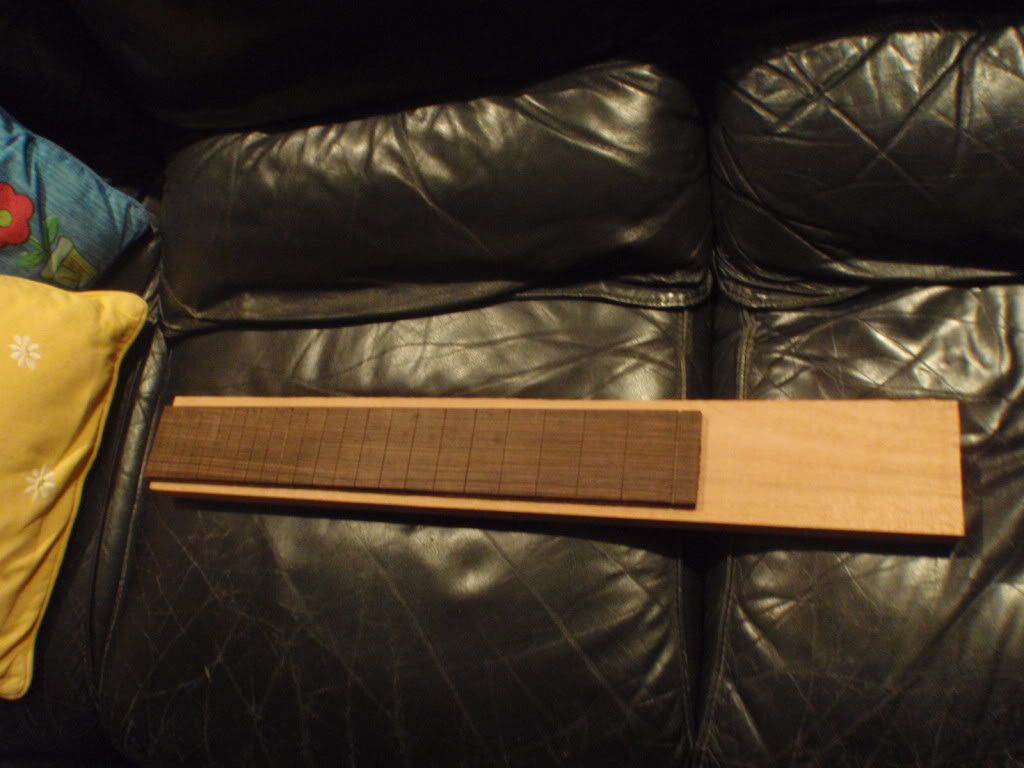
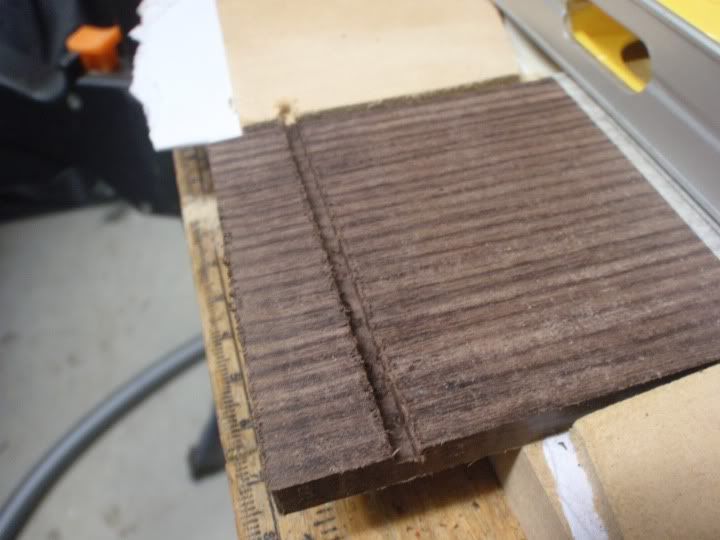
Ok that was hard and fiddly work, next time I am getting the Stu Mac slotting jig
4 frets done
all done
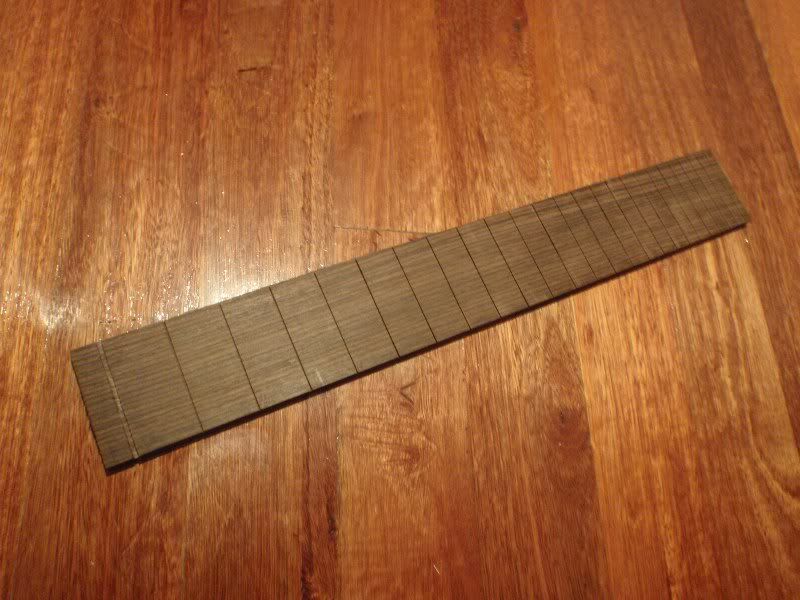
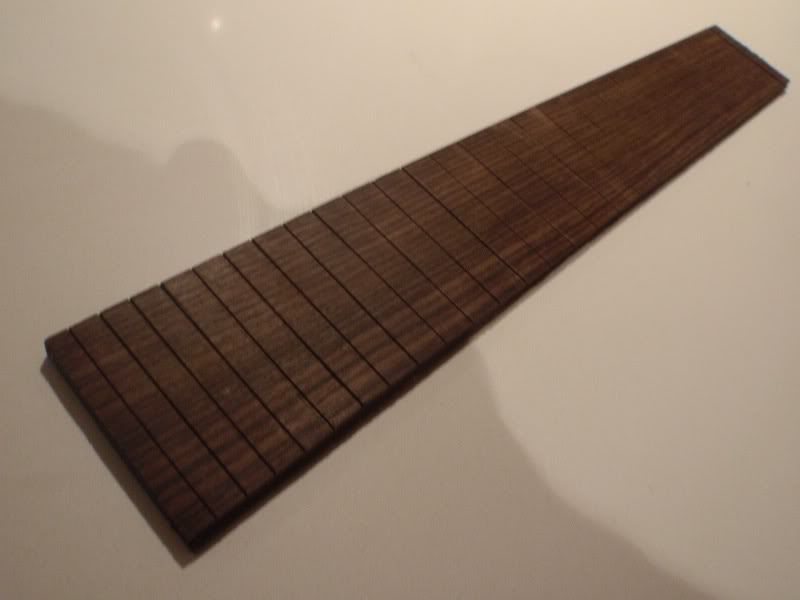
But the slots are in the right places so everything is OK
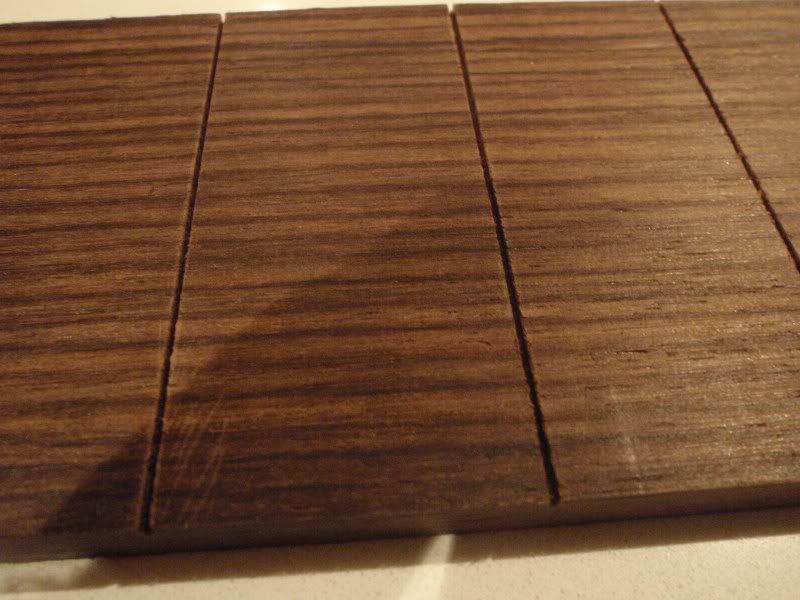
A few scratches and a bit wide on the edges of the 13th fret, but they will all sand out when the radiusing gets done
-
I do it the hard way too... gives me a certain satisfaction. I was recently carving a neck by hand with rasps & surforms & my brother was like "Whoa - you're making hard work for yourself there - why don't you use a power-file or something"
My reply? - "1. I don't have a powerfile. 2. I'm not afraid of hard work."....lol
I agree, the neck shaping is one of the processes that is good to do by hand, seeing the shape develop bit by bit is fun.
There's a certain satisfaction n doing things "the hard way". It really makes you feel like YOU did it, not just guided the tool.
That being said, there are a lot of things I'd never want to do without a power tool. EG: thickness a board, resaw, hog out a cavity (pickup, control, body chamber, etc)... None of that would give me anything but a sore back. I'd much rather put the time & effort into paying more attention to the small details or doing some ridiculous inlay work.
Can't argue here either, I can't imagine doing a pickup cavity by hand, inlaying makes a big visual impact on a guitar, I must try it sometime.
-
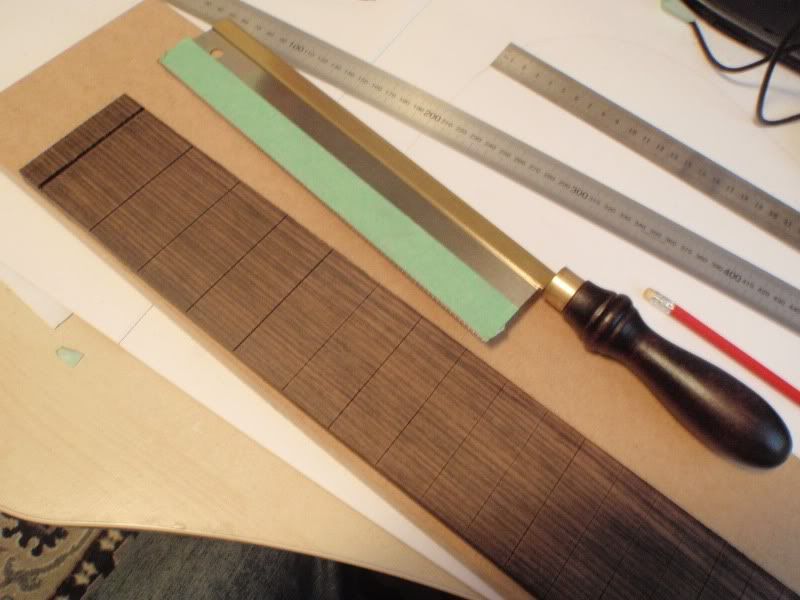
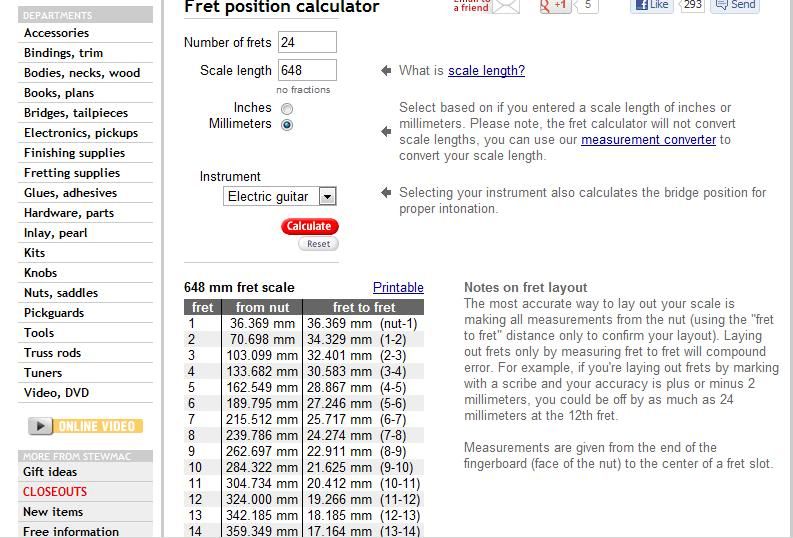
I used the Stew Mac fret position calculator for my 648 mm scale
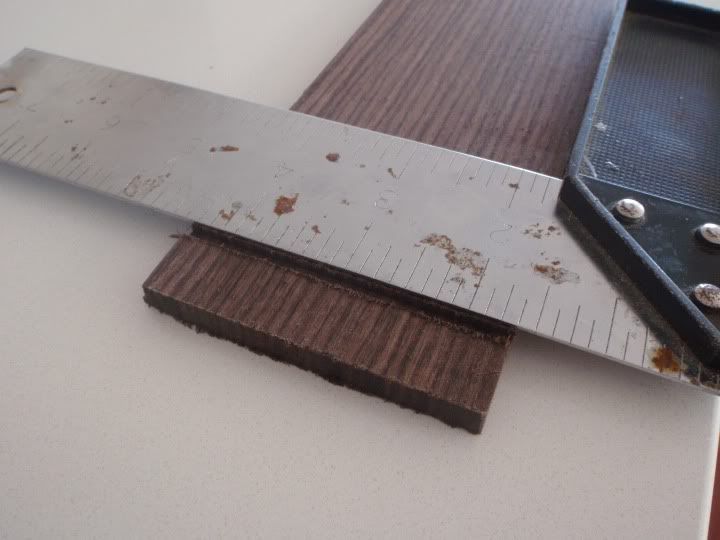
I measured my scoring knife thickness, it's 0.3 mm.
Measuring out, scoring with the knife
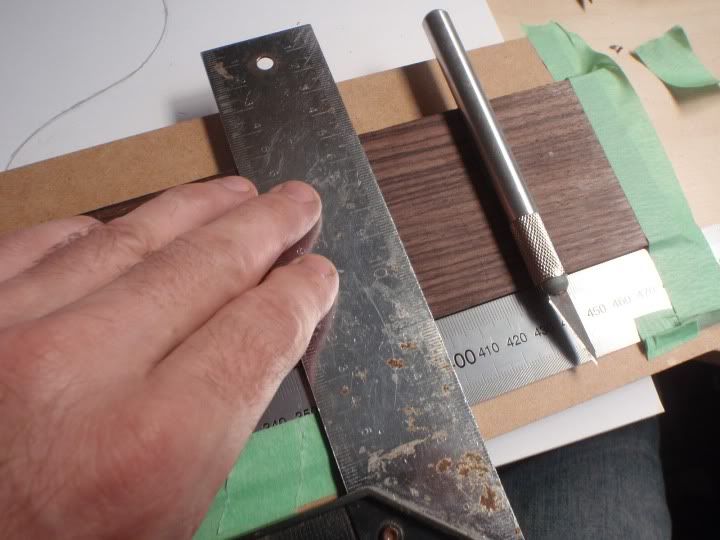
marked out
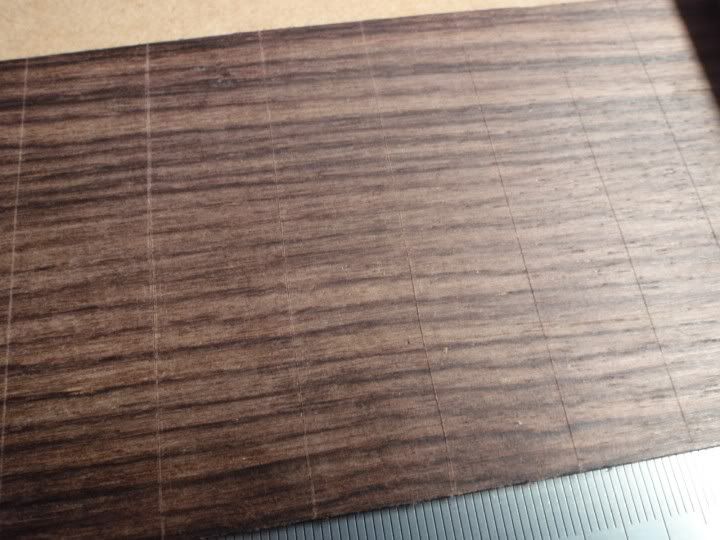
Scratches widened up with a Stanley knife. Ready for the slotting saw

-
I too love the handmade stuff. I slot my frets by hand and eye, no miter box involved.
Double n triple check ur measurements on the upper frets. intonation becomes critical when the spaces are so small.
P.s., I love how you can make a 5 page thread and still not have the body cut or the board slotted.
That
. Is it 5 pages already? That's good advice on the slotting, will do
-
Dude... that'd destroy me! If you're willing to pay for the shipping to ya, I'd gladly slot a handful of boards for you for free (labor wise) so you have a stock to work with for future builds. Just have them sent here, or I could sell you some boards out of my stash. But that hurts to watch! But it is also skillz
Chris
Wow that is so cool of you, I won't take you up on your offer this time, but I do appreciate it. For me the slow and hand made techniques are what it is all about, and so I hope it hurts to watch in a good way
A few years ago I read Jon Fisher's "How to build a Les Paul the Hard Way" http://members.fortunecity.com/jtfish/lpc/cvr/cover.htmand I thought it was fantastic, it had a great influence on me. It triggered me to take up this amazing hobby. I wonder if anyone who is thinking about making their first guitar is reading this thread?
Next step for today is scoring out the fret positions on the board, and that is going to be old school as well
-
I know, I have to use a magnifying glass.
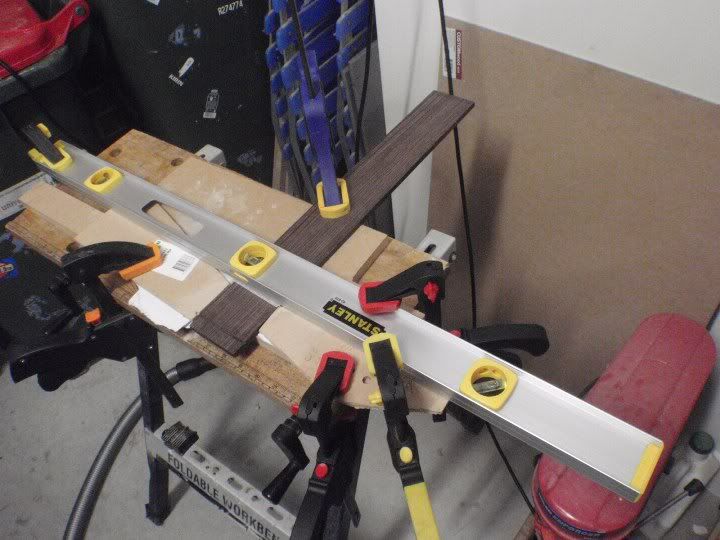
Cutting the nut slot, the nut is 16 mm back from the edge of the fretboard, the router bit is 59 mm from the edge of the router, so I set my level as a guide 75 mm back from the edge of the fretboard. Squared it up and ran the router along the level straight edge. I put scraps of MDF on either side of the fretboard and leveled them to the wood with bits of paper. This means the router dousn't wobble as it passes the edge of the wood.
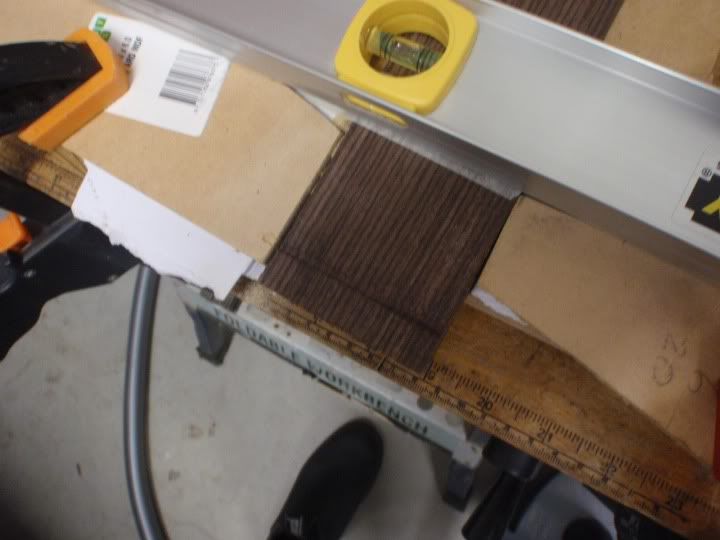
that's not bad, it will need widened up a bit to get the nut in.
Checking, it's square, yep, close enough
-
Looking great and good to see the router attached to the vacuum.
-
I don't bother to square either side of the board blank as I know I'm just cutting them off so it's just wasted effort (in the way I build)
I square off the nut end according to where I want the grain to end out and cut the frets square to that. Then when I go to cut the edges they are marked from that nur end and also a center line I draw from that point before fret slotting
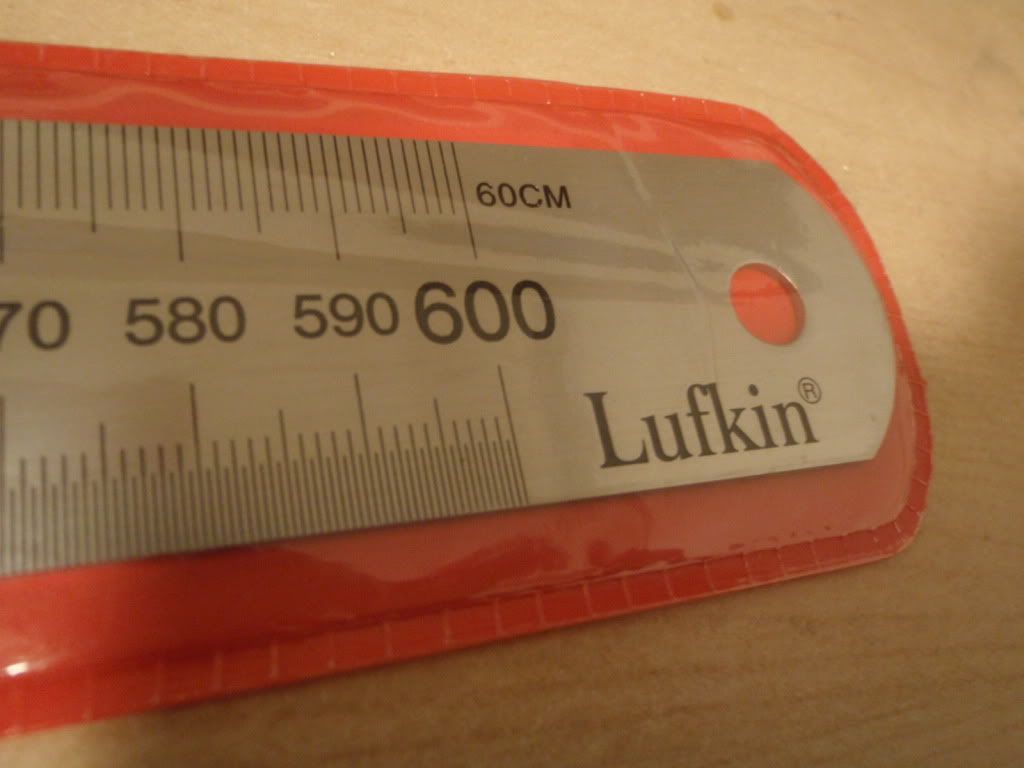
Picked up my new ruler yesterday to do the fretboard mark out on theweekend, this is new territory for me.
-
Ah... the things I would do if let loose in an Aussie timberyard...
Chris
PS: Hopin' to see Angels and Airwaves in May when they're in the area for the DC101 Chili Cookoff!
You will love the Angels and Airwaves show, the drummer even gets a go on the piano
-

Lovely grain patterns, great guitar.
This guitar will never be for sale though, it's for me.
HA HA HA ! famous last words man. Iv tried that a few times & never managed to hold on to the guitar.
Iv just about held on to a green JS I built myself last year, but a customer offered me a stupid amount of cash for it after he played it & Im looking to get a CNC so its gonna be bye bye to another of my personal builds.
Its odd. I build these things, but i dont actualy have a guitar of my own
So what do you play through that big monster Marshall that you have?
-
Great asymmetrical shape and gold finish,
I'd much rather play this guitar than a Gibson Les Paul.
-
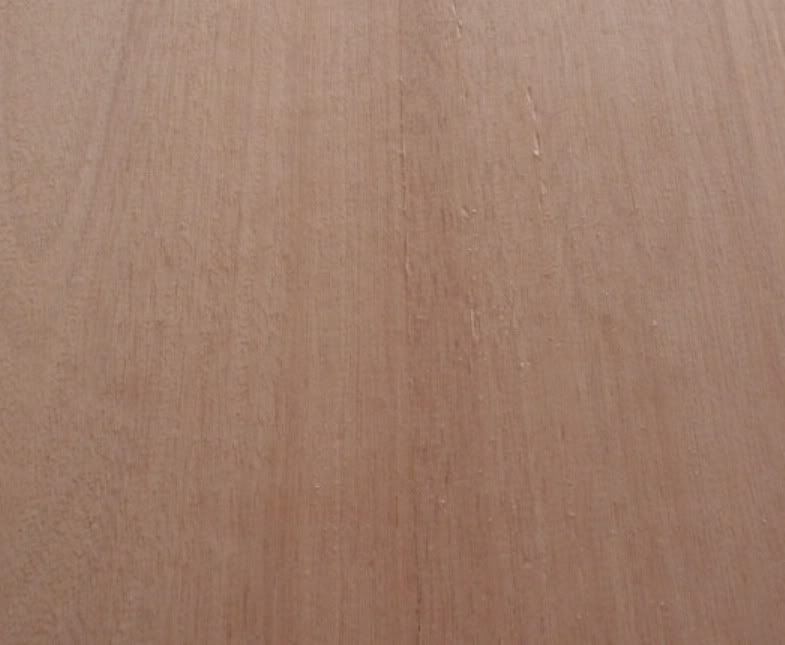
This evening I squared up two sides of the rosewood fingerboard. I like the streaky grain inn this piece. I put double sided tape on some MDF and lined up the board to overlap by the width of a steel ruler.
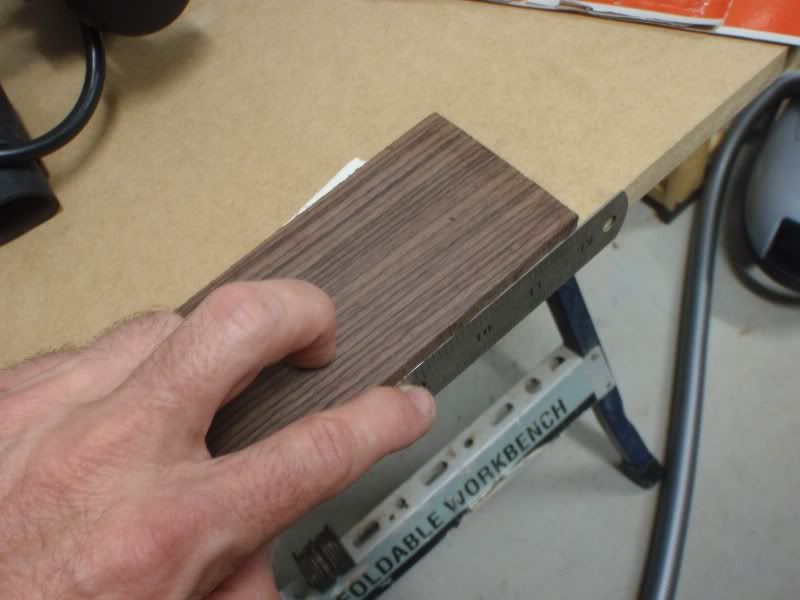
Than I ran the router with a pattern following bit with lower wheel, around the left and bottom sides as it is sitting in the photo

This got a nice straight edge, for the right angle ruler to sit up against for when I mark up the fret positions.
-
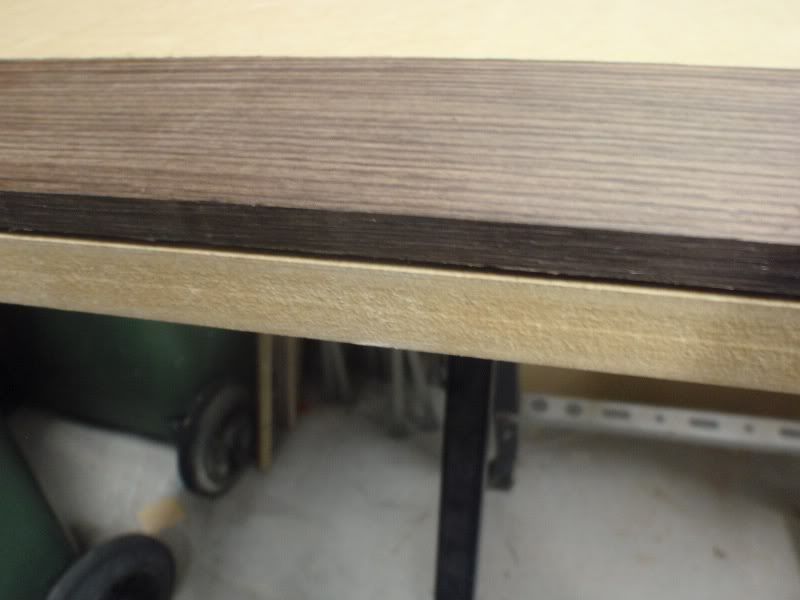
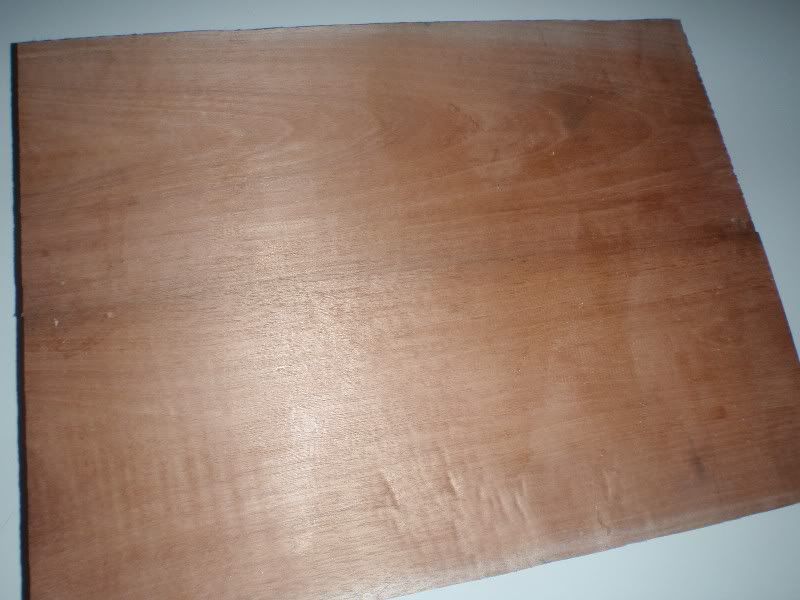
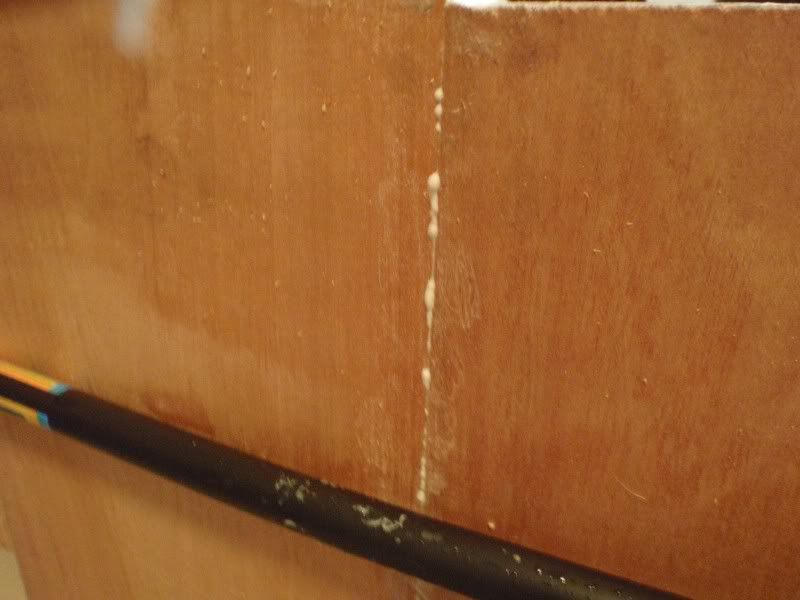
And back to guitar timber, this is the old joint
I went to mark up the finger board on the weekend, but the 60 cm ruler I had to use was slightly out by about 1/2 a mm over the 60 mm. Just can't bring myself to use it even though I know it will make practically no difference. Back to the hardware store soon to get an accurate ruler. Next step, square up the fretboard wood.
-

and from the night before


Happy Days
-
"Just got back from a fun gig with my band, quite a few drunk girls on the dance floor kissing each other. Why does that go great with rock music, I don't know, it just does"
PICS?
These just in


-
I quite enjoy jointing by hand, but I'm glad I've finally purchased a jointer. I'll still use one of my hand planes and a shooting board for the thinner stuff or figured stuff the jointer may not like (i.e. acoustic plates and potentially electric guitar tops), but I do like me some power tools from time to time...
It must be lovely to have the choice
I get serious workshop envy when I see some of the work spaces in the posts around here. Plenty of room in the blank.
-
Yep, you can fix both of those without any problem as they will be internalized. For the neck just route out straight, square of the round end with a chisel and fill with square moulding from the hardware shop. For the tenon, smooth off the wound, and glue on flexible shavings, build up the bulk then shape it. Noone will ever know
-
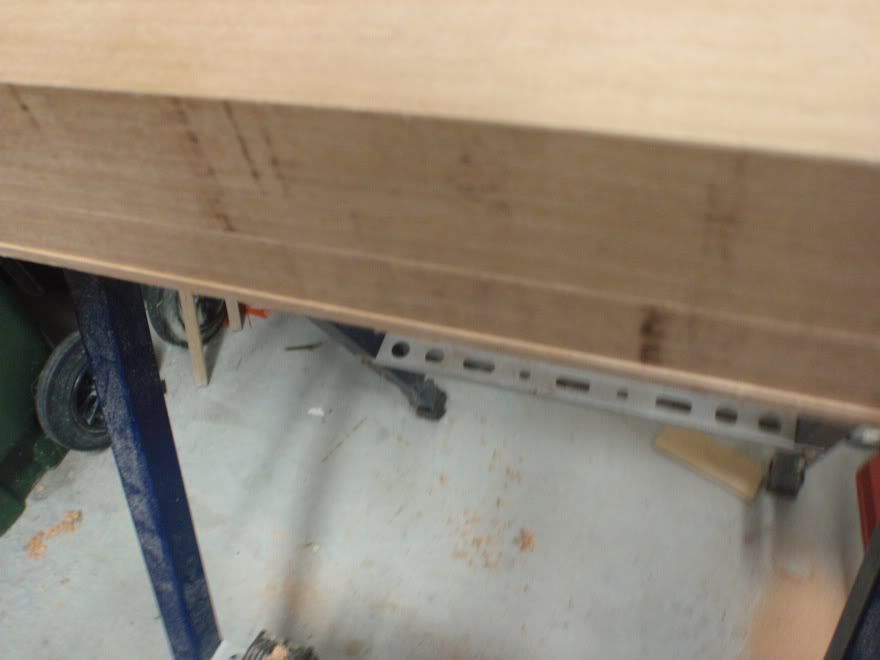
Out of the vices
Close up of the join,
So this guitar construction is all about taking different choices than the last one. Last time around Our Souls inc suggested an AANJ which I had to look up to see what it was. After thinking about it I decided that for that guitar the AANJ wasn't what I wanted because I wanted some elements of a retro look on that one. But for this guitar I am taking OSi's advice, it will be perfect.
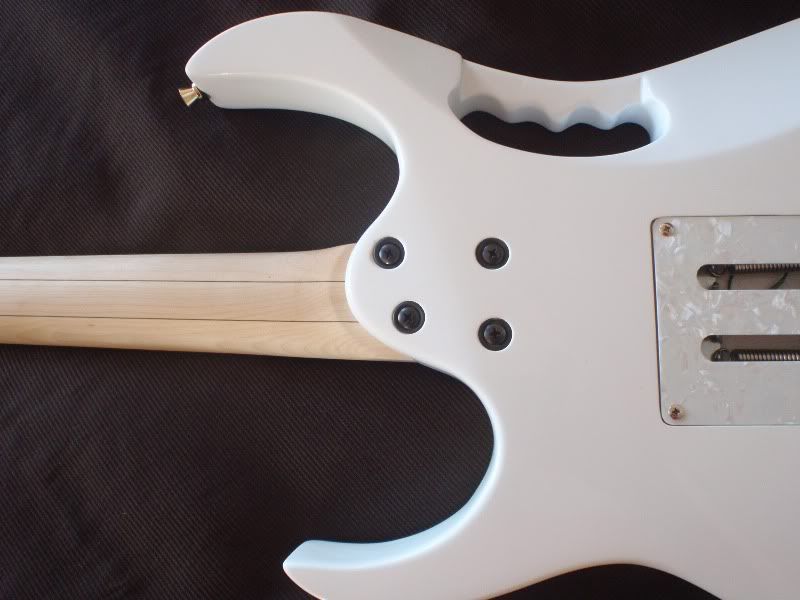
I like the AANJ on my white guitar
I drew the curves on to my template with my blue curve, anyone else use these? They are the best thing for designing guitar shapes.
-
Then I neatened up the edges with my hand plane
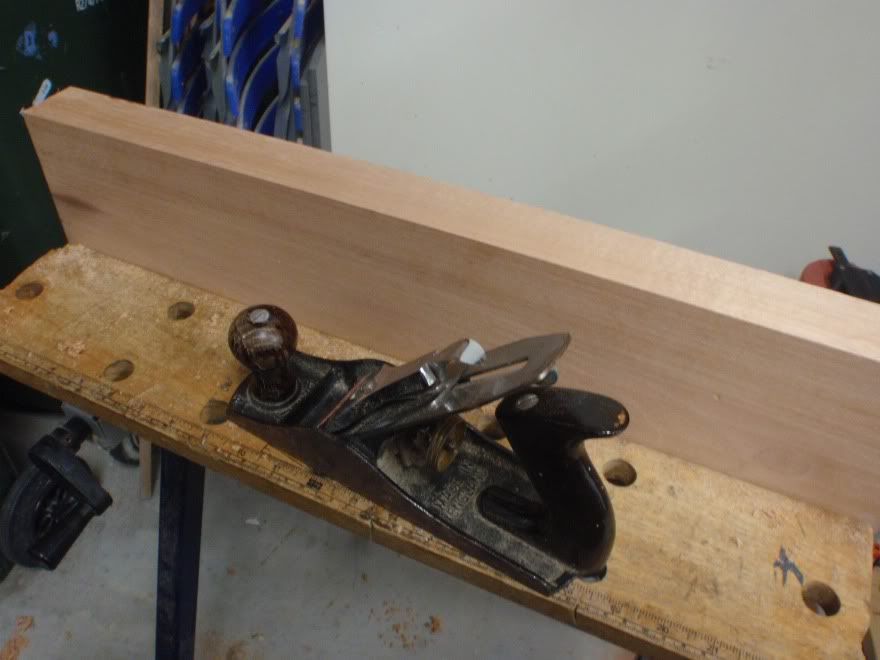
I make the blade really sharp and set it high so it is just scraping the wood. I set the edges on a shelf from Ikea to check straightness and checked that I could not get a piece of paper under the edge at any places.
Here are the edges placed together, no clamps, no glue
Then it was back in the clamps
-
Awesome guitar
-
"Just got back from a fun gig with my band, quite a few drunk girls on the dance floor kissing each other. Why does that go great with rock music, I don't know, it just does"
PICS?
Someone told me that they have photos like that on the internet, after I do this post I will investigate and report back
When I wasn't falling over yesterday morning I went into Cotton On, more shops should decorate the walls with old guitars
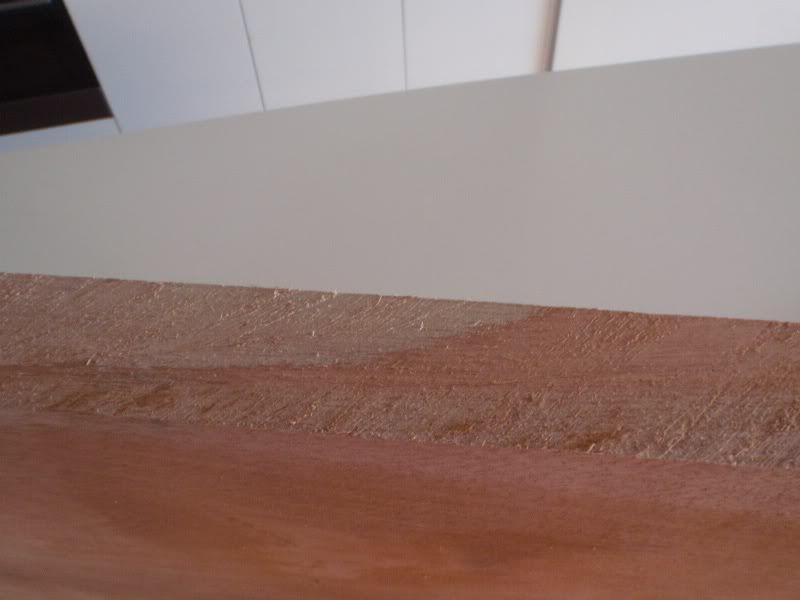
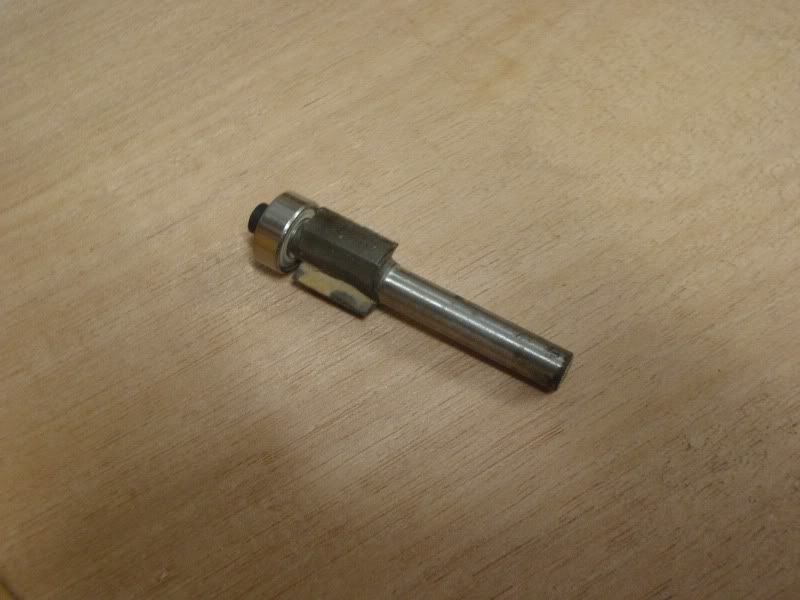
I lined up the edge of an MDF sheet along the edge of the Queensland Maple and ran along it with a pattern following bit, going nice and slow, I didn't want the slightest tear out.

Second pass, lower
Then for that last little ledge, I flipped the wood over and used a bit with the cutters over the wheel
-
Hmm..I guess it's true you learn something new every day.I never really considered hand tools as good as power tools,but after my recent huge issues with my jointer this shooting board setup looks very nice.I just researched it a bit and bought a good plane to use with one..so I guess later today I will be making a shooting board.
More and more I am appreciating hand tools, for all sorts of reasons, for one they are just so relaxing to use. I will never forget seeing a dude in hospital who dropped his power plane on his leg, he took off a huge chunk of his outer calf muscle. Good score on the hand plane. I have a nice Stanley plane that my dad gave to me.

 Is it 5 pages already? That's good advice on the slotting, will do
Searls - Experimenting With Finish Products
in In Progress and Finished Work
Posted
Putting my hand up, I learnt the hard way too