


ScottR
-
Posts
12,085 -
Joined
-
Last visited
-
Days Won
606
Content Type
Profiles
News and Information
Tutorials
Product Reviews
Supplier Listings
Articles
Guitar Of The Month
Links and Resources
Forums
Gallery
Downloads
Posts posted by ScottR
-
-
Thanks Amiee.


SR
-
Ahhhh....I'm not sure how to respond to that one gracefully.

I got the set up done. Then I was playing and noticed I had one string slot in the nut a little lower than the rest, and the action on that string was a little better than the rest. So I tweaked the rest of the slots and set it up again. So now, for it to be done "done" I need to change out that cap, install the strap buttons and truss rod cover--if I decide to put on a truss rod cover.
And take one last set of pics. This week end should see it done "done".
SR
-
Congrats on the GOTM win Brett.
Have you and HiTone worked out a schedule for sharing the trophy yet?
Seriously, both were very well done.
SR
-
Ha! The socks came from the (laundered) sock drawer, from that dark corner where you shove all the pairs that aren't fit to wear in public, but still don't have any holes in them yet. Everyone has a corner like that in their sock drawer, right?
There are plans for soundclips, Mr. Hook, aka Skullsession, has an excellent studio in which he does first rate work. I was going to ask him if he minded me posting a link to it, but I see he's added it to his signature. He has generously offered to put this in the hands of some of his hot shot players and make some professionally recorded clips. I can't wait.
GOTM? We'll see..... if I can pull off some decent shots.
SR
-
I like the big horn. I've got one with a similar sized horn and love it. It's all about balance--visual and literal.
SR
-
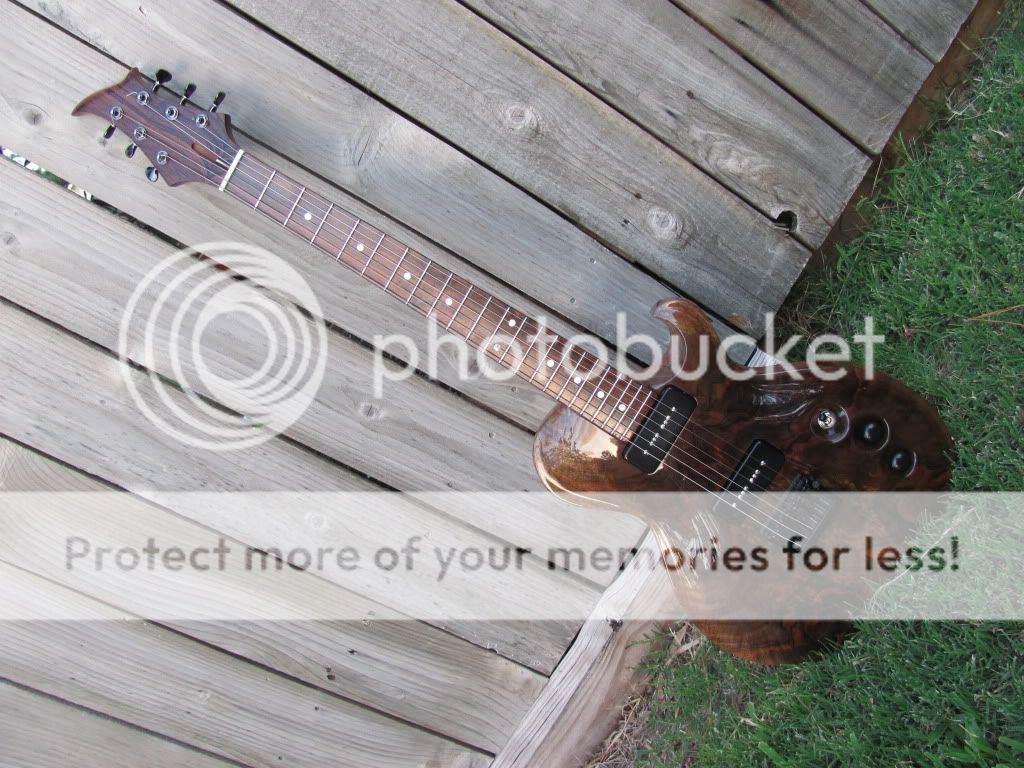
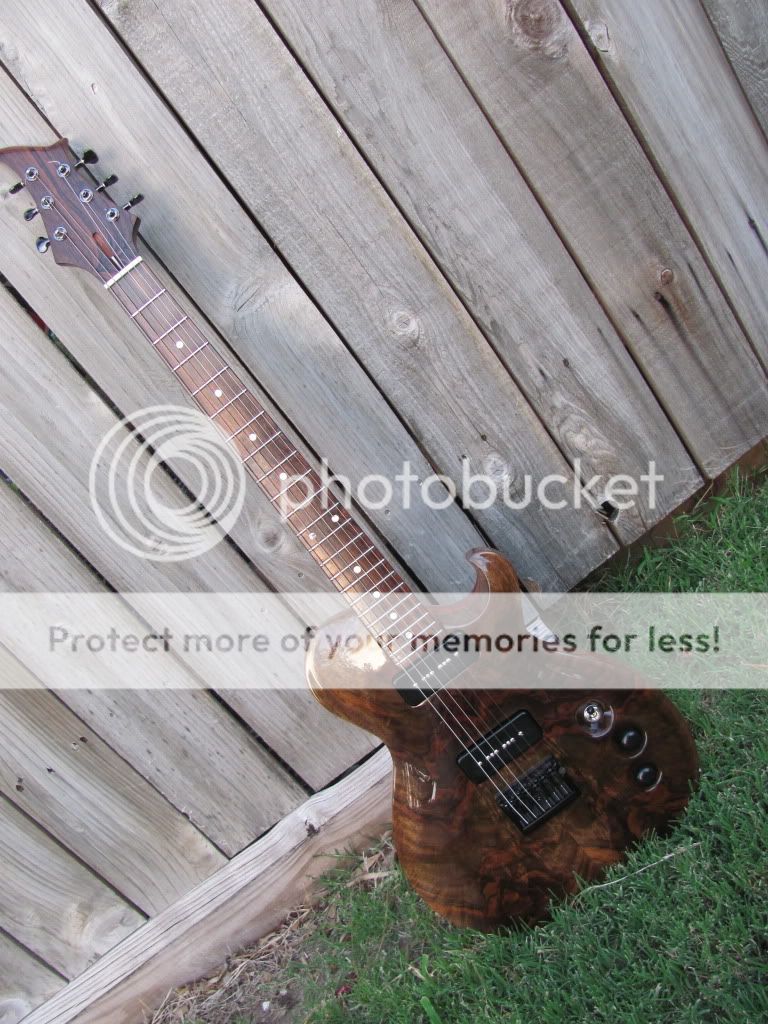
Thanks guys. I'll get some better shots up in the next few days after I finish the set up. Yesterday I was literally in the middle uf setting saddle heights, when I noticed the light was going....away. I grabbed it and the camara and ran to the only spot in the back yard that had enough light to get a couple of shots. I hadn't noticed till just now, but I think you can see the sunset in the reflections in the clear.
SR
-
I want to convert one of my builds from a bolt on to a set neck - kinda.
The idea would be to take the neck out, clean the pocket route, glue the neck in and use hardwood dowels instead of screws. I think I'd prefer that look.
What do you think? Should the dowels be strong enough?
It's just my opinion, but since you are glueing the pocket as well, I'd say it should be plenty strong
SR
-
On one hand the fade makes this look like it got burnt around the edges; on the other hand, the finish looks deep enough to wade in. This is going to be awesome Paulie.
What did you do the logo inlay in? It looks sparkly.
SR
-
Scott...I was wondering in the earlier pictures, but thought it might be angle. Is that headstock a little wider than the ones you've done in the past?
I have your caps?? Uh oh....I sort of remember you giving me a bag of those back when you built mine. I'll look for those tonight.
COOL! Get that sucker setup! We'll rock it this next weekend if you got time.
It's a little wider in the area of the top two tuners. They were crowding that little carved rib in the past, so I gave them a little more room. I also used mini tuners to create a little more space, which creates the illusion of it being wider than it is. I think I like the looks of the mid sized ones better though, to tell the truth.
Sr
-
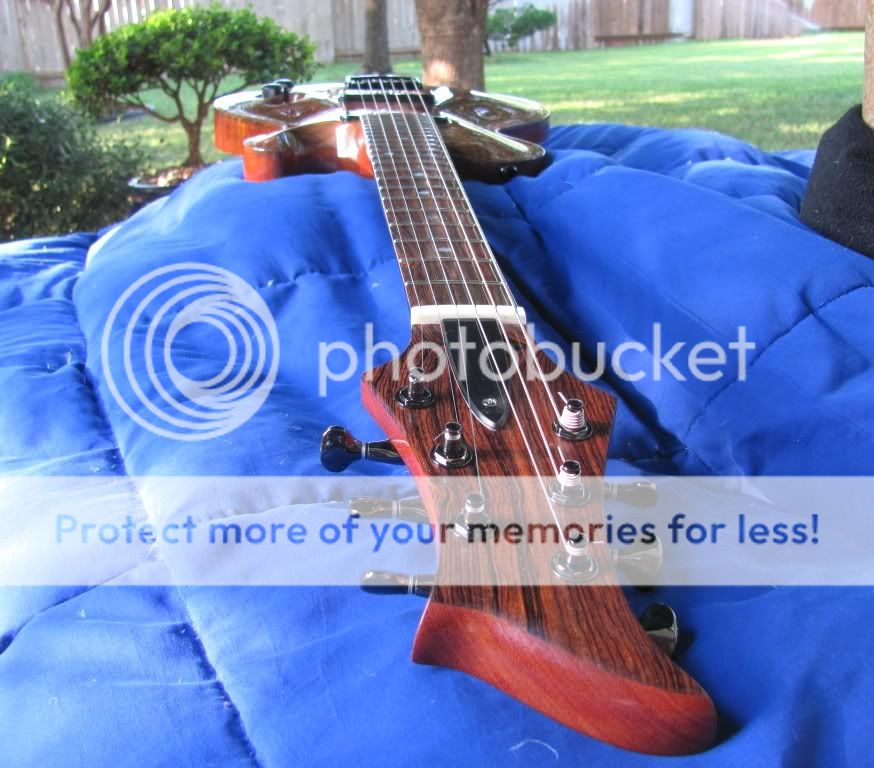
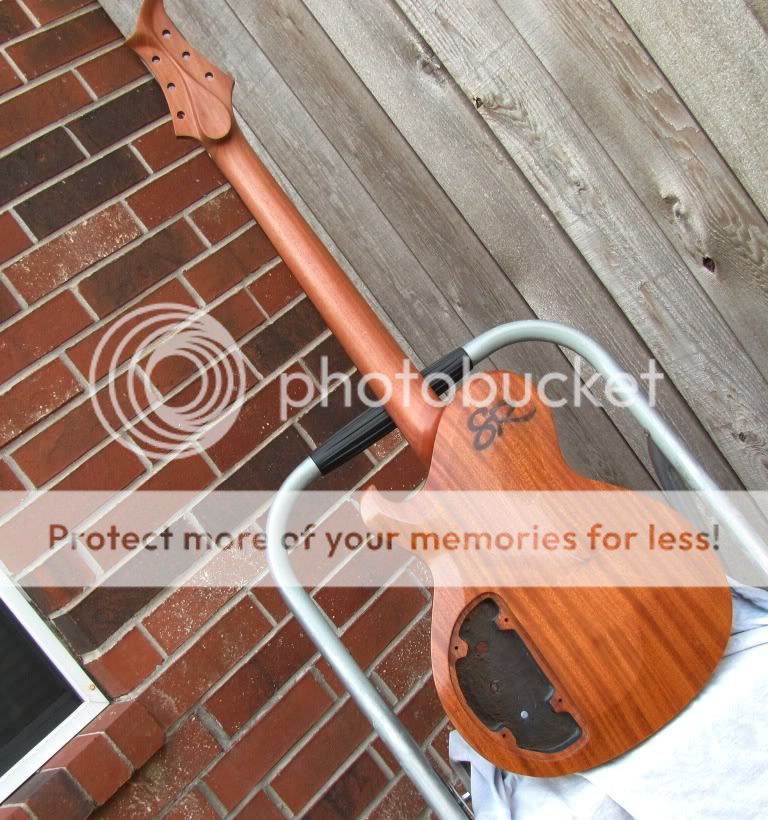
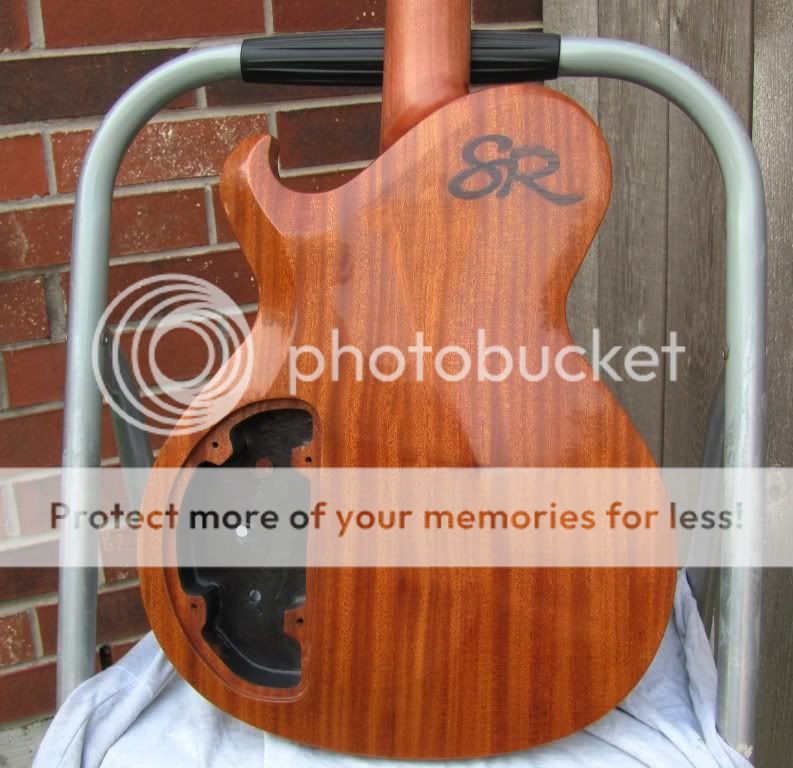
Well......I got it put together. But I didn't finish getting it set up. That's what's tomorrow's for, right? The wiring works... and the pups sound great so far. I
need a different cap for the tone pot. I think I gave my supply to Hook....
RAD sends plenty of wire with his pick-ups.

Here's what we've got so far....more to come.

SR
-
I had a thought yesterday as I was working through the final micromesh grades. Buffing--hand rubbing as it were, is a lot of work. I happen to own one of those little Black and Decker mouse things, which is a small random orbital sander shaped like a tiny clothes iron. It has the hook part of velcro on its base and the various grits of sandpaper have the loop for easy changing. I wondered how it would work for buffing if it had a thick foam pad.
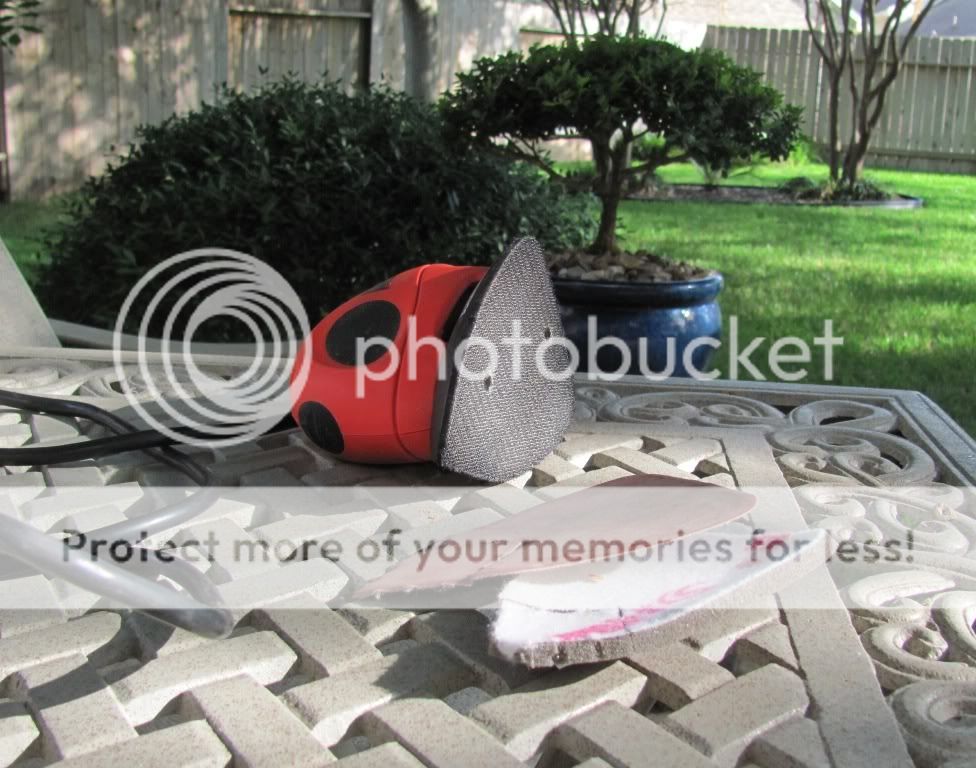
I sacrificed a koozy.(?) I can't say I've ever written that word; I wonder if it's spelled right.
Anyway I traced a sandpaper pad and cut out a little larger shape from the foam.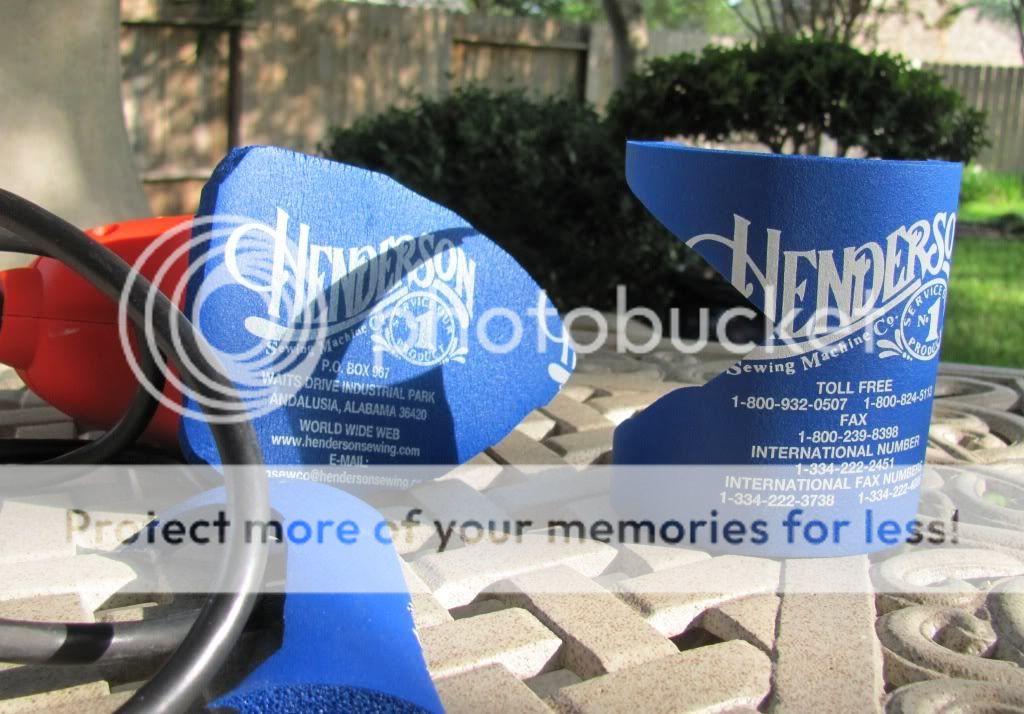
Then I grabbed some old shortie socks to use as the cloth surface. The fit was tight enough to keep the sock on nicely. You just have to hold the excess space for toes up and buff away.

It worked like a champ. The foam pad was thick enough and dense enough to conform to the curves of my carve and yet provide a firm surface to polish with. It's sort of a poor man's buffer.
Enough for now. I'm off to put this baby together.
SR
-
As for this thread. I have purchased some System 3 Epoxy to harden the burl and fill the grain with. I also bought a digital scale to mix it with. I can not believe I am starting to become an epoxy guy. And it is your fault Scott!
Let us know how it compares to T-88. Are you still considering West System?
SR
-
Sure enough, it's right there. I didn't go back far enough. How do you like it so far?
SR
-
Thanks for that input gentlemen. My method so far is basically Paulie's- that is to start a little high by leaving a little bit bigger gap at that first fret per Melvyn, and then dialing it in with the strings in place. Rad mentioned filling slots if they are cut too deep or replacing the nut. I'm guessing shimming one would work as well - assuming it was done properly - solid fit and good craftsmanship?
SR
-
Thanks Paulie, I can't wait to get it finished up either.
In fact as I'm impatiently waiting for the weekend to arrive so I can finish the polishing and get this set up a question about nut slot depth/height comes to mind. The common wisdom as stated by Melvyn says when pressing a string at the third fret, it should barely clear the second fret if the slot depth is correct. And then we have zero frets, which I understand are the same height as all the other frets. If a zero fret works equally well (or better depending on your point of view)as a nut for setting string height at the headstock end of the neck, then logically the nut slot depth could be anywhere between the string clearance height as stated by Melvyn, down to flush with the frets.
Surely, this affects the height of the saddles at the bridge. I would think the saddles would need to be slightly higher with a zero fret set up or at least require a bit more neck relief to avoid buzz. And the strings would be closer to parallel to the fretboard using a nut over a zero fret? What am I missing here? I have no experience with zero frets.
SR
-
I like the use of the self centering bit. Excellent idea.
I'm guessing these first weeks at the new job are keeping you hopping. Enjoy.
SR
-
Dear sir. What might be that 7-string headstock to the far left in the picture with a bunch of necks. Bah dap ba ba ba... I'm lovin' it.
Chris
You my friend need to follow my blog better... I don't post everything here. And you missed a string.
At the risk of repeating Chris' question--since I didn't find the answer in your blog; what did you do/use for the top plate on the headstock of that 8 string neck in the picture that he was referring to?
SR
-
Oh well, it sounds like he's a good customer. He'll keep coming back too, if that's the way he treats his instruments.
SR
-
The guy wants one of the jap rising suns I do.
Speaking of those......whatever happened to that LP build with the rising suns you had going on here a year or so ago? I don't remember exactly, but it seems like it had some kind of issue you had to work out....and then it never came back
You had to know I was going to bring that up.
SR

-
The grain on the new back is very nice. What did you do to the old back prior to putting this on--plane it off?
Do they come back for mods very often? That must feel kind of odd- to cut into one that's already gone to a new home.
SR
-
I like the telesque best, but agree with Chad that it favors a Les Paul more than a tele. Frankly it makes me think of your Marlin...which was way better than a tele or an lp.
SR
-
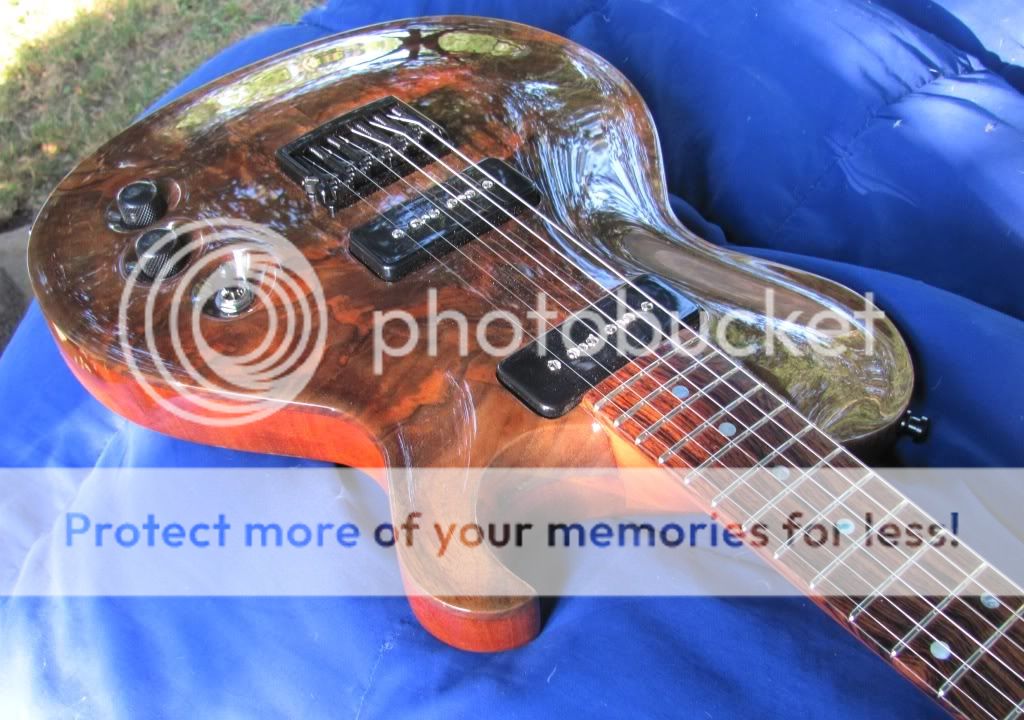
Drak says he only does two grades of micromesh a day at the most (I think I remembered that correctly) when leveling and polishing his finish. I did not have that intention....but that's pretty much how much I could get done. These shots are polished up to the 3600 mesh--front and back anyway. The neck and sides are at 3200. I must say this is the highest gloss level I've ever had at 3600. I suppose that means I'm finally doing it right.
It probably doesn't hurt that my wiping cloth is cut from the back of a 25 year old denim work shirt and has been sprinkled with aluminum oxide powder (used to load strops for knife and tool sharpening). Only 4000, 6000, 8000, and 12000 to go.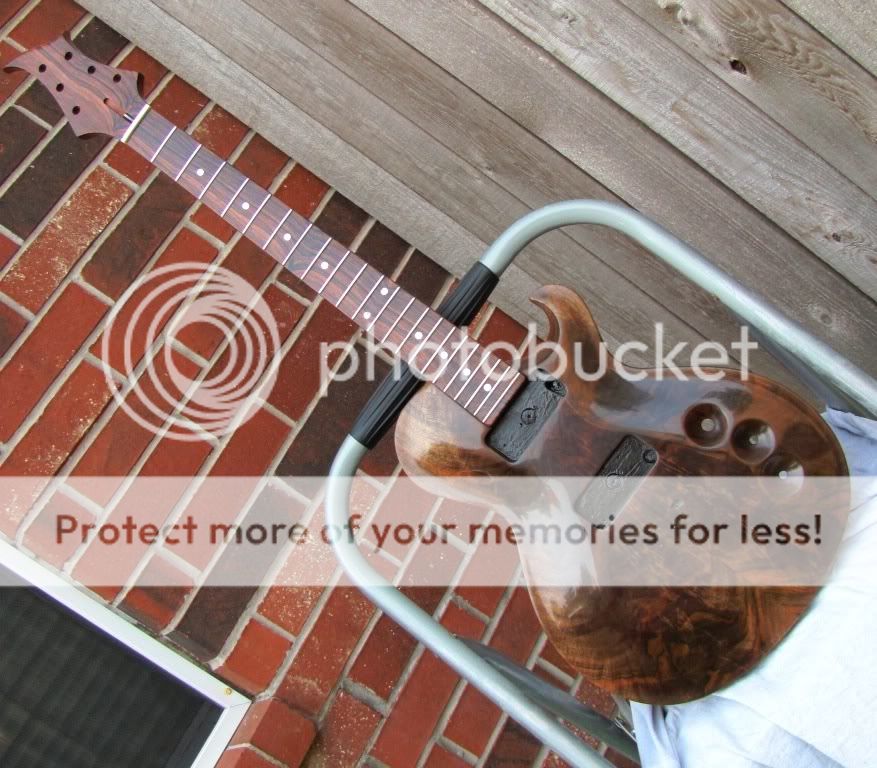
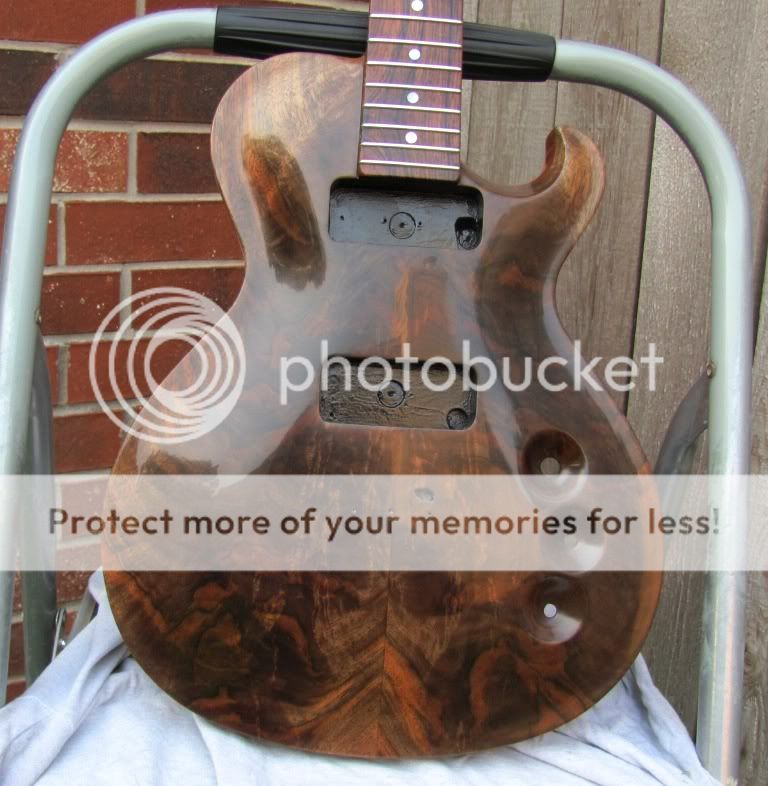
It's kind of looking like another brown guitar huh?
I think it is safe to say that by this time next week--Memorial Day at the latest, this baby will be playin'.
SR
-
If you were to decide to bind that you could let the binding just barely cover the top to body join and get almost the full thickness of the top to carve. I had the exact same thing happen with a burl myrtle top and still got a pretty dramatic carve by doing this.
Hopefully I'll be done leveling this by the end of the week, and my wife won't be too pissed at the amount of time I'm spending hunched over a tile scraping a loud piece of wood back and forth during commercials.You've got to get a place with a garage and start building your man cave. (You could also toss Amiee's cats in there if that ever happens again).
SR
-
That looks like black walnut to me.
SR


#3 Is A Single Cut
in In Progress and Finished Work
Posted
SR