


ScottR
-
Posts
12,086 -
Joined
-
Last visited
-
Days Won
608
Content Type
Profiles
News and Information
Tutorials
Product Reviews
Supplier Listings
Articles
Guitar Of The Month
Links and Resources
Forums
Gallery
Downloads
Posts posted by ScottR
-
-
Both versions are nice. Why did you change it?
SR
-
Good to see you getting back in to it Chris. When you think you are getting close to flat with your granite tile, take a soft pencil and lightly scribble all over the surface that you are leveling. When the last of the graphite disappears you should be good to go. I have also picked up a 24" aluminum carpenter's level and glued sandpaper to the flat edge of that. You can drag it all the way across the face of your piece and inspect the scratches. If you have the same coverage of single direction scratches across the face of your piece you're good to go.
SR
-
I was just thinking about this build a week or so ago and wondered what happened to it. I must say...
WOW! I did not see that coming. Awesome finish! I especially like the headstock treatment. The masked areas creating the plasma rays or whatever you are calling them turned out very well. I can't say I like the way it looks better than the double fade you did on the headstock, but I love the way it was executed. I did not foresee a black back either. It really makes the inlays pop. In fact I did not expect any of the black in this but I'm sure glad it's there! Tremendous look. Were the back inlays tough, or maybe I should ask was it tough painting around them and cleaning the edges and whatever it took to make them come out this nice?
Is that a P-rail in the bridge? How's it sound?
SR
-
I don't remember where I saw it, but I remember seeing a lapsteel bridge made from aluminum round bar as well.
Check out Quarter's builds. Not anly are they awesome and worth seeing for that reason alone; he makes all his bridges that I can remember, typically from a round bar or rod, sometimes a piece of angle. You could just make a nut for that end as well for that matter.
SR
-
Hey Scott,
Love the build. That top is gorgeous!
I had a quick suggestion for applying CA. When I used to build RC planes I would saturate different parts of the wing with CA and I would wrap a cheap plastic sandwich bag (not a ziplock...the really cheap ones that fold over and tuck in) around my finger and use that to spread the glue. The CA doesn't stick to the plastic that those bags are made out of. You could put your cloth pad in one of those bags and try that to spread the CA. It might work better.
That's a thought worth trying, I wonder if saran wrap would work the same way. The thing about the cloth pad is it soaks up excess and you don't chase runs like you do with cards. And the ridges are not as high. Leveling out those CA ridges was not all that different than leveling the lacquer orange peel I'm leveling now. There is no doubt the stuff polishes like glass. And I repaired a couple of dimples pretty much the same way as you would with nitro...with the same results and no witness lines. At this stage it feels harder than nitro, but my nitro will get harder as time goes by. So....it makes a great looking coating, but the application methods available pretty much suck especially when compared to spraying. On the other hand drying and cureing is about as fast as it gets.
SR
-
If I can stand it.
SR
Haha i know that feeling all to well!...hurry up and finish it allready, 3 weeks is enough! My semi Tele has been hanging in the shed waiting for buffing for a while now, been way too busy to even look at it. The motivation is almost non existent cause i can't spend money on parts until november when we get back from Europe!

That little guitar is shining like glass Scott...looks sick!
Chad.
Hey Chad.
I remember reading in your thread that we wouldn't see those teles again till they were done. The other day I was peeking at who was looking at what and noticed you were in your teles thread. I thought woohoo! here we go.
Not yet though, huh? Well that trip to Europe will surely help keep your mind off of them. It must be getting close. Waiting for that must be hard to stand too.
Have fun--take pics.
Scott
-
No not realy. I just adjust the angle & slightly shorten my headstock to suit the billet on this one. Even the inline 6 version of this model is that thick. the headstock fitting is just a flook.
The Les paul & Prs type guitars I carve this way need a 4.5 inch board, to accomodate the neck to body angle. But it is justafiable there. but here all it takes is a degree off the tilt of the head & 4mm off the overall lenght of the front face of the headstock.
Walnut is nice to work with. But you get some very fine sanding dust that can be realy nasty in your lungs so get a face mask. its easy to work if you keep things sharp, but it can sometimes blunt your blades very quickly so just keep an eye on your planes & you should be fine. what species have you got ?
Speaking of thick boards. HEY SCOTT !! I found 6 more of these size walnut boards, all flat cut with serious grain even before they are planed, 3x14 inch - 15 foot long. & 3 boards 3.25x16 inch 25 foot long of white limba. does my timber guy look out for me or what
this crappy week had to turn around sometime !!!!
Dude, I'd say your timber guy takes extra special care of you. Be sure to slip him a quart of whiskey.
Folks, you need to pay close attention to what Paul is doing here. There is some serious planning involved in this. Getting all the planes and surfaces where they belong while remembering that wood moves and having a plan to accommodate that is no small feat. That's a lot of timber wasted if it moves and you didn't allow for it. This is a get it right the first time build.
Keep 'em coming Paulie, this is fascinating. And it's gonna be sweeet!
SR
-
That was a serious pile of wood shavings you made there..Signs of good progress.
SR
-
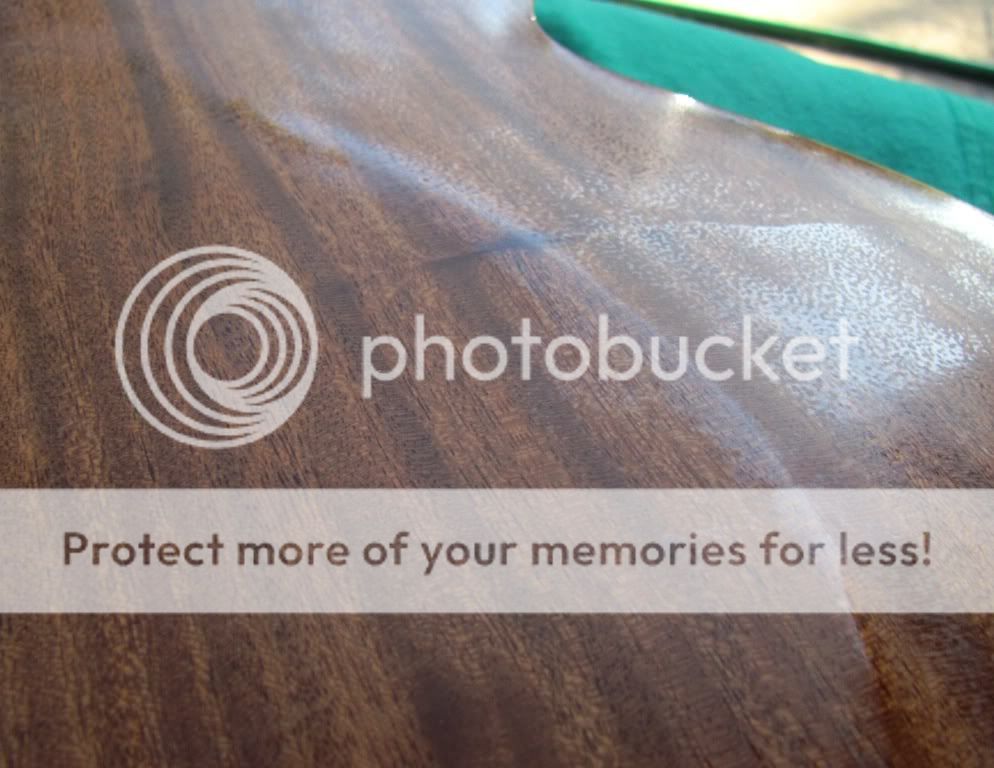
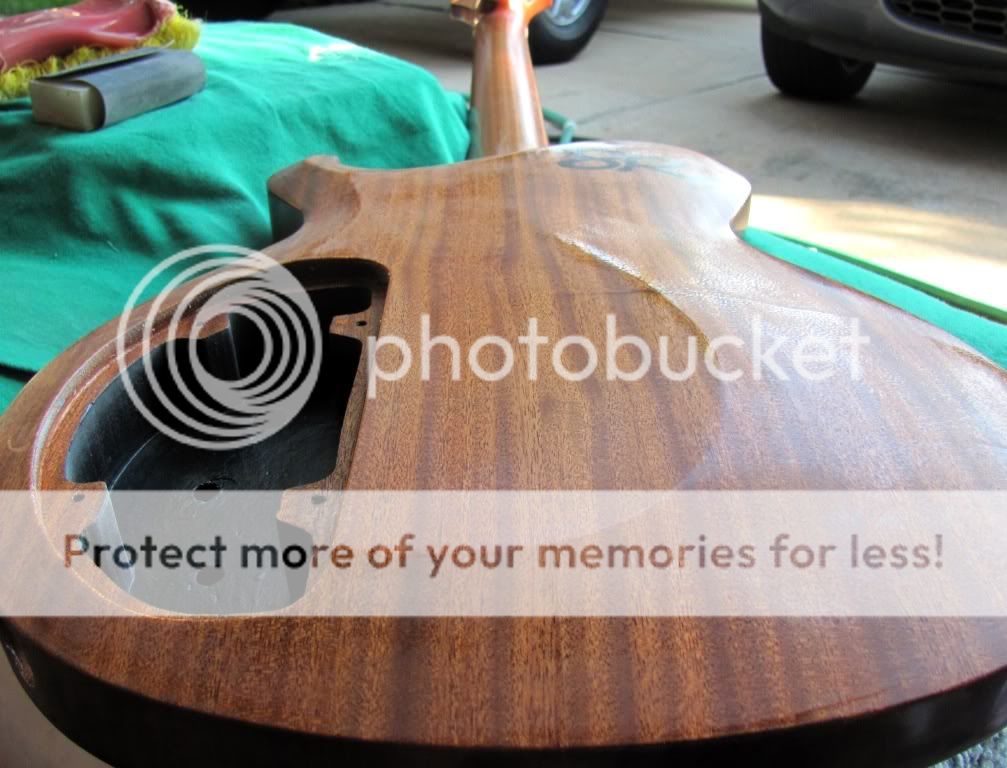
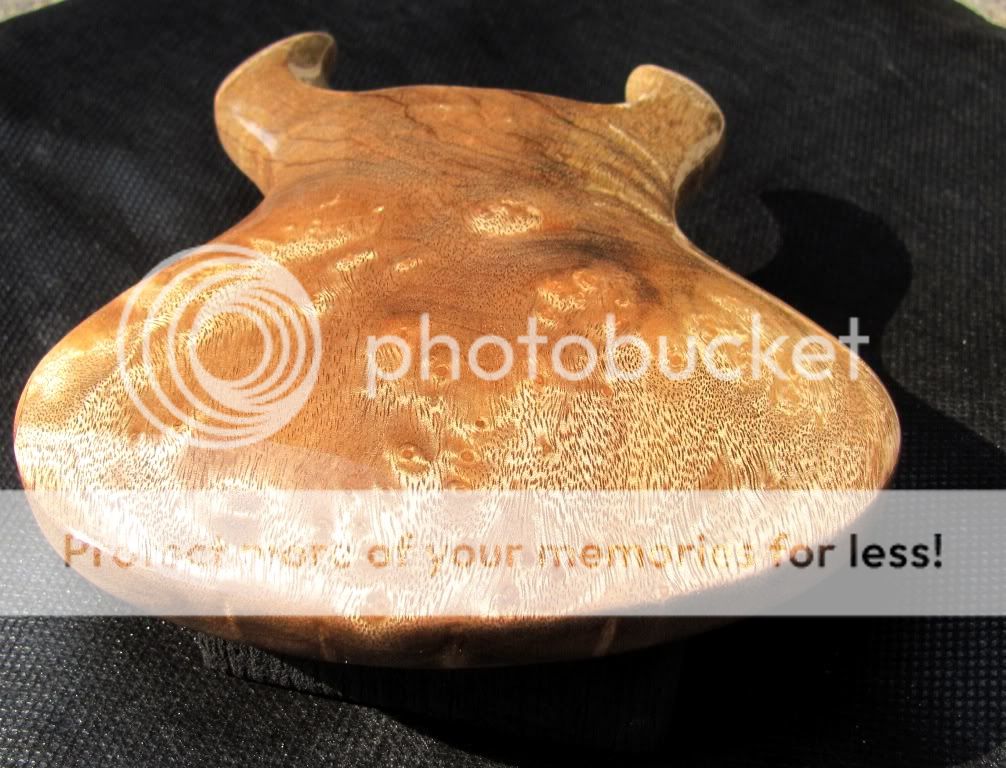
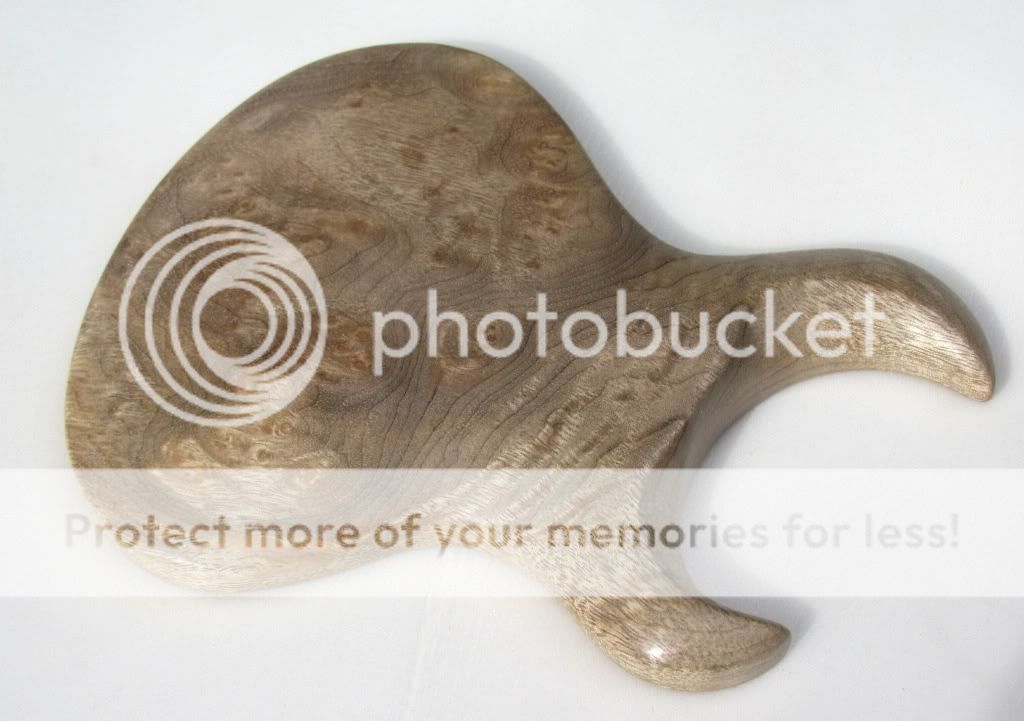
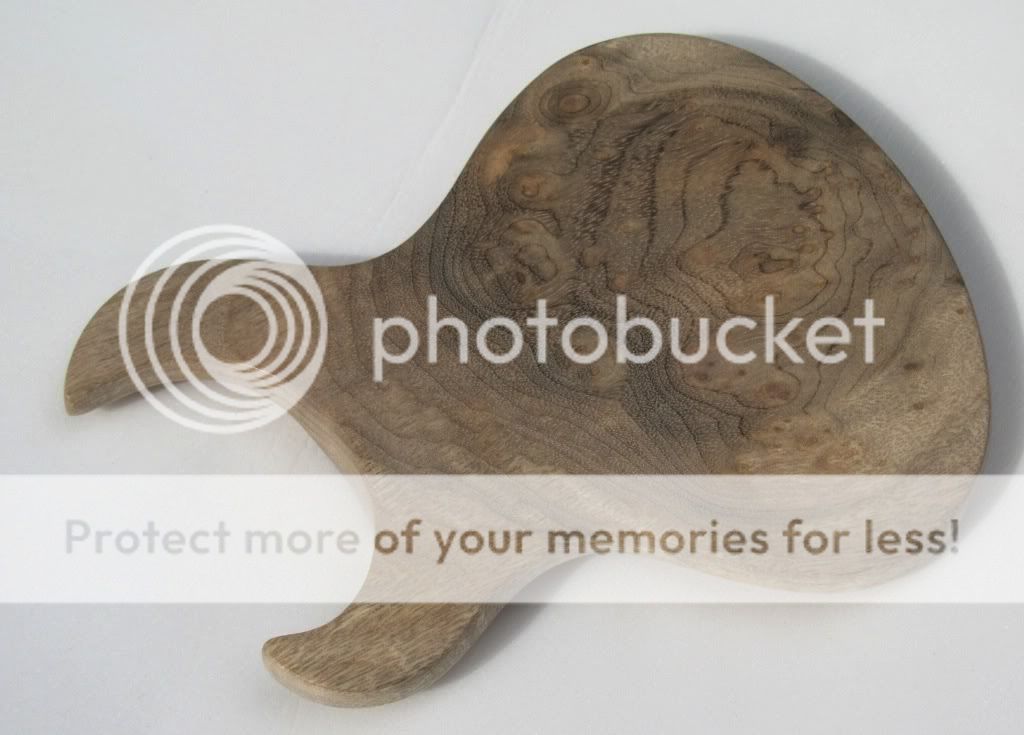
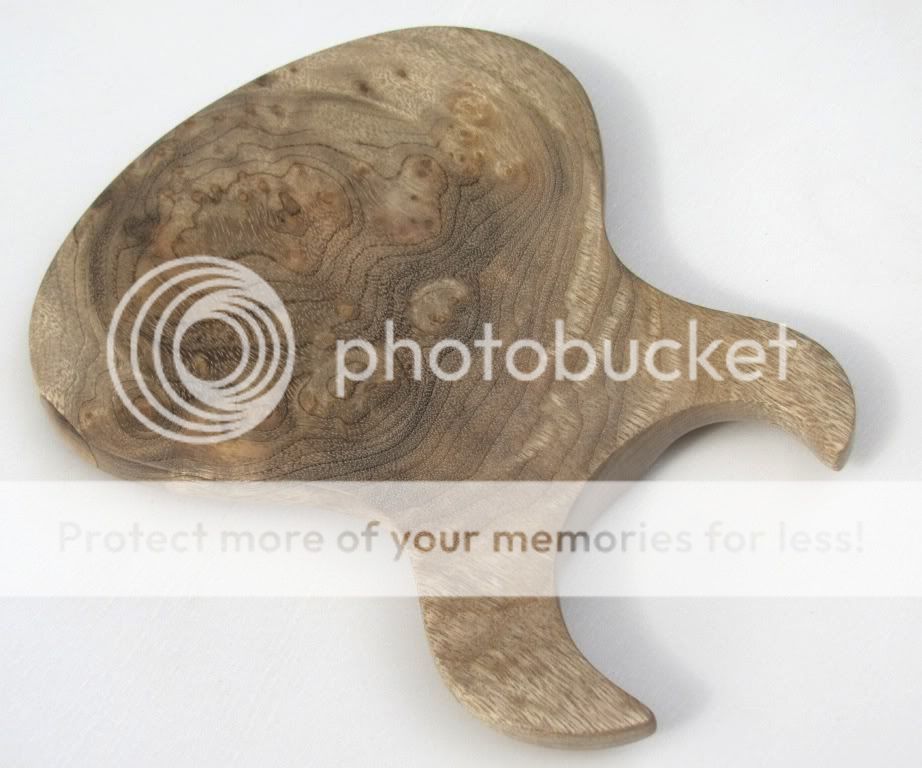
So after I polished up that little guitar shaped piece of myrtle burl, I was sitting in my chair....you know the chair, the lazyboy recliner that putts you to sleep as soon as you lean back? Well that's the one I was sitting in...and I have this light right next to it and I was admiring the chatoyance in the wood and noticed that under that light I could see all kinds of scratches that I couldn't see when I was polishing it in my garage--facing the sun. Well hell. So I went through the grits again and made it shine even more.

You may notice my guitar in that picture. this weekend I wired up all the controls except the pickups...and put them back in the box. Then I shaped the nut and slotted it....at least to the initial stages. It'll get completed during the set-up. The guitar's been curing for almost three weeks...and my brisket's smoking, and my blues are playing, and my beer is cold and dammit I gotta do something to that guitar. So I began the initial leveling. I'm going very light and just knocking the tops off of the orange peel and any runs. I figure less lacquer will finish curing all that much faster, right?

I'm not trying to get completely level with this grit. My plan is to get to the bottom of the pits with a pretty fine grit, which should have me in pretty good shape in terms of having all the deeper scratches polished out.
I keep smelling it to see if I can smell any solvent. I smell plastic but not solvent.
I plan to go ahead and let it cure the rest of this week and continue this weekend.
If I can stand it.
SR
-
The craftsmanship looks excellent on this Jaycee. Very nice attention to detail. Good to hear the customer is happy.
SR
-
Although I do plan on buying a spiral head planer soon.
When I get warped boards I stack the boards leave them in an even lower humidity environment with lots of weight on them. I give that a week, then move it to my 50% room with a little less weight on them for about 2 weeks.
What that doesn't handle I just go over on with my DA sander with 60 grit followed by a straight edge.
Yout stuff looks like it isnt warped much, just sand it some.
Its been sitting for about 6 mo with spacers in between. These are 3/4" boards. I'll try to get some better pics up soon. I dont really have an option of putting them in a controlled humidity environment right now.
I'm still wondering through, If I run these through a standard planer do I risk tear out?
The short answer is yes. It is not certain but it is a risk. You can reduce the risk by making sure your blades are very sharp and more importantly taking very small depths of cut per pass. Those that have the ability use a thickness sander instead of a planer. I glue sheets of 60 grit onto a flat table and get a workout.
SR
-
That's a shame Anthony, but it's obvious from these shots, it's going to be beautiful when finally sign off on it.
SR
-
I used to love going into rock shops. I wanted to get some lapidary equipment and polish stones with a bit more control than tumblers. I'd be surprised if there was one within 200 miles of me now though.
SR
-
BTW Barbeque, blues and beer should be starting again soon.
I should hope so, it's the second week of May for cryin' out loud. You must be going through withdrawal by now. It's a sympton of living too far north.
It never really stops down here....at least in my backyard. Just have to take the random week off to let a cold front clear out.
SR
-
Cool idea, what a bout friction pegs? You could find some cheep violin ones and cut them down.
That's a thought The friction peg set up from old classicals might not be too bad to reproduce to scale either. But they have to support steel strings.
SR
-
This looks like it's turned into a purple guitar. A really nice purple guitar.
I've never heard of a rock burnishing cloth, but it makes perfect sense that they exist. Where does one find one of those?
SR
-
Surely there are some small worm geared posts out there in the modeling world somewhere that could be modified into tuning machines.
On the other hand I'm thinking a full sized strap would be a must so you cold wear it slung low on stage and look cool. Probably have to break out a Chuck Berry/George Thorogood duck walk right across the stage.
SR
-
Holy crap Paulie, you sure paint some vivid mental pictures! The first time he did that. You need to get those on canvas sometime.
As far as a demon uke...yeah it almost does have to be done. But I may need some input on the construction. I figure the scale would be a little over 8 inches. I'd need something to make tiny frets out of and tiny tuning machines. I guess the little pup could be wired directly to a mini jack. That would be a tiny pup RAD.
I wonder if there is such a thing as a pattern following bit for a dremel.....
SR
-
Well that sucks Paulie.
How long does it take for that to clear up, or is this a first time thing for you? (I figured that since you knew you were somewhat allergic to rosewood, you may have had this happen at least once before).
I'm guessing you used a bandsaw to clear away most of the back of the neck, but how did you avoid the horns near the body join?
SR
-
I hadn't noticed that you put your side dots right on the fretboard neck join before. That surely helps to line them up in a staight line, if nothing else.
SR
-
My question is how does the CA feel to the skin?CA sealer coats always felt "grabby" to me..like they would rash up your forearm while playing.
This feels pretty much like nitro to me...which can be grabby if it's polished and it nearly always is. I'd probably put a coat of car wax on it for various reasons, one of which would be to slick it up.
SR
-
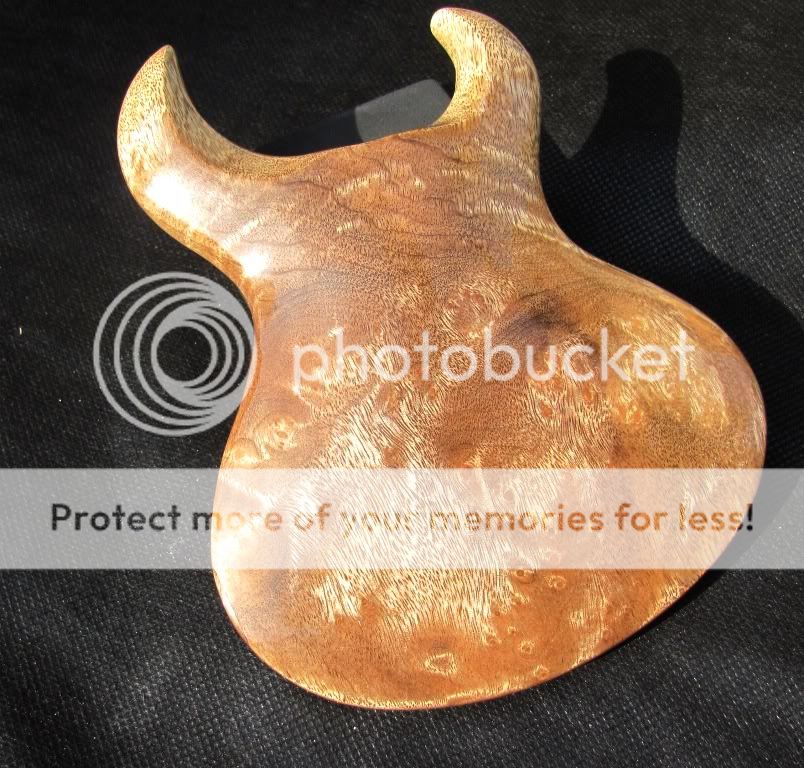
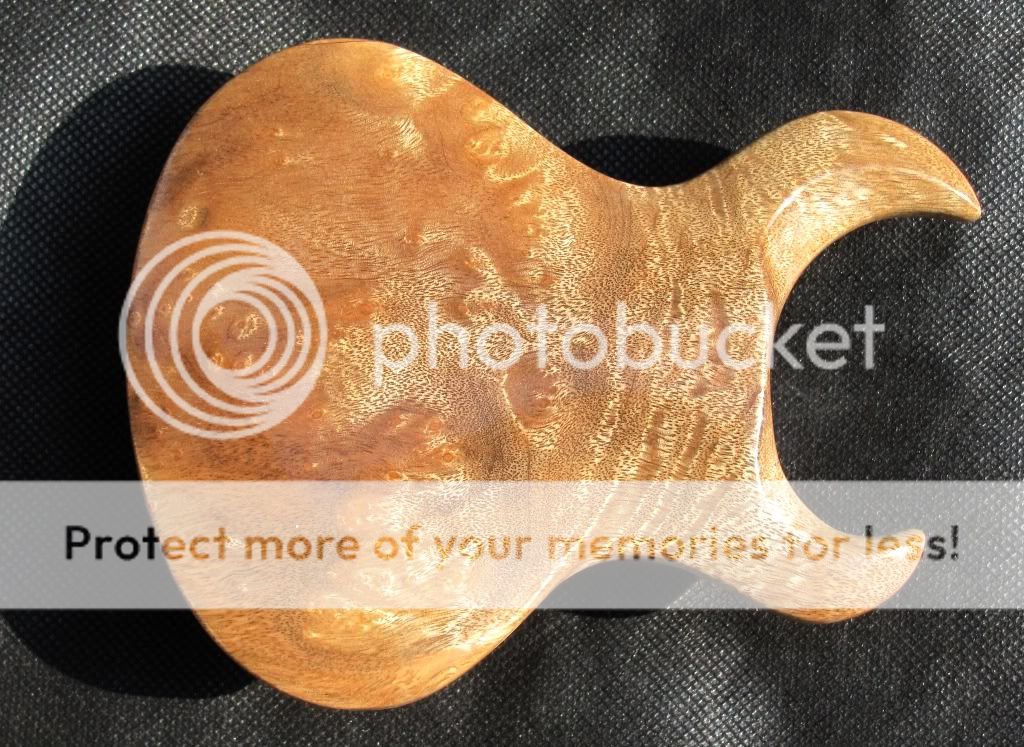
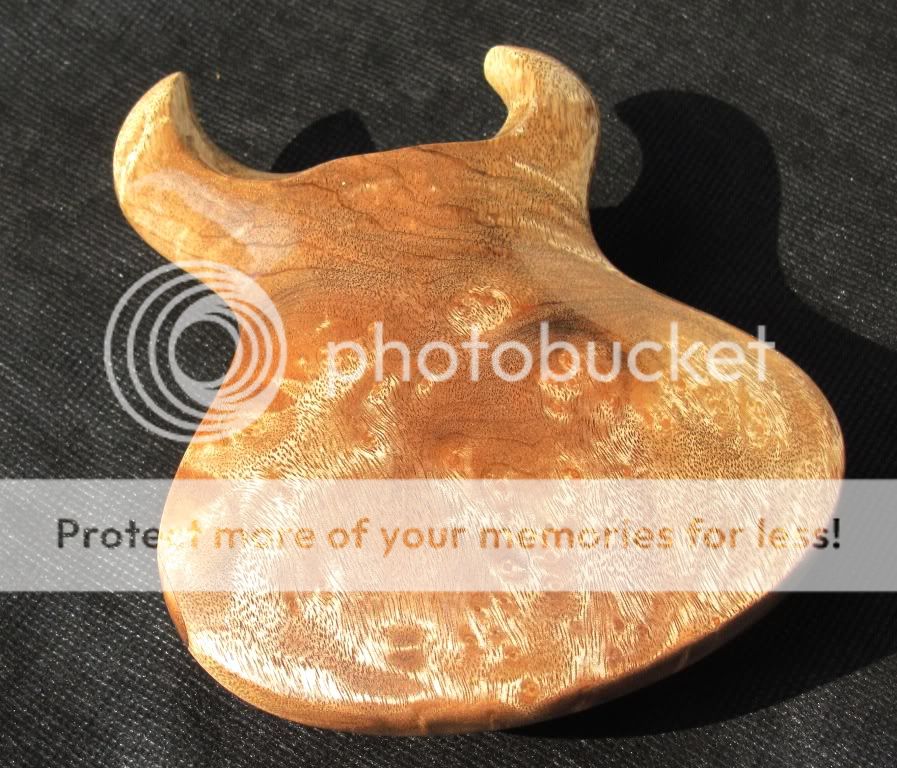
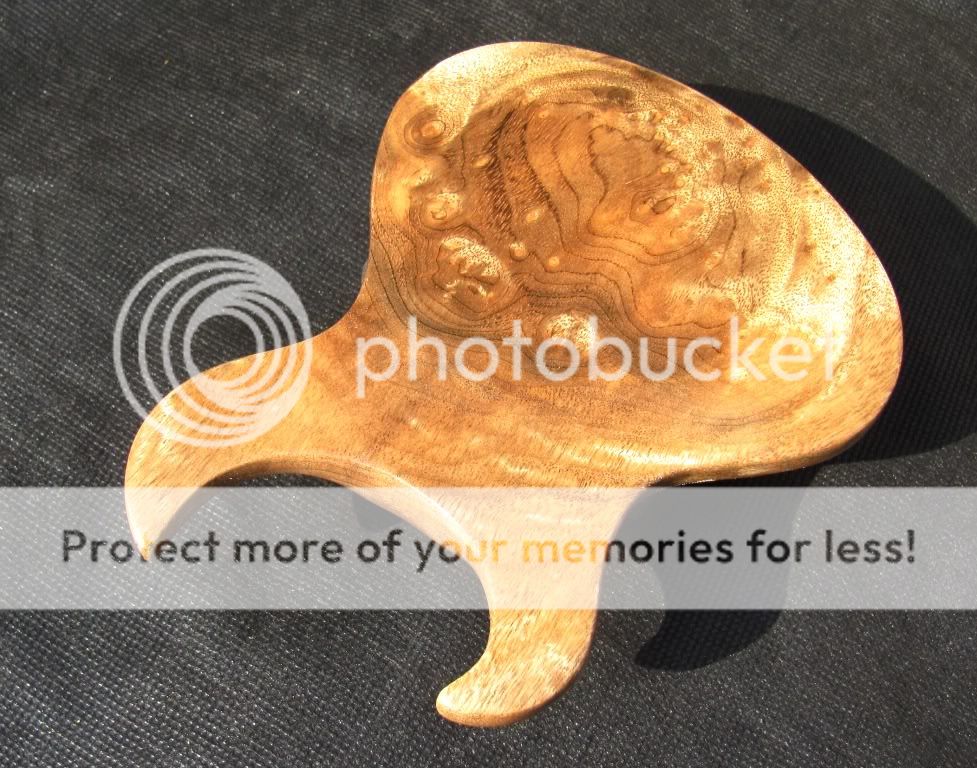
That is burl Myrtle from Oregon Wildwoods. After working with it I really want to do a whole body out of Myrtle, rather than just a top.
I just did a rough sketch on the wood and cut it out, but I quite like the shape. It's offset just a smidge, enough to look cool, but not enough to bug me.
I thought it looked rather Aeolian, Paulie.
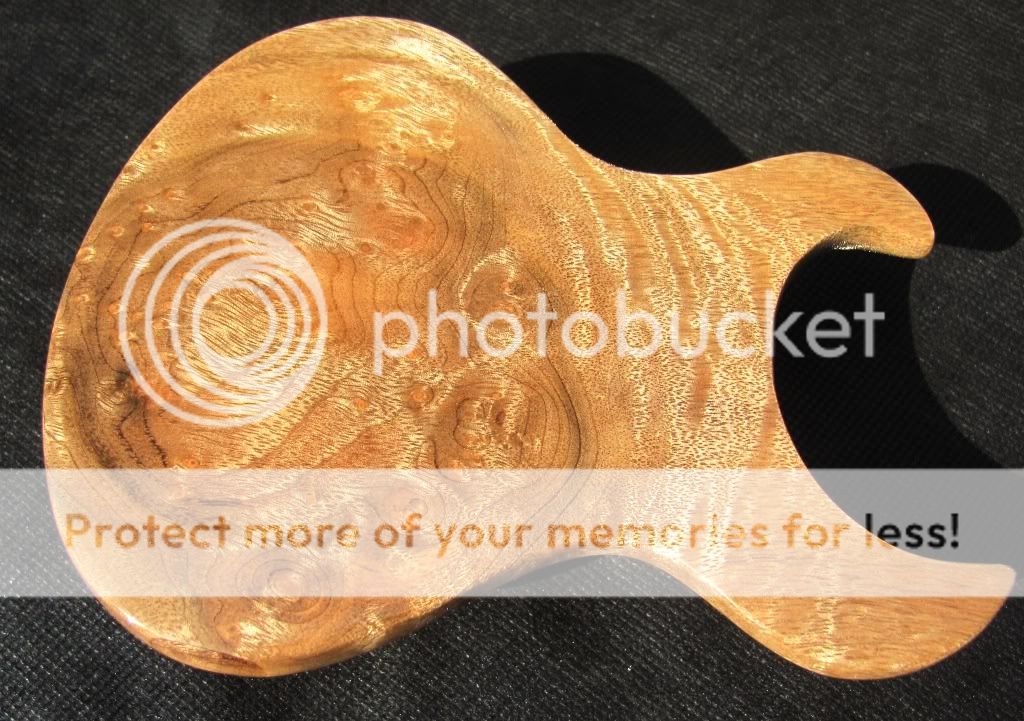

My wife thinks I should put a neck on it. Alas, it's only about 4" across. It would be a true quarter scale. I wounder if RAD could make pickups to fit it? Who the hell could play it if he could?
SR
-
Next came the CA which was the cheapest stuff I could find: Rockler Stick Fast CA which was about $12 per 4.6 oz. bottle. Thanks Wes from way back when for pointing me towards that. The first coat was the thin stuff. It dries too fast to get any coverage and let me tell you it is just about impossible to sand off a piece of latex glove once it's stuck to the finish. so I moved to medium. The good thing about medium is it dries slower, which allowed me to card on a pretty thick layer. The bad thing about medium is it dries slower so the thick coat took what felt like forever to dry enough to level. Next I tried making a little pad out of a rag and pouring a little medium CA on that. I spread it before it dried on the pad and only had to wait a couple of minutes before handling it. I leveled the first two layers before going to the pad, but after that I just kept adding it up and building thickness, sort of like Tru-Oil. After 6 or 8 layers on both sides and edges, I let the whole thing dry/cure for about a half hour and starting sanding. I started with 320, moved to 600, and then began micro mesh at 1800 right on up through 12000, using mineral spirits as a lubricant. It polished up like liquid glass. I had to stay away from the low angle shots that show reflection so well, because you couldn't see any wood at all, so these shots don't really show how glossy the finish is. It will be interesting to see if the lacquer on my guitar polishes up any better.

SR
-
Waiting for the lacquer to cure. If there is ever a time that I get impatient, this is it. so like I threatened to do several pages back, I conducted a test to see how CA would look as a finish. I used some off-cuts form the Hook custom; Skullsessions (Hook) posted shot of the wood pre-guitar. To give it a realistic difficulty I shaped the test piece into a guitar body. Then I polished it up....it didn't need that to begin, but I just can't seem to help it. I love to see the burls and curls dancing in the light when it's polished.

SR

Black Lotus,
in In Progress and Finished Work
Posted
That looks like black walnut to me.
SR