


ScottR
-
Posts
12,089 -
Joined
-
Last visited
-
Days Won
609
Content Type
Profiles
News and Information
Tutorials
Product Reviews
Supplier Listings
Articles
Guitar Of The Month
Links and Resources
Forums
Gallery
Downloads
Posts posted by ScottR
-
-
I remember a post a year or so ago where the guy used a polymerized tung oil that looked great. I think it built a film and was essentially to tung oil what Tru-Oil is to linseed oil. (Polymerized). I am a fan of watco danish oil and have tried watco teak oil...which IIRC turned out to be nearly the same thing as the danish oil. Have not tried Behlin's. I'm looking forward to your verdict.....and will be watching for the suburbans.

SR
-
RAD, I forgot to ask.
What kind of oil are putting on this?
SR
-
Jig saws can cut drop tops fine. On full body thickness cuts the blade tends to move off of vertical which will leave much extra work cleaning up your cuts. However it can be done. Check out Scatter Lee's builds and you'll see he drills many relief holes along the cut path and then cuts the body out with a jig saw.
These days made in china can mean the tool is crap or it can mean the tool is made to high quality standards with cheap labor. If it's a reputable company getting tools made in China, odds are the quality is fine. If it's a Harbor Freight house brand...not so much.
SR
-
No he was not good, Gary was a God. Easily one of the best ever.
I am in 100% agreement with you here.
(Sometimes I go in for the understatement thing).
As far as the checks go, neither are more than 1/4" deep. The one along the back will get carved away....and the other should become invisible, or so I hope. I'm so used to carving from whole logs that filling one of these is routine to me. All my carvings have them somewhere. Maybe I should be freaked about it...but I'm just not.
You know, I grew up where black walnut was so common they used to cut it down and build barns out of it. But I've never seen the kind of tree that produced that piece. I think they grow in California....everything looks a little different out there.
SR
-
+1 on the Bosch router. I love mine. All my other hand held tools are Craftsman and they work fine. Most recently got a lithium cordless drill that so far has been excellent.
SR
-
Thanks WM.
Is yours still hauling around trees for fun?
SR
-
You know, I could have sworn I saw a response from Mexican Breed before I shut down last night.....
You´d be right Scott. I deleted it because I felt it was too light mooded (is this a real adjective) after what you posted about Moore. But basically, I said that top is fantastic! I don´t think it´s dark hue should be a problem if you offset the color with the hardware. I know gold might be too "bling" but I always think walnut looks great with gold.
Yeah, I remember exactly how you put it...and I appreciated it just fine! Thanks! Those posts ended up more somber than I entended, probably, so a good lightening is likely needed.
So on that note I'll go dark again. The hardware is going to be black. The cocobolo and the claro walnut are both pretty colorful and busy, so the hardware is not going to compete with that. Plus I just really like black hardware. The intent is to subtle it down a bit.
Hopefully, it won't end up looking like a "stealth" guitar.
SR
-
Scott,
Excellent execution as per usual and that carve on the headstock looks great! Bit of a signature for you.
I heard on the radio the other day that Gary passed
I don't have much of his music but i know he is revered for his guitar work. RIP.Chad.
Thanks mate.
I'm having fun with this one and like yours, I don't think it will take as long as the last one. And yeah.....Gary was good.
SR
-
Excellent top!
Good dog.
Bad Checks...those looked serious.
Nice work on the clamps... soon you too will have many.
Thanks. I have heard worries expressed that the top is awfully dark....
I'm seriously considering airbrushing a mild black fade just to set it off from the edges.
The checks are not really all that deep but they look huge in that extreme close up. The one that goes the length of the back will likely get cut completely away during the contouring of the back. I've had that piece of timber for a long time though so it surprised me by doing that. It has gone through some pretty large temp swings in the last couple of weeks, from low twenties to high seventies several times and was in direct sunlight half of each day this weekend.
And that is the best dog I have ever had.
SR
You know, I could have sworn I saw a response from Mexican Breed before I shut down last night.....
-
I totally agree about having serious pipe clamps for body glue ups. I cringe everytime I see shots of those narrow beam type clamps being used. Which is confusing me, since your first shot showed the same type of clamps as the second; those were just newer looking. What was wrong with the useless set?
SR
-
Boy, you are not messing about with these are you? Very nice work so far Chad. I think you'll be done much sooner than 15 months this time
.SR
-
I traced the body onto some poster board and cut it out to make a window to pick the best spot to cut the top from.

Once it was cut I reversed the leftover pieces of Claro Walnut to see if there was enough for another book matched top.

Here we go with some mineral spirits applied to the top to get a feel of what we have to work with.

Here's my buddy Cooper who reminds me that there are other things to do beside work in the garage on guitars and stuff...like chase balls in the backyard for instance. He doesn't seem to like the smell of mineral spirits. I know he likes walnut...he's eaten some of it.

SR......
Dammit.
-
I spent several hours getting the neck to the shape I wanted. Then I found I needed more sand paper so I made a run to Home Depot and picked up a bunch of Norton3X--the absolute best on the market. I picked up two clamps as per RAD's instructions. Then I changed my bandsaw blade to a quarter inch blade. I think this setup is my best ever. so I sawed out the body shape from the African mahogany.
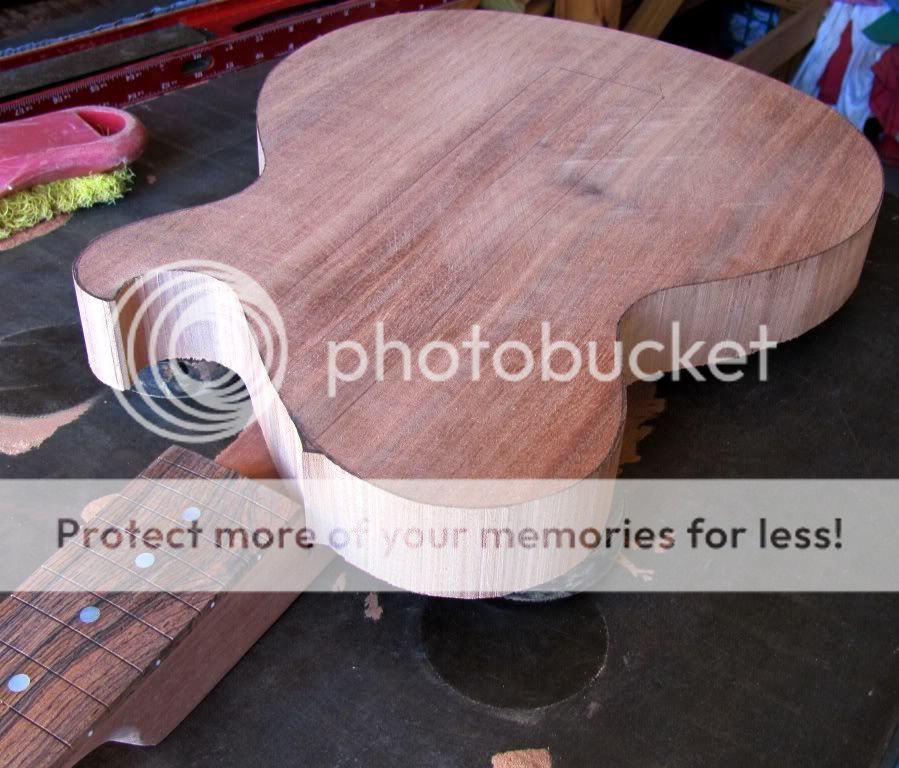
I did a good job cutting it out. I smoothed out the curves on the edges by hand. That works best for me as I can feel whether the curve are smooth better than I can see them. if you set the curved part on a smooth surface and it rocks like a rocking chair you've done good.
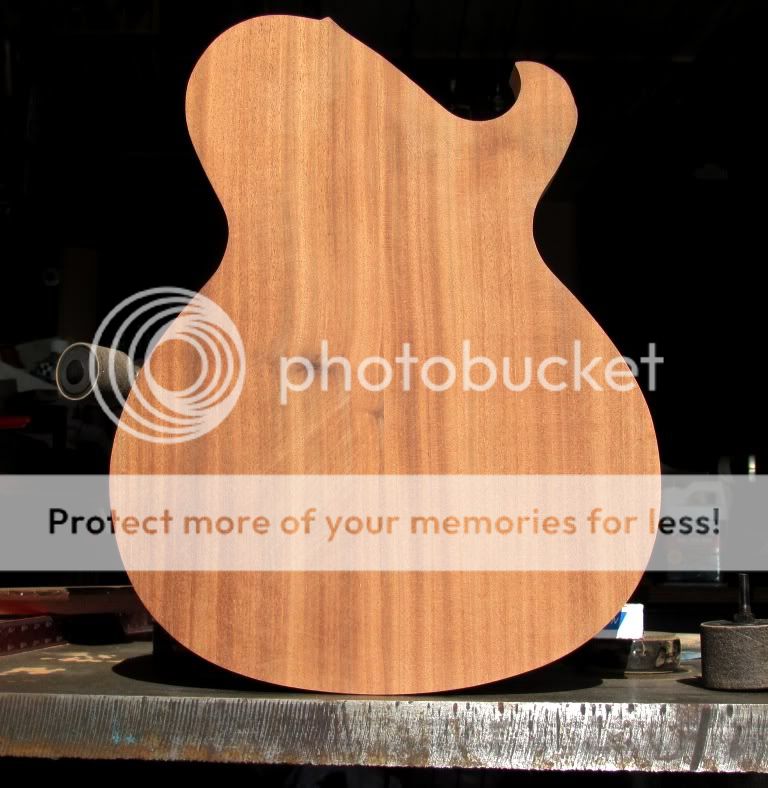
I don't have a thickness sander or a planer but I do have a nice flat cast iron table. I'm not the first one to do this...but I'm glad i can. I glued four sheets of 60 grit and went to work flattening the surface to be glued to the top.
I drew pencil lines on the face and went to work.

This particular board has been in my garage for three years and has been the bady for two previous guitars. For some reason it wanted to check whilst I was working it today. Must have been the sunshine.

I filled them with water thin CA. The back is going to be carve and the whole thing will be grain filled with Ca as well...so I don't think these will be very noticeable....

SR
-
Those of you that have read my posts over the last couple of years (particularly the bear carving thread)know that I never go into the garage to work without my music.if you have read all of them you know that I am a huge Gary Moore fan.
This weekend was a Gary Moore weekend in my garage.I played all five of the Essential Montreux cds amongst many others. When Business AS Usual from Essential Montreux 1997 came on I thought it was especially poignant what with the reference to Phil Lynott and the refrain "These are my memories...coming home. I wanted to post the video and share the song. It was tougher than I ever thought.
http://www.youtube.com/watch?v=BJ3FFoLdAeQ
Dammit. That choked me up.
SR
-
That's beautiful.
Oregon Wildwoods?
SR
-
The first thing to come to my mind is a similar comment. Whenever I look at the progress shots of your builds I see imaculate work. And yeah the background is clean, but I'm talking about the parts you're building. The curves are smooth, the lines are straight and parallel, the corners are square, and theres not a speck of dust on the wood or a sanding scratch to be seen. Maybe you tidy up your wood work for nice pics...but the craftsmanship is top notch.
SR
-
Nice tip Crash.
SR
-
I would definitely keep that as a clear body. Personally, I would sand that out on the belt sander. There's no way anyone could tell if you do it well. That, or just re-route with the template moved up a bit.
+1
Also, it should be pointed out that this has been a very nice instruction on template building.
SR
-
Looking very good Chad! I truly loved that last guitar you made, the teak grain and the fade was beautiful. I have no doubt these will be as well. Do you suppose these will take as long?
SR
-
-
Show off !!
Seriously cool work Scott, As usual. Have to get myself another set of those chisels, Cant find mine anywhere
You didn't leave then where your walnut loving dog could get them did you?
SR
-
Scott, that headstock is so kewwwl!! And the fretboard and headstock veneer are too. I love that you use hand tools for most of your work.
Thanks Joe. There are many times that the feel of the wood under my fingers tells me more about what's going on than my eyes do.
dude, this is AMAZING looking. Keep it up!
Glad you like it Tom. I certainly intend to, at least until all that's left is a guitar.
SR
-
There must be something about wenge and Vs....I'm not particularly a fan of Vs, but the two builds that have been wenge heavy I've just loved. Probably has more to do with the magnificent craftmanship of the builds than the wenge.
This is beautiful.
Great job.
SR
-
Somehow I missed the last part of this post earlier today. I must have been to busy messin' with you in your other threads. You didn't say what these body woods are (I checked). I like the way you have that top laid out even if it doesn't end up on this one.
I had no idea how tough it is to get titebond apart after only a few minutes. I had to put my knee into the middle to get ti to let go.That is really interesting. I wonder if there is a report somewhere that explores the strength of the bond at various lengths of time after glue up...but prior to cure.
SR

Project S907 #3
in In Progress and Finished Work
Posted
Nah, I was just curious.
+1
+2 Well, when I want an oil finish at least. For instance, I will use Watco danish oil on the neck I am currently building and only as much as will soak in. I don't want any sitting on the surface. And it is extremely hard wood. The rest will get lacquer.
SR