


Crusader
-
Posts
1,273 -
Joined
-
Last visited
-
Days Won
36
Content Type
Profiles
News and Information
Tutorials
Product Reviews
Supplier Listings
Articles
Guitar Of The Month
Links and Resources
Forums
Gallery
Downloads
Everything posted by Crusader
-
Thanks for the compliments, you had me steering toward getting some epoxy....but......I couldn't be stuffed going to Bunnings so I just used Super Glue (which I already have) So its done, Yay! and they look pretty good to me but you're right there are some gaps, esp. on the 12th fret By the way talking about fret spacings, a couple of interesting things. I'm a bit of a Gibson fan so I generally use the 18th Rule. However I tried it on a 666 scale before but it isn't the best. Using it on a 24 3/4 scale it causes the notes in the middle of the fretboard to be a little low and the upper ones slightly high, but with a longer Scale length the discrepancy becomes too much While calculating I don't actually use 18, I use a number derived from it 1.058823529 This is found by a simple formula which also works for the 12th root of 2 1 divided by (1 - 1/18) = 1.058823529 and this number is actually 1 1/17th and thinking about all this is how I came up with the idea of dividing 666 by 628.65 to get my divisor for this guitar 1.059413028 Adding a fret to the 24 3/4 scale using the 18th Rule in millimetres comes to 665.63 And the other way round, a 666 scale via 12th root of 2 makes the 1st fret 628.62mm But I am so pedantic I wanted them both to be exact 24 3/4 inches = 628.65mm 666 divided by (my new number) 1.059413028 = exactly 628.65 and 628.65 times 1.059413028 = 666


-

When is a Les Paul not a Les Paul…. A build thread.
Crusader replied to Blackdog's topic in In Progress and Finished Work
Wow so many things are the same as the LP I'm currently building. Thicker Mahogany, thinner Maple, Rule of 18. I can't remember what I was doing in 2015 but I could be accused of lifting your ideas LOL! -
Thank you all for the compliments! So here's a picture of the inlays. I still haven't glued them in yet but it shouldn't take long. Funny thing, I was wondering if they'd be thick enough for the radius, huh! its only about half a millimetre that will get shaved off the edges ....Oh whoops you can see one of the repairs I made LOL Also you might wonder why I put a marker in the 1st fret position, I could have started at the 3rd fret like a Standard, therefore having a marker for the 24th position. I was concerned if I moved them up that some of them would be too close to the frets. The scale length is 666mm which means from the First fret it is 24 3/4 inches. So starting at the 3rd fret is same as starting at the 4th fret on a Gibson. And besides I might not keep the 24th fret Another interesting thing I did is I altered the Fret Factor so it really is 24 3/4 inches from the 1st fret. I achieved this by dividing 666 by 628.65mm (24 3/4") = 1.05941303 The 12th root of 2 is 1.05946309 so I don't think you'd notice any difference in Intonation

-
Thank you, cheers Ah so now it makes sense to me. There are a couple of tiny gaps so I think I could go either way
-
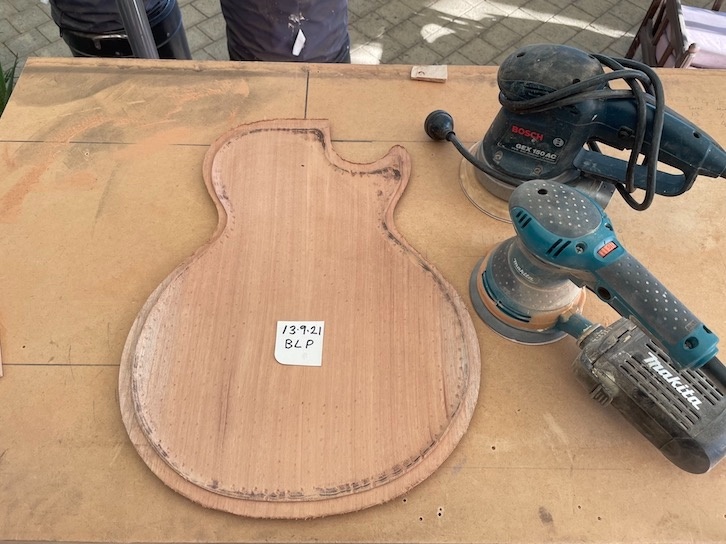
I got a delivery a couple of days ago so progress has resumed Such a big box for such a small shipment I intended this fretboard to have a 25.3" Scale and I anchored it while gluing where the 12th fret dots would be but now they ended up in the 11th fret position So a bit of repair was required and ................. problem disappears! This is the first time I've ever installed MOP block inlays so it was very stressful but it turned out quite well The first one fitted perfectly (then the rest got worse) I haven't glued them in yet because I am undecided what type of glue to use. ALS say to use Epoxy with sawdust from the fretboard but I think I could just use Superglue. Anyone have suggestions about this?


-
Latest progress with this I decided to try the 666mm Scale which keeps the bridge position relative to a standard Les Paul. I can try it before I glue it in and if I don't like it I can swap it out. I also extended the fretboard to get 24 frets. I wish I had left the fb full length, really kicking myself over that. The joint will be under the 20th fret so hopefully won't be noticeable To router the channel for binding I set the neck up under the bench. The silly thing is the edge of the MDF wasn't square so it routered just the right thickness for thicker binding (not shown) The neck is extra wide so it should work out okay. It turned out right for the other side I got the fretslots cut and did a bodgy job of it but then that's what Super Glue is for! Then did the Radius The Graphtech Piezo arrived later in the day so now I have two to choose from. The Graphtech will need more components so will have to look into that later


-
I built a Strat with an angle on the headstock, therefore no string trees. My pegs would not be the same distance apart as a Fender but nevertheless the ringing-on is terrible. While you're playing you are changing chords and moving around the fretboard, its hard to pin it down if the ringing-on is causing unwanted overtones. I'd say a bar chord would halt the problem and a locking nut I think definitely would
-
So as I think I mentioned before I have been moving the bridge around and comparing different scale lengths. The ones I'm considering are 24 3/4 inches, 25.3 inches and 666mm. While doing this I noticed the ring-on from the string partials from the nut to the pegs. 24 3/4" and 666mm had quite a bit more so this became a deciding factor and I've decided on 25.3 inches. And after all I did design the peg spacings for that scale length Just for example, when I have it set at 24 3/4" the nut to peg length of the G string (154mm) is close to the 4th harmonic of that string. When I have the bridge set at 666mm there is quite a bit of ring-on but none of the string partials match any string's harmonic lengths. But the A string partial matches the 5th harmonic of the fourth string! Interesting 24 3/4" = 628.65mm.......628.65mm divided by four = 157.2mm which is close to 154 and causes ring-on 666mm divided by five = 133.2mm which doesn't match any of the nut to peg partials but does match the pitch of the A string 106mm There are others but they are the main ones

-
I wonder what I can glean from this, or maybe I should just buy one and be done with it! https://guitarchimp.com/products/2003-gibson-custom-shop-les-paul-acoustic-electric-rare
-
I was trying to get the photos to go side by side but they kept coming up all in line Glued top to body and routed binding channel Had to join the binding. I thought it was a good place to hide but discovered later you look straight at it when playing! Found a hacksaw blade the best thing to cut off excess Had to reshape the top a bit, worked out nicely In hindsight it would have been better for the joint to be the other way round, or just a square joint. I'm still holding hope that I can melt it over On previous guitars I've had trouble getting a tight tenon joint but this time I used hand tools more and I'm very happy with it. Haven't glued on yet, just held in with a screw! I just sit here looking at it. The maple has no flame in it but that swirling grain is magic


-
Oh well I get to try again!
-
I forgot some of the comments but I took too long and the ability to edit was gone! I didn't have any wide binding left except for some off-cuts so I had to join it. Its quite visible so I hope I can fix that I've always had trouble getting a good neck joint but this time I used a combination of chisel and router and got it really good
-
I've got the body and top glued now, routed the binding channel and fitted the neck The neck is not glued in yet just held in with a screw. I'm moving the bridge around trying out different Scale Lengths to see if it makes any difference. Its a bit hard to tell with just an open G chord and plunkety plunkety fretted notes for comparison. I'm considering 24.75" 25.5" and 26.22" 26.22" is one fret longer than 24.75 so putting a capo at 1st fret is back to 24.75" Its good for tuning to Eb or even D. The trouble is it will join at the 15th fret which might be hard to get used to
-
I like those magnets
-
Precisely!
-
There's this thing I do with guitars I make, I find the balance point or centre of gravity of the body. I hang it over the edge of a bench and mark where it starts to tip, do the other way round and find the centre of the two lines. I have no idea if there is any logic in this, it just seems like a good idea. The bridge is located near this line This is my LP4 it balances at 244 and the Bridge is at 252, 8mm past With the Big Les Paul I got the top to balance at 253 and I was happy with that but the body balanced at 227mm So I reduced mass at the neck end And now the body balances at the same line as the top. I was happy with 252. Once again I have no idea if this will make any difference but it seems to me that the vibrations in the timber would be in synch with each other The back does not balance at this line and I don't know what to do about that but it's so light I think I will not worry about it


-
That's a good way of putting it. Once I had posted the picture, etc. I knew it needed more explanation That's a good way, or you could just sand the job if you didn't want to modify the template
-
Wow a big hollow Explorer, that would be something to behold! And by the way you want to be very careful of tear-out with that On the topic of tear-out, yes it can happen even when you are being as careful as possible. I have the same advice as Prostheta in doing shallower cuts and going in the other direction. I call it "going backwards" And another thing I do is rather than router along the line, go towards the line taking little bites (while going backwards) This might take some explanation to understand what I mean so I drew a picture... It can be painstakingly slow but its better than having a bad result. I do this then skim along the line going backwards then forwards to be sure. By the way doing this you're not actually going backwards, its going in line with the grain considering its end-grain And apart from the bit of tear-out its looking very good so far

-
Well there was no Gladys tonight, they're all about A-bombs now....meanwhile I'm looking up Seinfeld
-
Yes I get "Error 404" - "File not found" Well here's what's typically on my TV screen these days. The top row changes every time but the second row is always has a picture of Gladys

-
Thank you for your kind words! I have to confess to you and Bizman at first I was making a bit of a joke. The back will be stunning when lacquered but being inside you will never see it LOL. But taking it seriously I think lacquering outside and inside would hamper resonance so using oil is a great idea, cheers! I do think I will have the same problem with cracking in the finish. Both semi's I've built have lots of cracks and the first one has a Qld Maple top While I'm working on it I get really carried away making corners round and so forth and I keep thinking "why not go all the way and make it fully accoustic?" But I'm sticking to the plan for the time being, its a hybrid. I'm experimenting with construction and learning from the previous build (the ES) For example instead of having a block inside like most semi-accoustics, the top is its own block and also the way I've sunk it into the sides it is its own kerfings. I saw a video recently where I think someone else has the same idea - huh! I've got an LR Baggs T-Bridge on its way for this one so I'm hoping to get some truly accoustic sounds as well as fully adjustable intonation
-
Got a bit more done today, and then the phone rang so I will be busy working for the rest of the week I scooped the top out behind the tailpiece and finished shaping the back Routered out the love heart then went round the edge freehand... This Turboplane is pretty aggressive, it could do with some type of depth gauge. Could very easily ruin many hours of work It seems like everything I do lately is "on the edge" What would it be like if I lacquered the inside?


-
I haven't watched TV for a long time now, only an occasional show I've recorded and I'm not doing that any more either. Sometimes look something up on Youtube and every time that Gladys woman is there but I just skip past those, too much doom and gloom Good find on the headstock veneer. Always good when you look around and see something you can use
-
Yep that's as far as the drill press can reach!


