


Chris G
-
Posts
151 -
Joined
-
Last visited
-
Days Won
6
Content Type
Profiles
News and Information
Tutorials
Product Reviews
Supplier Listings
Articles
Guitar Of The Month
Links and Resources
Forums
Gallery
Downloads
Everything posted by Chris G
-

This ain't gonna be yer "normal" SS.
Chris G replied to ScottR's topic in In Progress and Finished Work
Sorry about that. I was just browsing the site when I seen you just posted some progress. -
This ain't gonna be yer "normal" SS.
Chris G replied to ScottR's topic in In Progress and Finished Work
Looking good!! -
59 Les Paul Guitar Build. My 1st Build
Chris G replied to Chris G's topic in In Progress and Finished Work
I for got to say. It's just for the shell not the veneer and inlay. I going to do that part myself. -
59 Les Paul Guitar Build. My 1st Build
Chris G replied to Chris G's topic in In Progress and Finished Work
Ok thanks. I was not sure how much custom lettering was going for. -
59 Les Paul Guitar Build. My 1st Build
Chris G replied to Chris G's topic in In Progress and Finished Work
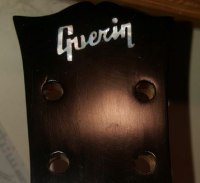
Hey guys I want to get a custom headstock inlay with the Gibson font and style but with my name. Does anyone know where I could have a custom inlay made? I found someone online and they said they could do it for 80. Is that a good price? It seems a bit high to me. -
59 Les Paul Guitar Build. My 1st Build
Chris G replied to Chris G's topic in In Progress and Finished Work
I was just following a few other builds and they did the same thing. The blank was about 1/2 inch to thin so I needed to add the scarf. At the back of the headstock it does not bother me expecially my first build. I will look at flipping it next time I run into having to do one. -
59 Les Paul Guitar Build. My 1st Build
Chris G replied to Chris G's topic in In Progress and Finished Work
I always bite off more then I can chew, but I am learning a ton. I was able to get some more work on the neck. I roughed cut the neck on the bandsaw. I cleaned most of the excess of with the drum sander. On the tenon I used sand paper on a board to get it flat. I finished smoothing out the neck with a palm sander and hand sanding. The neck is 80% shaped now. Next step is the truss rod route, tenon, glue on the ears, and so on. I going to order the truss rod, fingerboard, frets, binding, binding router bit, and inlay from Stewmac. I going to see if my buddy has some router bits that I dont have. I need the 3/16 bit for the truss rod route and some others. I am also going to make the templates for the carve. I have been practicing on some scrap wood. -
59 Les Paul Guitar Build. My 1st Build
Chris G replied to Chris G's topic in In Progress and Finished Work
Winging was maybe a too strong of a word. I have done a ton of reading on other les paul builds and other guitar builds. I had a game plan the whole time. What I meant was I have never done anything close to this project and have not experience with wood or tools. I am going to right a detailed check list and measurements and make my final decisions on the rest of the build. With all the forms I have read and everyone doing it differently I will decide how I want to do and what will work for me. -
59 Les Paul Guitar Build. My 1st Build
Chris G replied to Chris G's topic in In Progress and Finished Work
I have no updates as now. The last few weeks have been jammed packed with family and work. Now its looking like I may get some time to work on the guitar and I have the itch. I going to start with making some detailed notes, so I don't miss anything up. I have been winging the build for the most part, but I need to start focusing on details, so I don't screw up. I did go to the mill shop today for some ideas on control covers and the headstock veneer. They have some beautiful Brazilian ebony I think I am going to use. They said they would be able to get it thin enough for what I need. -
This ain't gonna be yer "normal" SS.
Chris G replied to ScottR's topic in In Progress and Finished Work
Beautiful in a scary way!?! ScottR the craftsmanship is out of this world!! -
59 Les Paul Guitar Build. My 1st Build
Chris G replied to Chris G's topic in In Progress and Finished Work
Thanks Scott for the link. I read it beginning to end and a lot of useful info. I have also been looking at the forms that blackdog was looking at. My problem is skimming through and not taking it all in. That' ADD for you. Good tips!! I have not thought about doing a practices carve but will now. I am trying to get as close to a 59, but in my mind it does not have to be exact spec. I did have to use a scarf on the headstock. The neck blank was not thick enough for a one piece neck. Thank you curtisa!! -
59 Les Paul Guitar Build. My 1st Build
Chris G replied to Chris G's topic in In Progress and Finished Work
Will note in the future on the clamping. Yes I will be doing a carved top trying to find the best process online for it. What do you think the best way to do the carve? -
This ain't gonna be yer "normal" SS.
Chris G replied to ScottR's topic in In Progress and Finished Work
Looking Awesome!! Love the timbers. -
59 Les Paul Guitar Build. My 1st Build
Chris G replied to Chris G's topic in In Progress and Finished Work
Hey everyone its been a while since I posted. I have been working a lot on the guitar so lets get started on my progress. So I had some router chip out when flush trimming my top. I was able to fix it with some advice from you all and friends. I traced the chip on some scrap maple from the top I was able to cut it out on the band saw, prepped, glue, and clamp. Here it does not look to good but it fits great. Here is after its been sanded down. The binding will cover it up and I might get lucky and will not be able to see it. I had my buddy help me cut the 16 degree angle for the headstock. His saw burned my wood, but its will sand out. The saw did crack the headstock a little. I glued the crack I had to glue the top piece to bottom to reinforce the crack and the wood was not thick enough for the headstock Now I am real nervous about screwing up my neck. If anyone has any tips that would be great. For now I am going to put my neck on hold and continue with the body. The top is ready for glue. Put a generous amount of glue on the body. Used every clamp I owned. and let clamped for 36 hours. Clamps off and everything lined up great. There is a couple gaps after gluing. I had the bow on that top and thought it was completely flat, but I guess I was wrong. I hope its still ok and hope the binding saves me. Should I try and use filler to fill the gaps? I got a large forstner bit from a friend to the the cover on the switch. I was a little off. I am going to get the body about 90% ready then start on my neck. I want to make sure everything is ready so I can get the neck tenon perfect. I am going to need some specialized tools to finish the project. I have an idea of what I need but what do you all suggest? -
59 Les Paul Guitar Build. My 1st Build
Chris G replied to Chris G's topic in In Progress and Finished Work
Here is some more progress!! I drilled the switch whole. Now for the cavities all I need to do is route for the covers. I am waiting to do that until I found the right wood I want to use for the covers and headstock. I am thinking Black walnut or Madagascar ebony. Ruff cut the top on the band saw. Done and I was happy with how my cutting skills are coming along. Since I do not have a thickness sander I have to do it all by hand. Since the top glued unevenly and it has a slight bow in it. I took a plank of wood 16 inches long with 60 grit sand paper attached. I went back and forth to flatten and even out. After the 4th round I needed to take a break. Got the bottom side really close, but still rocks a tad bit when on the body. After putting my arms through all they can handle I went to the router and flush the body with the template. Now I got some tear out. Here are the pics. Question for all you pros. I know all the tear out should be routed out when doing the binding, but here is my question. Should I patch it first just in case it is a little past the binding thickness? I don't want to fix the spots if its going to cause more problems when I do that binding stage. I was gong to use the sawdust from the top and superglue. Here is the top on the body. Sanding down the top to even out. I still have more sanding to do, but hopefully I glue it to the body soon. -
Sounds Great and nice playing!!
-
59 Les Paul Guitar Build. My 1st Build
Chris G replied to Chris G's topic in In Progress and Finished Work
Thanks!! I have been practicing with the router, but can be hard when you don't have large enough scrap to practice on. No biggie I will get better over time. I thing the top looks nice too. That was the best figured maple in the shop they had and it only cost me 35.00. Now when it comes to the pickup cavities. I am going to let one of my friends help with that. I really don't want to screw that up. Hopefully I can get the top cut and prep to glue on the body. -
What pups did you install? I thinking for my next build it will be an explorer style.
-
This ain't gonna be yer "normal" SS.
Chris G replied to ScottR's topic in In Progress and Finished Work
You got the neck construction down!! You make it look so easy!! When I start on my neck, I hope mine turns out haft as good. -
Beautiful!! How does it sound and play?
-
59 Les Paul Guitar Build. My 1st Build
Chris G replied to Chris G's topic in In Progress and Finished Work
Like I said I got a lot done. On Friday I got the body completely smooth with no bumps or dips. Here is a picture. Now will all the sanding i have done, the left side does not match the right. Its close enough and I am fine with it. After I got the body done I finished up the other body templates to match the master. Once I got the body templates done I started to route the body. I am not the best with routers, because I lac the experience. When I was routing the channel I tried to go to deep to fast and the router jumped twice and went past my template. I did not get a close up of it but you can see it. I am not worried about it, because it will be covered by the top. I know now to go slow and not to try to go to deep. Next I started the control cavity. I decided not to use the router just because I did not want to screw it up. I used forstner bits for this part. The cavity turned out better then I hoped for. Once I got done with the drilling I used a dremel, files, and rasp to clean up what the drill did not get. As you can see I did not go through the body. The original 59s did not go through the body also. I will also not have any weight reduction either, since the 59s did not have any weight reduction. Here is a picture of the top again. I have traced the body and I think I am good with the placement. I need to route the cavity cover and drill the hole for the switch. I am trying to find a friend that has large forshner bits, so I do not have to by them and only use them for a few minutes. -
59 Les Paul Guitar Build. My 1st Build
Chris G replied to Chris G's topic in In Progress and Finished Work
Got some mineral sperits. Here is the top now that you can see the grain. Have a lot more to post later got a lot done. -
Yes I seen both. I also watched and studded BigDGuitars. He had this site on his youtube profile or his website for resources.
-
59 Les Paul Guitar Build. My 1st Build
Chris G replied to Chris G's topic in In Progress and Finished Work
Thanks!! I agree with once you see it that's all your going to see. I brought the body to my friend at work yesterday for him to see the 2 troubled spots. He told me to take a palm sander and lightly go back and forth on the spots and it will smooth out. Last night I got a little time to try that out and it worked. I still have a bit to go, but I should have it done maybe tonight. I was hesitant to use a motorized sander at this stage, because I did not want to screw up and make it worse. I hope I get everything smoothed out tonight so I can start getting the routing done and start on the maple top. Question. What can I use and get locally to apply to the top so I can see the grain better? That way I can start on the top and see where the best placement so I can trace the body. -
This ain't gonna be yer "normal" SS.
Chris G replied to ScottR's topic in In Progress and Finished Work
I differently try some out of the box stuff in the future once it get a few builds under my belt. I want to make an 8 string, but thinking that will be by 3rd or 4th build.
