


mistermikev
-
Posts
4,769 -
Joined
-
Last visited
-
Days Won
133
Content Type
Profiles
News and Information
Tutorials
Product Reviews
Supplier Listings
Articles
Guitar Of The Month
Links and Resources
Forums
Gallery
Downloads
Posts posted by mistermikev
-
-
2 minutes ago, ADFinlayson said:
It was me, it's no secret!

hehe, I wasn't going to name names!

I figure the least I owe this place is passing on tips when I find something good so... I hope I don't annoy folks by trying to pay that debt back constantly!
-
 1
1
-
-
1 hour ago, Bizman62 said:
I can only help with what I've learned about lacquering the fretboard. For what I know it's done after hammering the frets in. You apply the lacquer and when it's (semi) dry you scrape the tops of the frets clean. Cut along the bottom of the frets in an angle for a clean seam. Or something like that. Hopefully I got that right.
I've got a vintage style strat neck that they did that way. It's a real beauty and stable as all get out, but def had lacquer left on the edges of the frets that over time has chipped off here and there. That was clear lacquer w a bit of amber and wasn't obviously visible... I'm guessing lacquer with an opaque white would be a dif story.
I suppose I could consider carefully taping off all the frets... but dang that'd be a lot of work. I wonder if taping off the fretboard near the frets and then using something like 'electric tape' would work. the elec tape would come right off of the metal easily even after lacquer was applied to it. thoughts?
seems like fretting after the fact could be really problematic... but then the general concensus on binding after finish was that it was a bad idea too... and that didn't stop me so... hehe - gonna have to think on that.
'edit: where are my manors: thank you very much for your thoughts!
-
something in the back of my mind from time to time is an entirely white guitar sort of like larry grahams bass. I've asked questions about this before and have an idea how I'm going to do it but have some questions.
so mohawk whitewash - beautiful stuff. it's nitro, and comes in a can. My question is... if you were going to shoot a fretboard with it... I imagine you'd have to do it prior to fretting as the white might not look good over frets and cleanup would be a nightmare. I know white will be a nightmare anyway... but I'll live with that. so if you shoot the whitewash before fretting would you also shoot the gloss before?
In generall... if you had to do this... how would you approach it?
So then... how do you keep it out of the fret slots? I suppose some toothpicks placed across them?
avoiding hitting the wood with a hammer would be another concern... I have recently made a clamp and will do this only on a bolt neck so I think that should do?
what can you tell me about shooting nitro on a fretboard/neck? Pitfalls? Have you done it and can you show an example?
-
Someone reached out to me and asked me who was my source for this top, I didn't mean to not post it! Not top secret or anyting... On Etsy look for down-home Woods in case you're looking for something similar.
-
some nice work there. Don't have a cnc myself so not a potential customer but if I did - I'd let you do the leg work in a second! Someday...
-
1
-
-
I think any one of the three would look amazing. Your design skills are outstanding. as said... I can't tell the dif between mop and creme at this size, but if I had to choose the first one stands out to me. More importantly, I think we all get into situations where we look at something too long and start doubting our initial ideas (guilty here). I am coming around to the idea that in those circumstances it's best to not second guess yourself.
-
47 minutes ago, ZekeB said:
Wow beautiful work mike
Thank you for saying so Zeke!
-
18 minutes ago, ScottR said:
Damn. You keeping a tiger as a house cat?
SR
naw... shes just a little thing but has tiger-sized territorial tendencies! any other cat/dog gets near that thing and she'll fight to the death. I was lucky just to borrow it for a short period.
-
 1
1
-
-
16 minutes ago, ScottR said:
That's definitely a beauty Mike!
I see some of the glamour shots were taken in the aforementioned fur lined bathtub.
")
Nice touch.
SR
Thank you sir! Hehehe, that's actually my cat's bed! Had to kick the poor girl out so I could use it! ( jk, no cats were evicted in the making of these photos)
-
1 hour ago, ADFinlayson said:
I dunno, no matter how much you dust off a guitar, when you go to take photos, it's covered again. Firstly - everything wrong with it:
- The weird white marks in the figure on the back, no idea what it is exactly, but it is the wood
- Annoyed at myself for getting the joint the wrong way round with sap wood in the middle on one side, but I didn't know any better at the time
- Some marks between the pickups where I sanded through and built up the poly again, fortunately the strings hide it well.
- The dog never left me any ovangkol offcuts from the body so I had to use a neck offcut, although it's ovangkol, it looks nothing like the body wood.
- and as @Bizman62 pointed out, the 6th tuner is on the piss.Anyway, apart from all that, Tada! Will do a demo video soon.


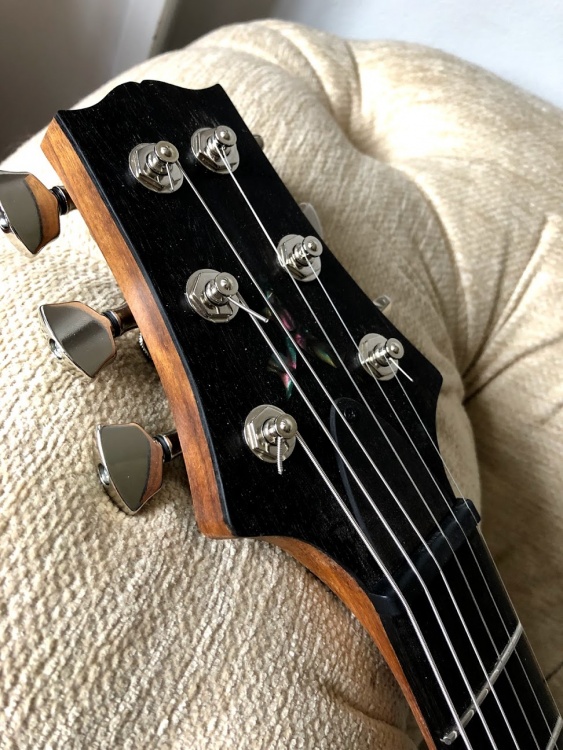

had no one mentioned the tuner I wouldn't have noticed(r u sure he's your friend? lol), still really can't see any of the other things you mentioned esp the sapwood comment - I think it looks great as the gain comes together to make an arrow. These are all things that almost no one but a luthier would notice... I wouldn't beat yourself up at all - it's an amazing build - don't question that for a minute. I look at my latest build and see a list of things I would have liked to have done differently... and also now when I look at factory guitars I see all sorts of things I don't like... that is the curse side of this hobby! was so blissfully ignorant before!
-
16 minutes ago, ADFinlayson said:
Well that's a pretty epic looking guitar

Thank u sir!
-
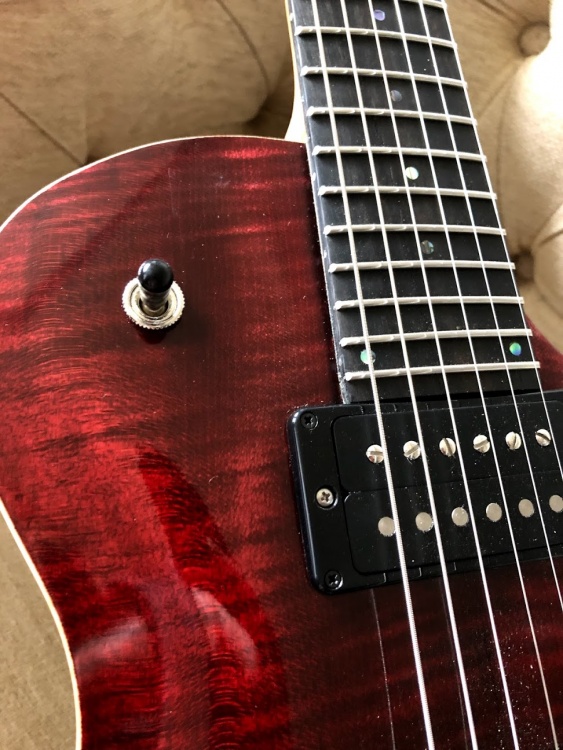
17 minutes ago, Bizman62 said:
So many well thought of details!
I once saw someone argue about having binding with a rounded edge. In this case hell yes, definitely!
Well done!

thank you sir. that was quite the learning experience! had to redo it 3x as I didn't like it when it was rounded over with the wood. if I had to do over again (and I do on my sister build) I would get the top finish completely done before doing the binding. all in all I got lucky and it turned out ok.
-
43 minutes ago, Andyjr1515 said:
Fantastic - well done
thank you sir! You are always very supportive and I am very thankful for that!
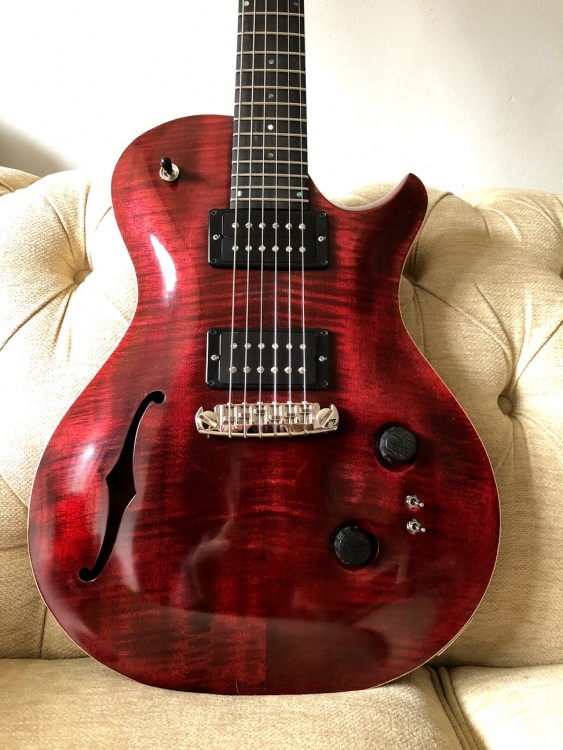
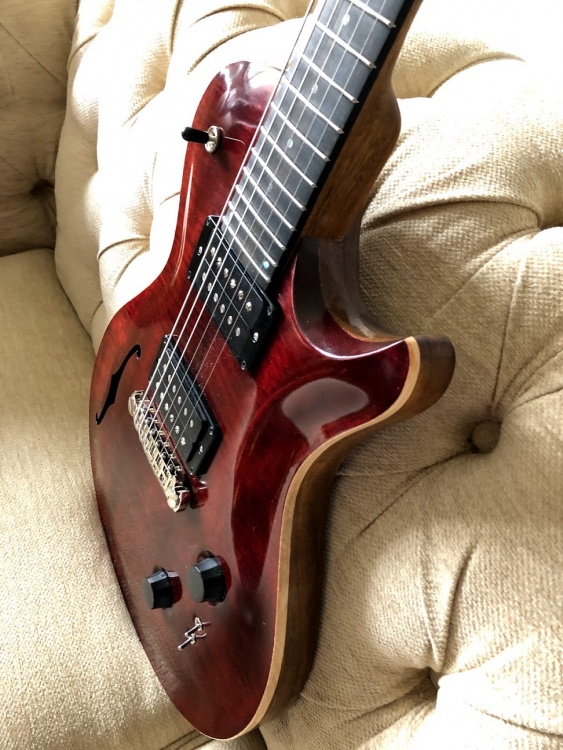
I can't help but feeling the finish is a bit of a flop on this one in the sense that it didn't quite turn out how I planned and isn't 'blow your mind'... but overall I'm very pleased.
I didn't even adjust the neck after putting strings on (10s). it is still perfectly straight but action is extremely low and no buzz. Nut needs some work as some binding going on there when I divebomb the trem. very comfortable to play!
Pickups - man I gotta say I love these. I can officially recommend bootstrap... esp the 54pro. I like these more than my tex spec, antiquities, rio grandes and as much as I like my blue velvets. I'm going to be working on a video demo this weekend and will hope to capture the versatility of these pickups but if anyone is looking for some great single coils - BOOTSTRAP!
-
finished up at 6lbs 8.9oz... so whomever had that number - you win a fur lined bathtub! Electronics fired right up and I've been playing it to death and dialing it in. Some flaws here and there... but I don't think I own a better playing/sounding guitar. Thank you to all whom have helped with advice and encouragment here - couldn't have done it without you!


-
4
-
-
7 minutes ago, ADFinlayson said:
She works! I used the the diagram for the on/off/on switch as suggested and it did exactly as I wanted, just flipped the white and black wires on for the bridge toggle.
Many thanks chaps
 looking forward to making some noise tomorrow.
nothing like the thrill... that first time plugging it in. Got a taste myself last night -I was playing guitar till almost 10pm! (that's really late for grandpa here!) Fired up and worked right out the gate. First thing I'm gonna do when I get home.
Anywho, this is about you: congrats on a fantastically successful build.
-
1
-
-
1 minute ago, curtisa said:
As others have already highlilghted, there isn't enough left to attach a new new nut to the end of the neck.
You could splice in a new section to build up a new extension area to whats left of the headstock that you could then re-shape into the required profile to support your headless nut, but as Noz rightly pointed out:
...the amount of work required to splice in the replacement piece would be the same as splicing in a whole new headstock, namely:
- Steam off old fret board.
- Remove truss rod
- Secure neck in some kind of jig and cut away shattered end where headstock snapped off. Cut/plane/route a new scarf joint into what's left of the neck.
- Glue new extension (for headless nut assembly or whole new headstock) into the new scarf to extend the neck beyond the nut area. Remember that as the neck is already fully profiled you have very little in the way of flat surfaces left to get a good grip with any clamps while the glue dries.
- Route new truss rod channel through extended section of neck.
- Re-shape extended section of neck into your desired headstock shape and blend into existing profile of neck shape.
- Re-attach fret board. Clamping will be difficult (but not impossible) with the back of the neck already shaped.
- If looks are important then re-finish the neck where the fret board meets the neck and where the extension piece meets the scarf joint.
- Fret board is unlikely to have survived the steaming off and re-gluing without some work required, so factor in a fret re-levelling/re-seating and crowning as well.
And then you'd need to do the work on the bridge area to implement whatever tuning system you were looking at installing.
some good points there... where's that easy button!
-
22 minutes ago, Norris said:
Actually, thinking about it, you might be able to remove the fretboard and truss rod, then scarf in a new headstock?
I was thinking about scarf but then thought about the truss... those have an anchor no? do they just unscrew? I've never taken apart a single action nor built one so have no idea. seems doable. seems like there have been lots of options put forth... I'm certain than any one of them could be done if the will is strong enough.
-
the trem I posted a link to actually has a hole for truss adjustment in the headstock end. you'd prob have to fill in the area a little with epoxy but I think it could be done... and I'd love to see someone do it.
there is a fixed bridge version of that trem too... probably a better bet as being from china.
I look at it this way - you can always steam off that neck and build one if it doesn't work. w the fixed bridge you might have to fill in some holes but I don't think you'd even have to route it... the only question would be string height... that might require a recess.
probably a bad idea since you got 2 of 3 luthiers saying no.
-
here you go:
good luck
side note: I am so tempted to buy this just because i want "overlord of music" on MY guitar!
-
12 minutes ago, kidr0x said:
again thank you very much for your help. really appreciate it
im gonna look into it and keep looking for the size comparison between both.
i wish you luck.
-
I don't like to post things that could get the forum hassled. there is a reason you won't find too many us sites making blueprints available. also, at full size my drawings tend to be a gig or more. here is a link to a thread where I post a guitar design I made using the same basic techniques but not full size:
here's a link to fret2find for building fretboards: http://www.projectguitar.com/fretfind2d/ with this tool you can create a full pdf/image of any fretboard size. if you can work with images, it is pretty straight fwd to lay one on top of the other and then change the opacity of the one so that you can see the other below it. from there you just rotate your picture to get it close to lining up, then scale the image and get it close to size. then small adjustments to both until they align.
I will tell you that if you hunt around on google for "jackson king v" plan you can find them and even free (elec herald) - i can't verify how accurate they might be. I know nothing about the KV1... can't verify it's dimensions compared to that.
-
9 minutes ago, ADFinlayson said:
Yeah the 408 apparently has that feature where in coiltapped mode it uses some turns from the other coil, I'm guessing that is where the other wire comes in. One of their models can be both coil tapped and coil split with 3-way mini toggles. I have far simpler tastes

so basically a partial tap on the second coil. I like that they do interesting stuff... just might be a good idea to not go the direction of apple and make wiring/color info more widely available.
-
2 hours ago, Prostheta said:
tip: "for f---s sake LOL"
snap apparently I still didn't get it - I am thick. I thought the 101 might be equiv of that vangoh painting with hands to the face and mouth open w susprise. LOL never even occurred to me. "I see the forest but where are all the trees?"
-
i suppose it is workable... not sure it's what I would do. putting the tuner behind the bridge migh result in some issues with string breakage and over time you may be grinding down your saddle pieces but I don't see why it wouldn't work.
also... I know the guitar you mentioned and it just didn't appeal to my eye - that is not to say that it couldn't be made more appealing.
had you considered trying to fix the headstock? esp if you ever plan to part with it - I think that'd likely be a better option IM humble opinion.


school me about planers...
in Tools and Shop Chat
Posted
i apparently never responded to this... i apologize... I thought I had but apparently forgot to hit send or something. Lots of good info here.
the planer is pretty solid afa snipe on ends because it's got both an input and output table... haven't seen any but then I haven't sent anything figured thru.
I was really thinking this would be the tool to get an item down to 1/8" thickness but apparently not as many have suggested that is perhaps sketchy territory. I'm going to keep yours and others comments in mind as I get more familiar with the tool. I plan to use it to thickness some bodies next time I build and perhaps I get more comfy and try using carpet tape to attached to something thicker and result in a much thinner finished size.
thank you for taking the time to response and again I apologize for not responding (I DID, just apparently didn't send it and walked away from the page!)